This tutorial covers exporting 3D objects from Blender. Specifically, we want to export these 3D objects in a way that does not give us any errors when we try to use them in xNormal.
Eventually, you may make your own 3D meshes and want to convert them into decals. There are plenty of tutorials on Youtube teaching you how to model 3D meshes in Blender, so we are skipping over that part and only focusing on exporting what you need for making a decal.
Input
Loading the Vent Example and setting up your work area
Click File/Open.
Select vent.blend from wherever you unzipped the input file.
The vent model will open your interface will not look exactly like the image shown below, not yet.
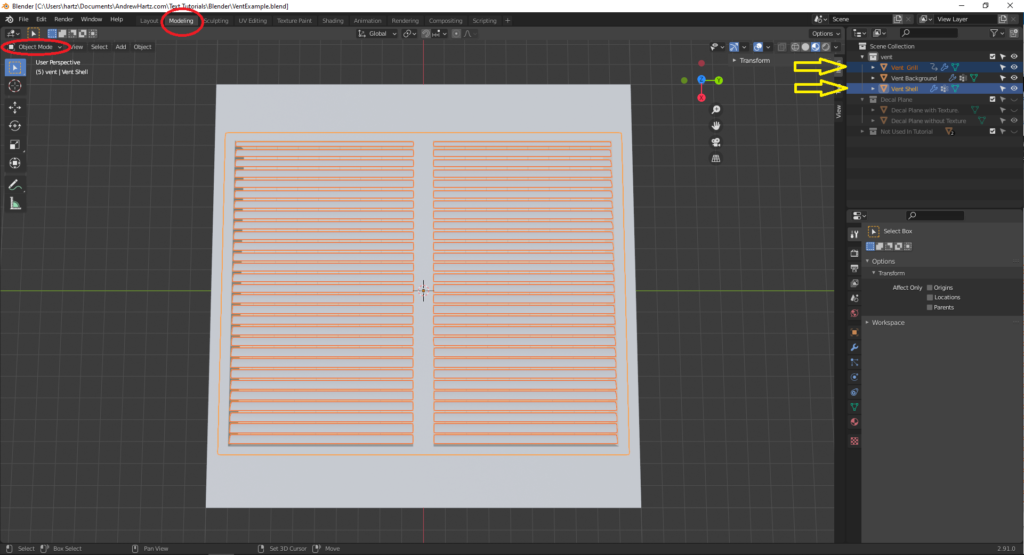
The yellow arrows point to the two meshes that are selected in the image above. When multiple meshes are selected, the objects are outlined in red or orange. The last mesh added to the selection is outlined in orange.
Press the modeling tab at the top of the window. It is circled in red in the image. Pressing the modeling tab switches the user interface to the modeling layout. It is a simpler user interface, getting rid of a few tools that we will not use. Inconveniently the default for the modeling layout has Blender in edit mode, which we don’t want.
Select Object Mode. The other red circle in the image above is where you select object mode and edit mode. Object mode is for selecting the entire object. Edit mode is for selecting vertices, edges, and faces. We want to select the entire object.
Throughout this tutorial, we will only use object mode, so go ahead and change that setting every time you enter the modeling layout.
Adding a texture to the plane
It is useful to add a texture to the plane to know which way it is oriented. That is the entire purpose of this section. You don’t want to go through the whole trouble of baking a decal to realize it came out sideways.
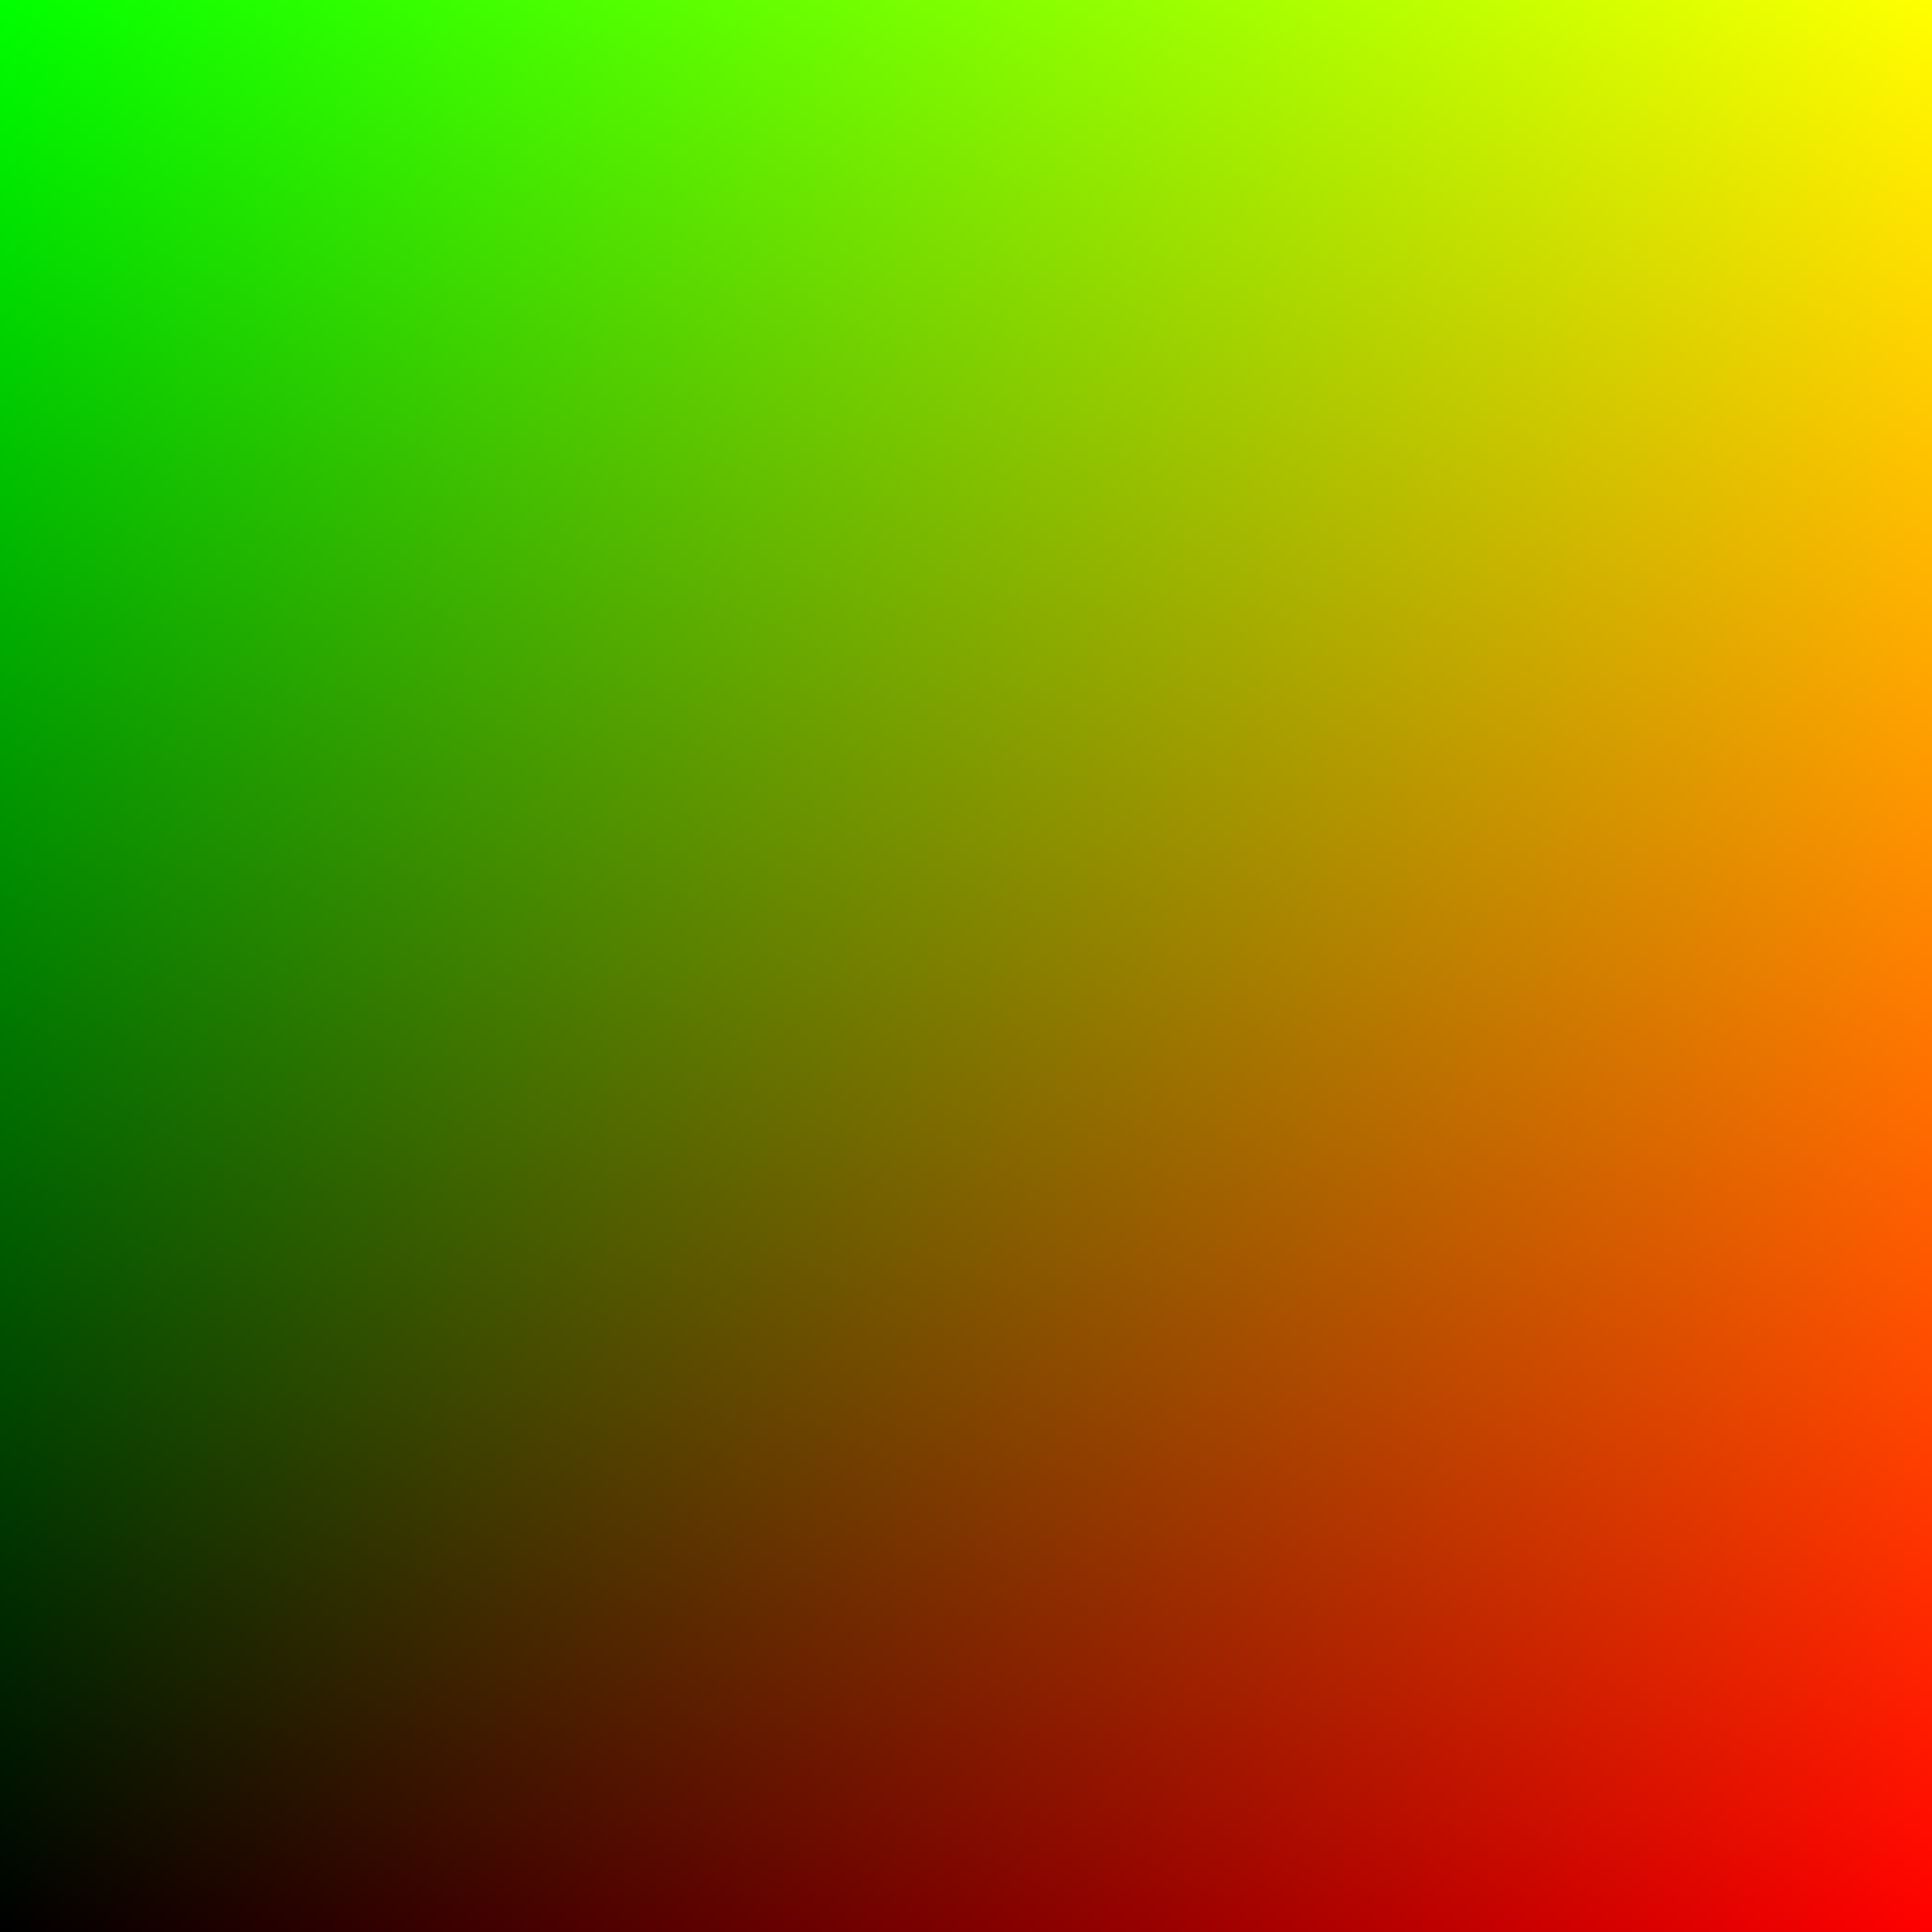
The UV image
The UV image from Material Tools works to display direction, but you could use a different image if you wanted to. On the UV image, red is right, and green is up. Yellow is both maximum red and maximum green. Black is both minimum red and minimum green.
Adding a texture to a plane step by step directions
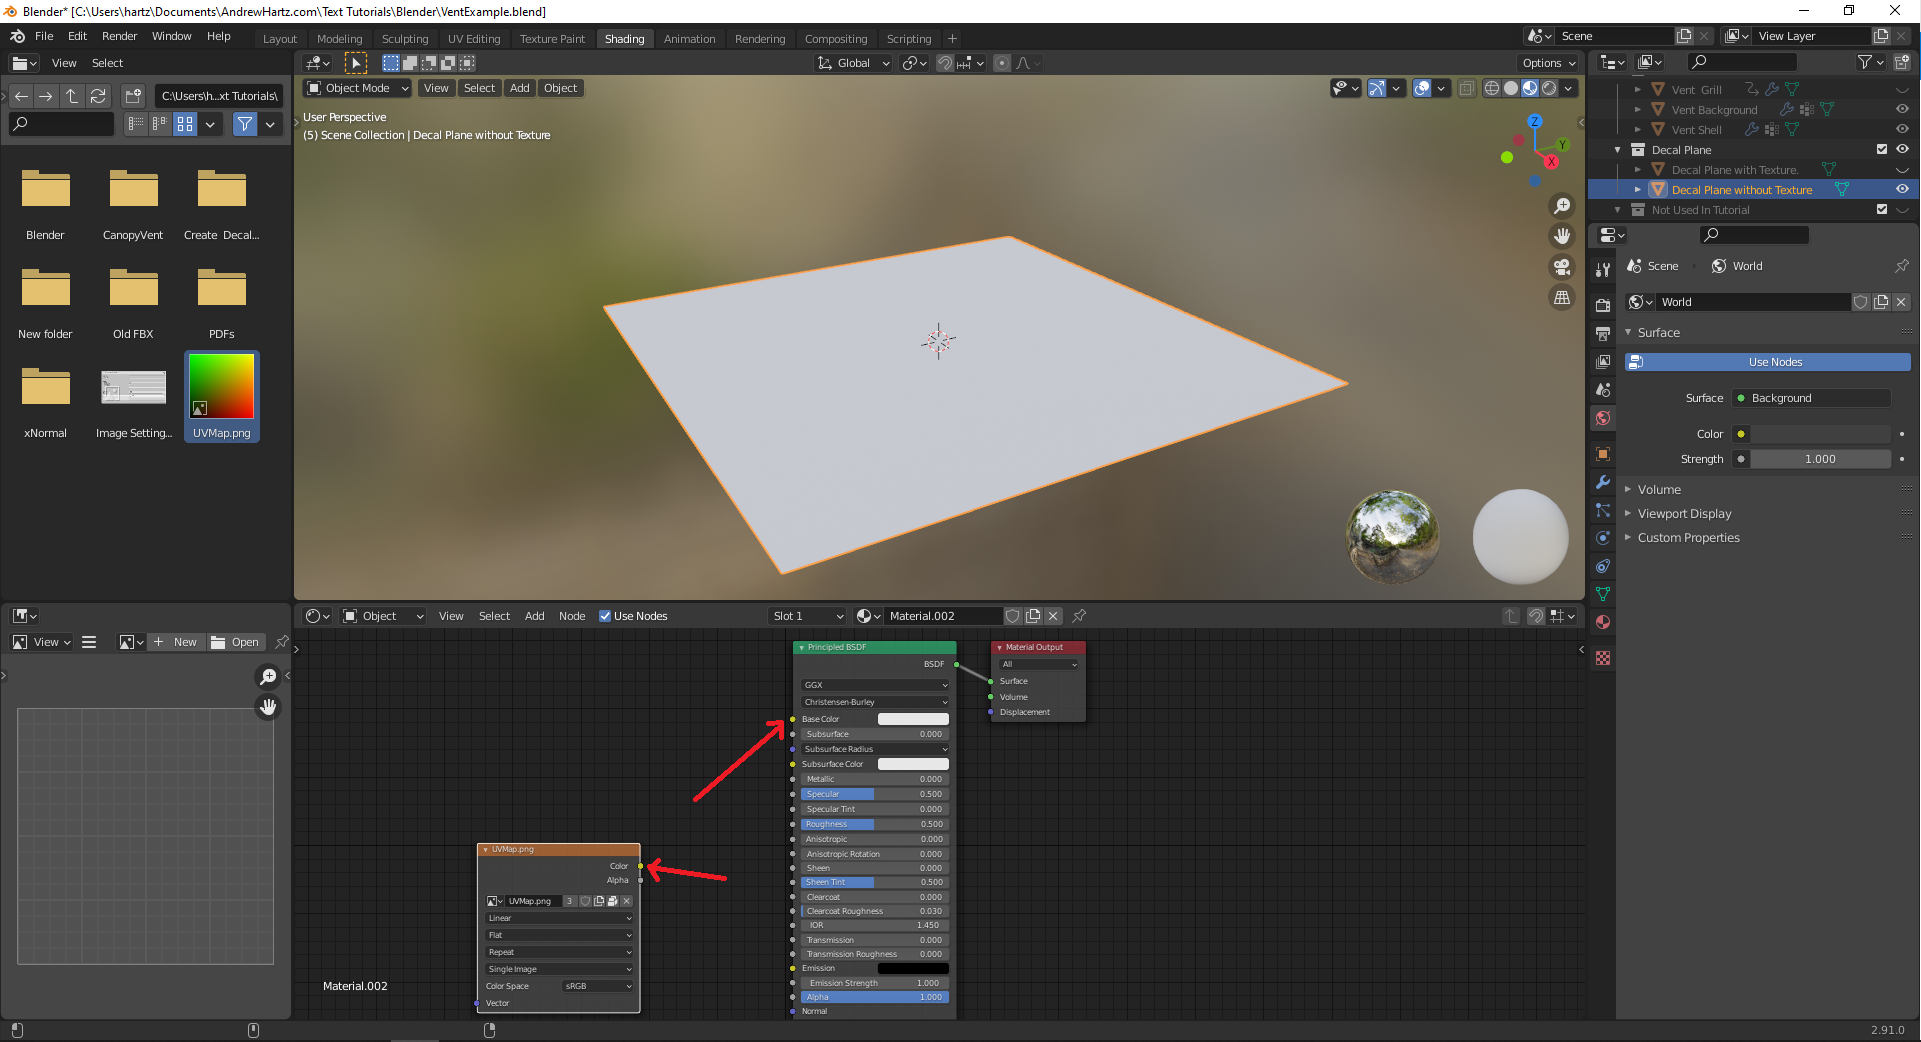
Now we will add the image to the plane for use in the blender window. The following is an image of the plane as it would look if you had just created it, resized it, and positioned it, on the vent, without adding a texture to the plane.

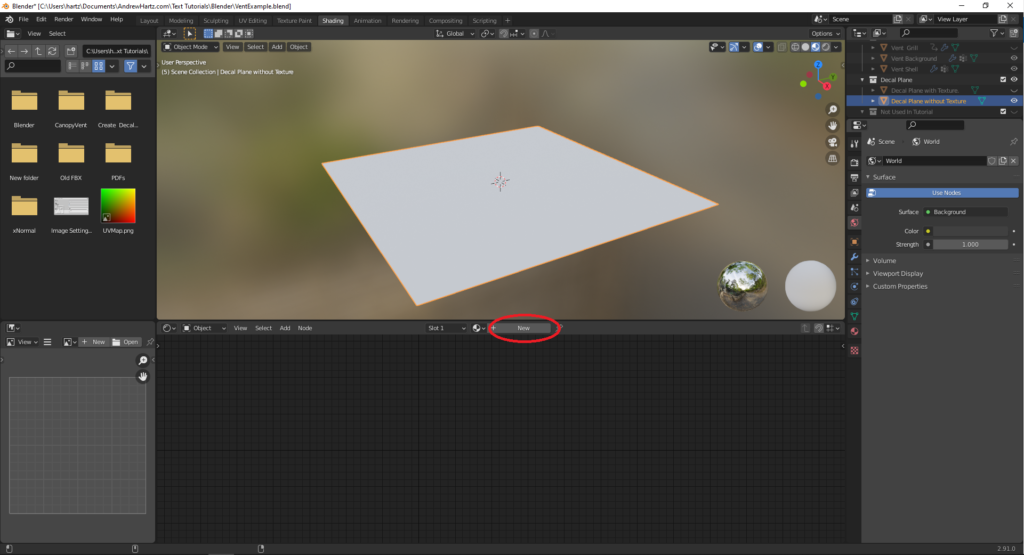
Click on the Shading tap to enter the Shading layout, circled with red on the image above. Then make sure the plane is selected by left mouse clicking on the plane.
Press the new button to create a new material for the plane, circled in the image below.
Drag the image from the file window, on the left, into the Node window, on the bottom.
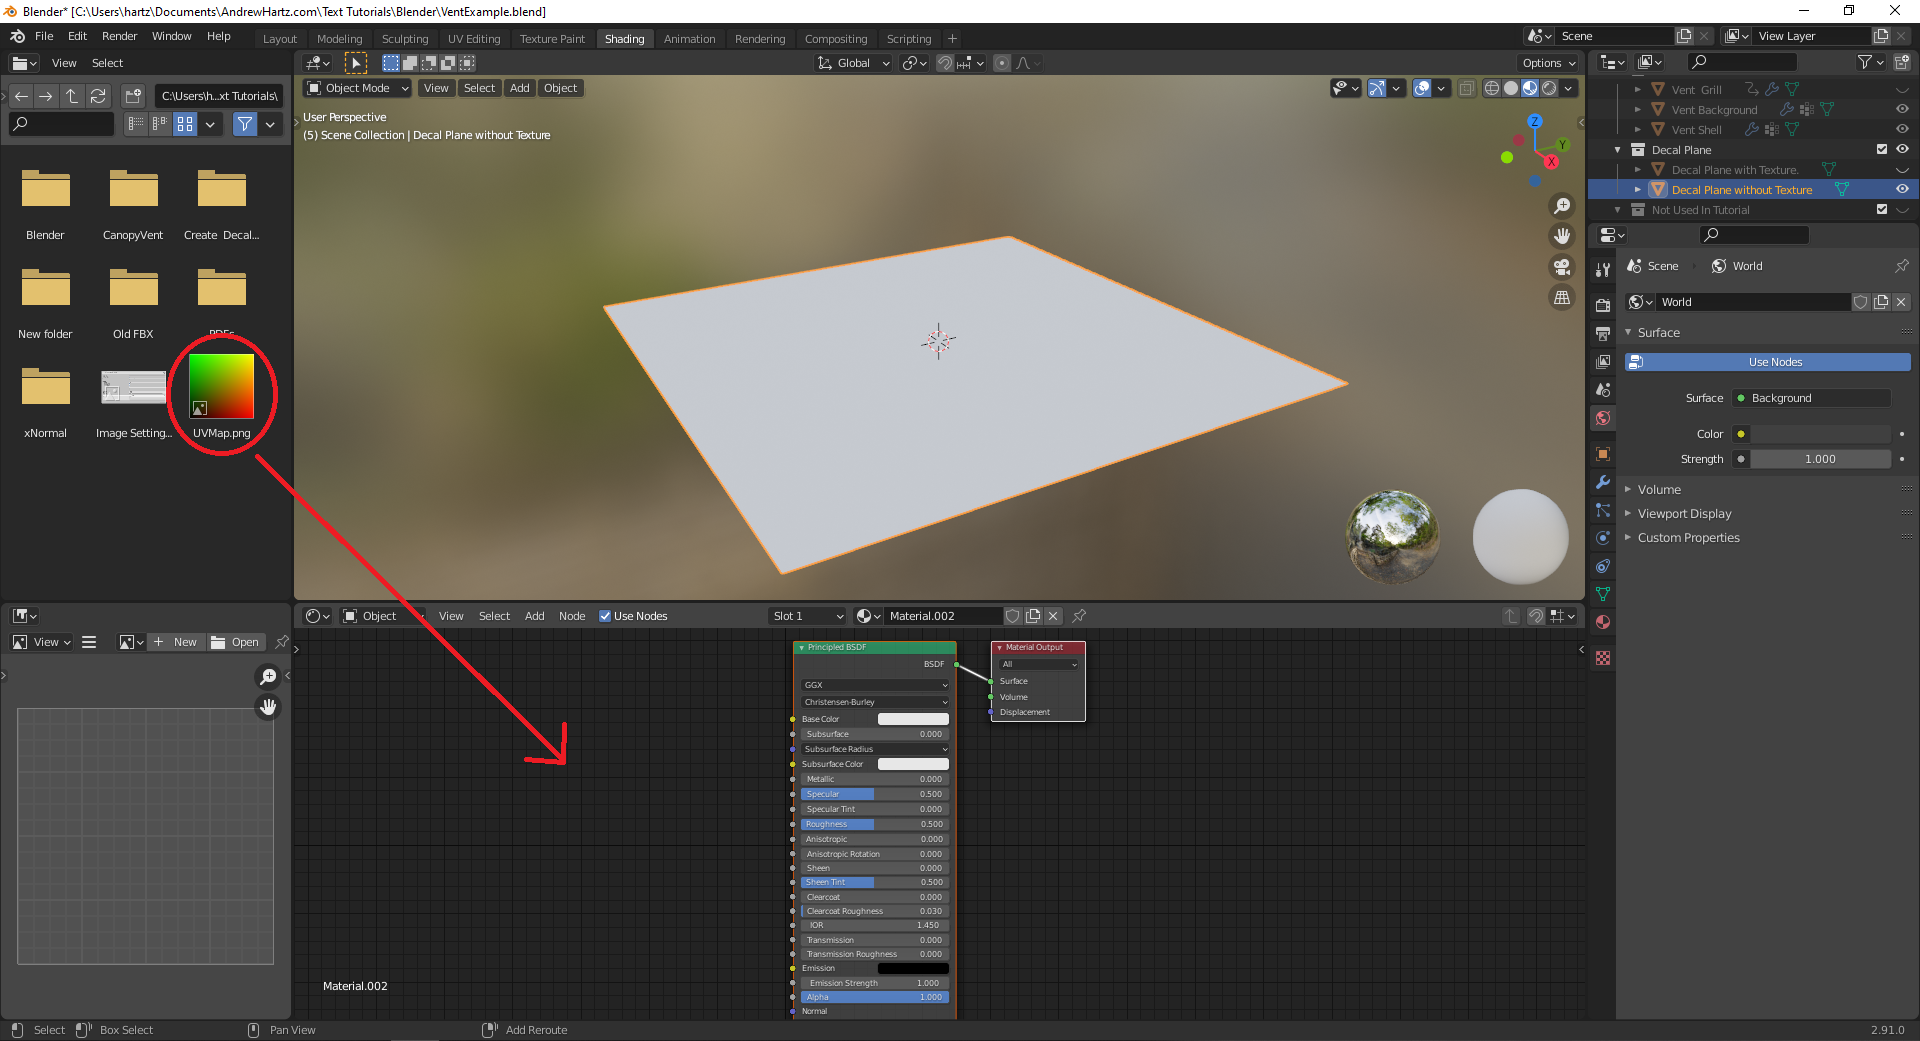
Connect a line between your new node and the Principled BSDF node. You will be connecting “color”, output, of the new node, and “Base color”, input, of the Principled BSDF node. Click the left mouse button on one yellow circle, drag the mouse cursor to the other yellow circle, then release the left mouse button.
Now return to the Modeling Layout.
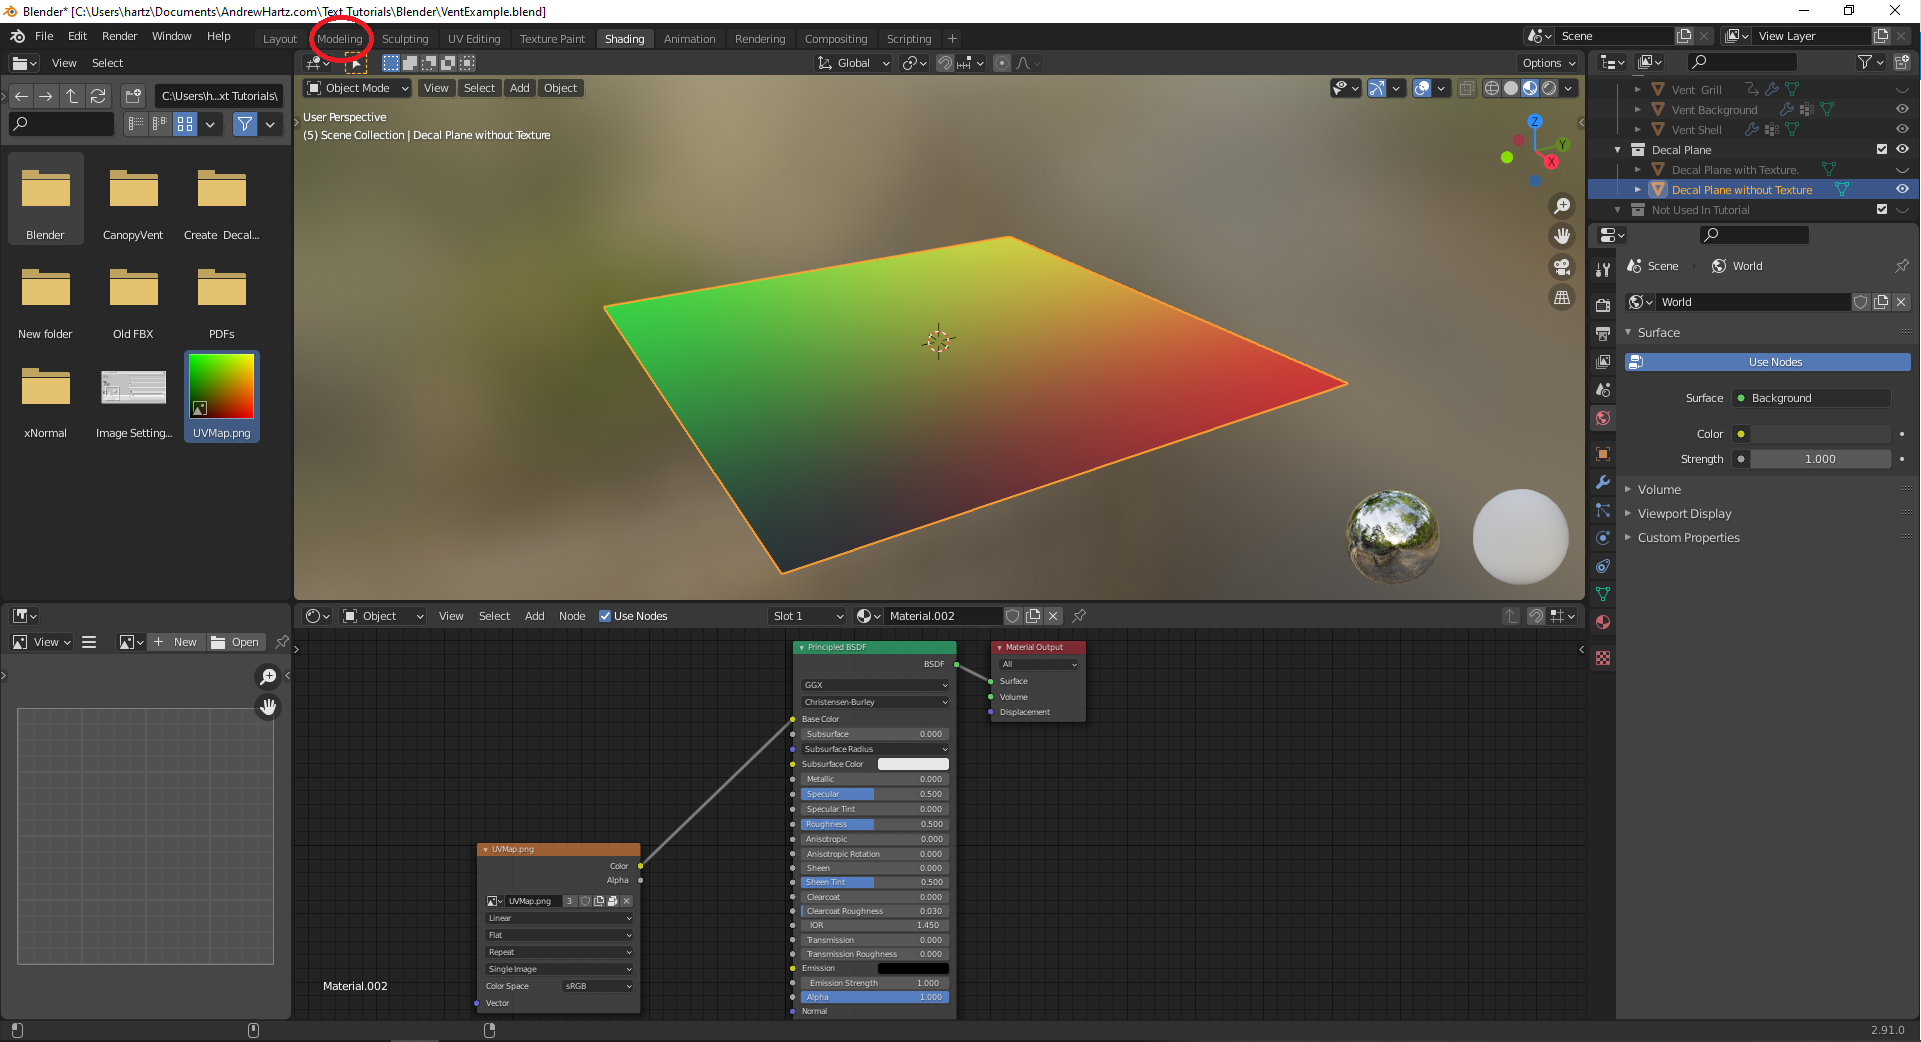
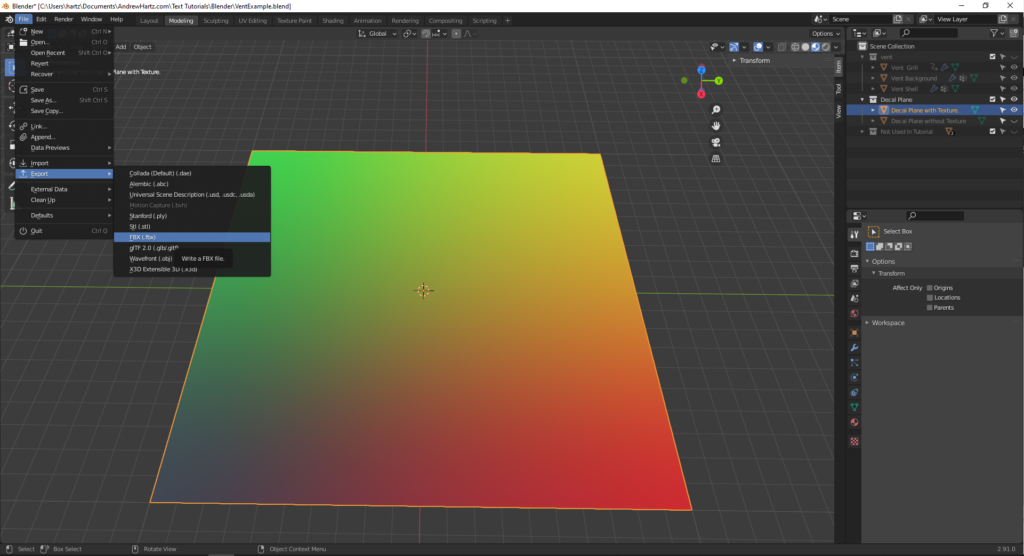
Select the option to show objects as rendered. In the image below, I circled in red the button you need to press.


If your plane isn’t oriented the way it is in this image above, rotate it.
First, make sure you are in object mode rather than in edit mode (press Tab to switch).
Then press the shortcut keys “r” (rotate), then “z” (about the z-axis), then “90” (90 degrees). The plane is rotated 90 degrees. Repeat the rotation until your plane is oriented the same way that the image above is.
Exporting
Triangulate modifier
Sometimes you need to add a triangulate modifier before exporting to appease an error in xNormal. xNormal can’t handle any faces with more than four edges. I have added a link to a video about blender modifiers here. The meshes in this example already include the triangulate modifier.
FBX
Export models in FBX format when you are going to use them to make decals. xNormal is best at using FBX objects. xNormal often throws errors when you try to use OBJ files.
Exporting step by step
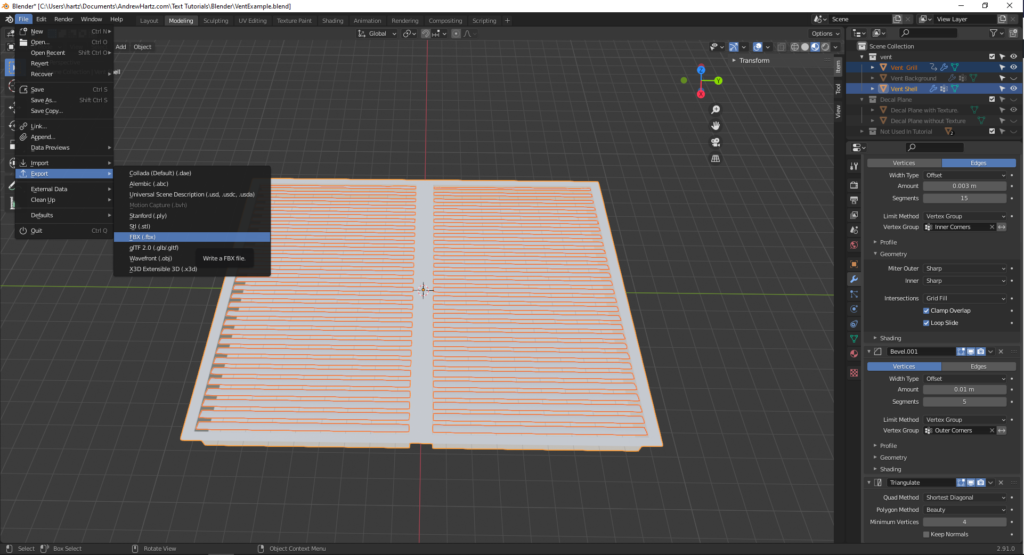
Select the shell mesh, then shift select the grill mesh.
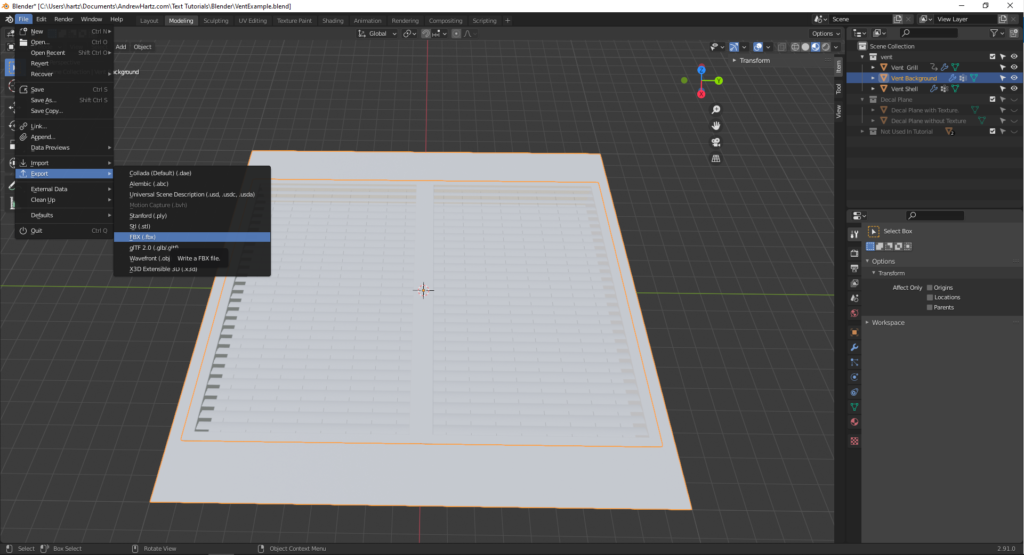
Select the tab File/ Export/ FBX file. To open the window with your exporting options.
Ensure you check the option to only export selected, circled in red in the image below. This way, you only export the vent shell and the grill together.
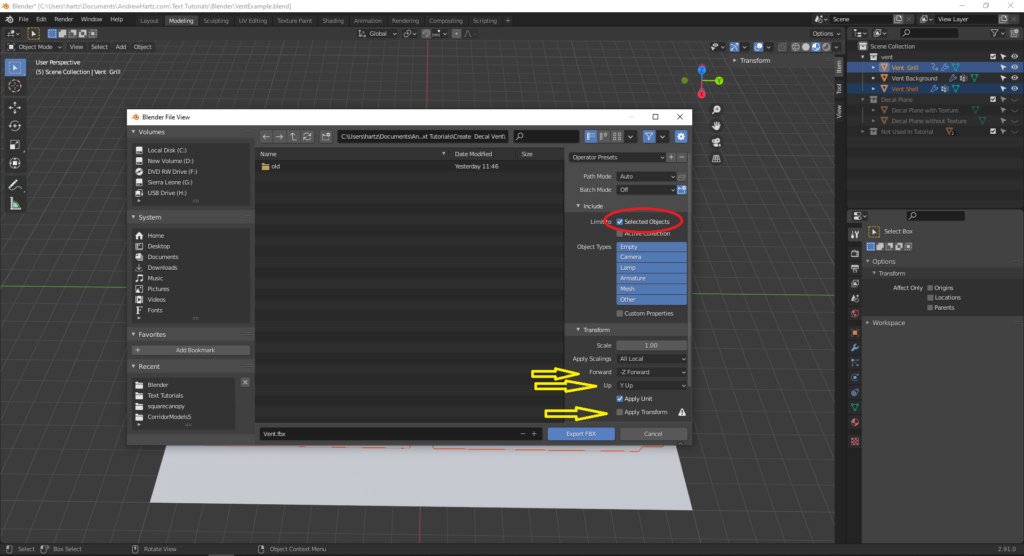
There are three options with yellow arrows pointed at them in the image above. They are meant to rotate the object exported to a different axis. These settings don’t actually work with FBX files, but they will not affect your results in either this tutorial or the following tutorial.
These options may give you trouble in the future, and explaining in detail how to work around the problems that they cause could be complicated. Just use this rule of thumb, and you should be fine.
- Everything you create in Blender for use in xNormal should be exported as an FBX file.
- Everything you create in Blender for use in Unity3D should be exported as an OBJ file.
Select the background mesh.
Export background mesh make sure to check the option to only export selected.
Select the plane mesh.
Export plane mesh make sure to check the option to only export selected.
Output
Output FBX files include
- the vent
- the vent background
- the plane