This program uses masking operations to combine textures and materials. If you are not familiar with masking, it is the same idea as masking tape when you paint a house. You use masking tape to cover areas that you already painted a different color, so you don’t paint over that area with the new color. In this program, you mask off a section of your image and then paint the rest of it with another image. Mask and Overlay has several options and variations on masking. The most important are the standard masking, overlay, and mixing.
Masking
Standard masking uses a mask image, a decal image, and a base image. The mask is compared to some specified condition (e.g., red pixels > 0.5). Each pixel of the mask is tested. If the condition is met, the corresponding pixel on the output image gets the corresponding pixel’s value on the decal image. If the condition is not met, the corresponding pixel on the output image receives the corresponding pixel’s value on the base image.
Example:
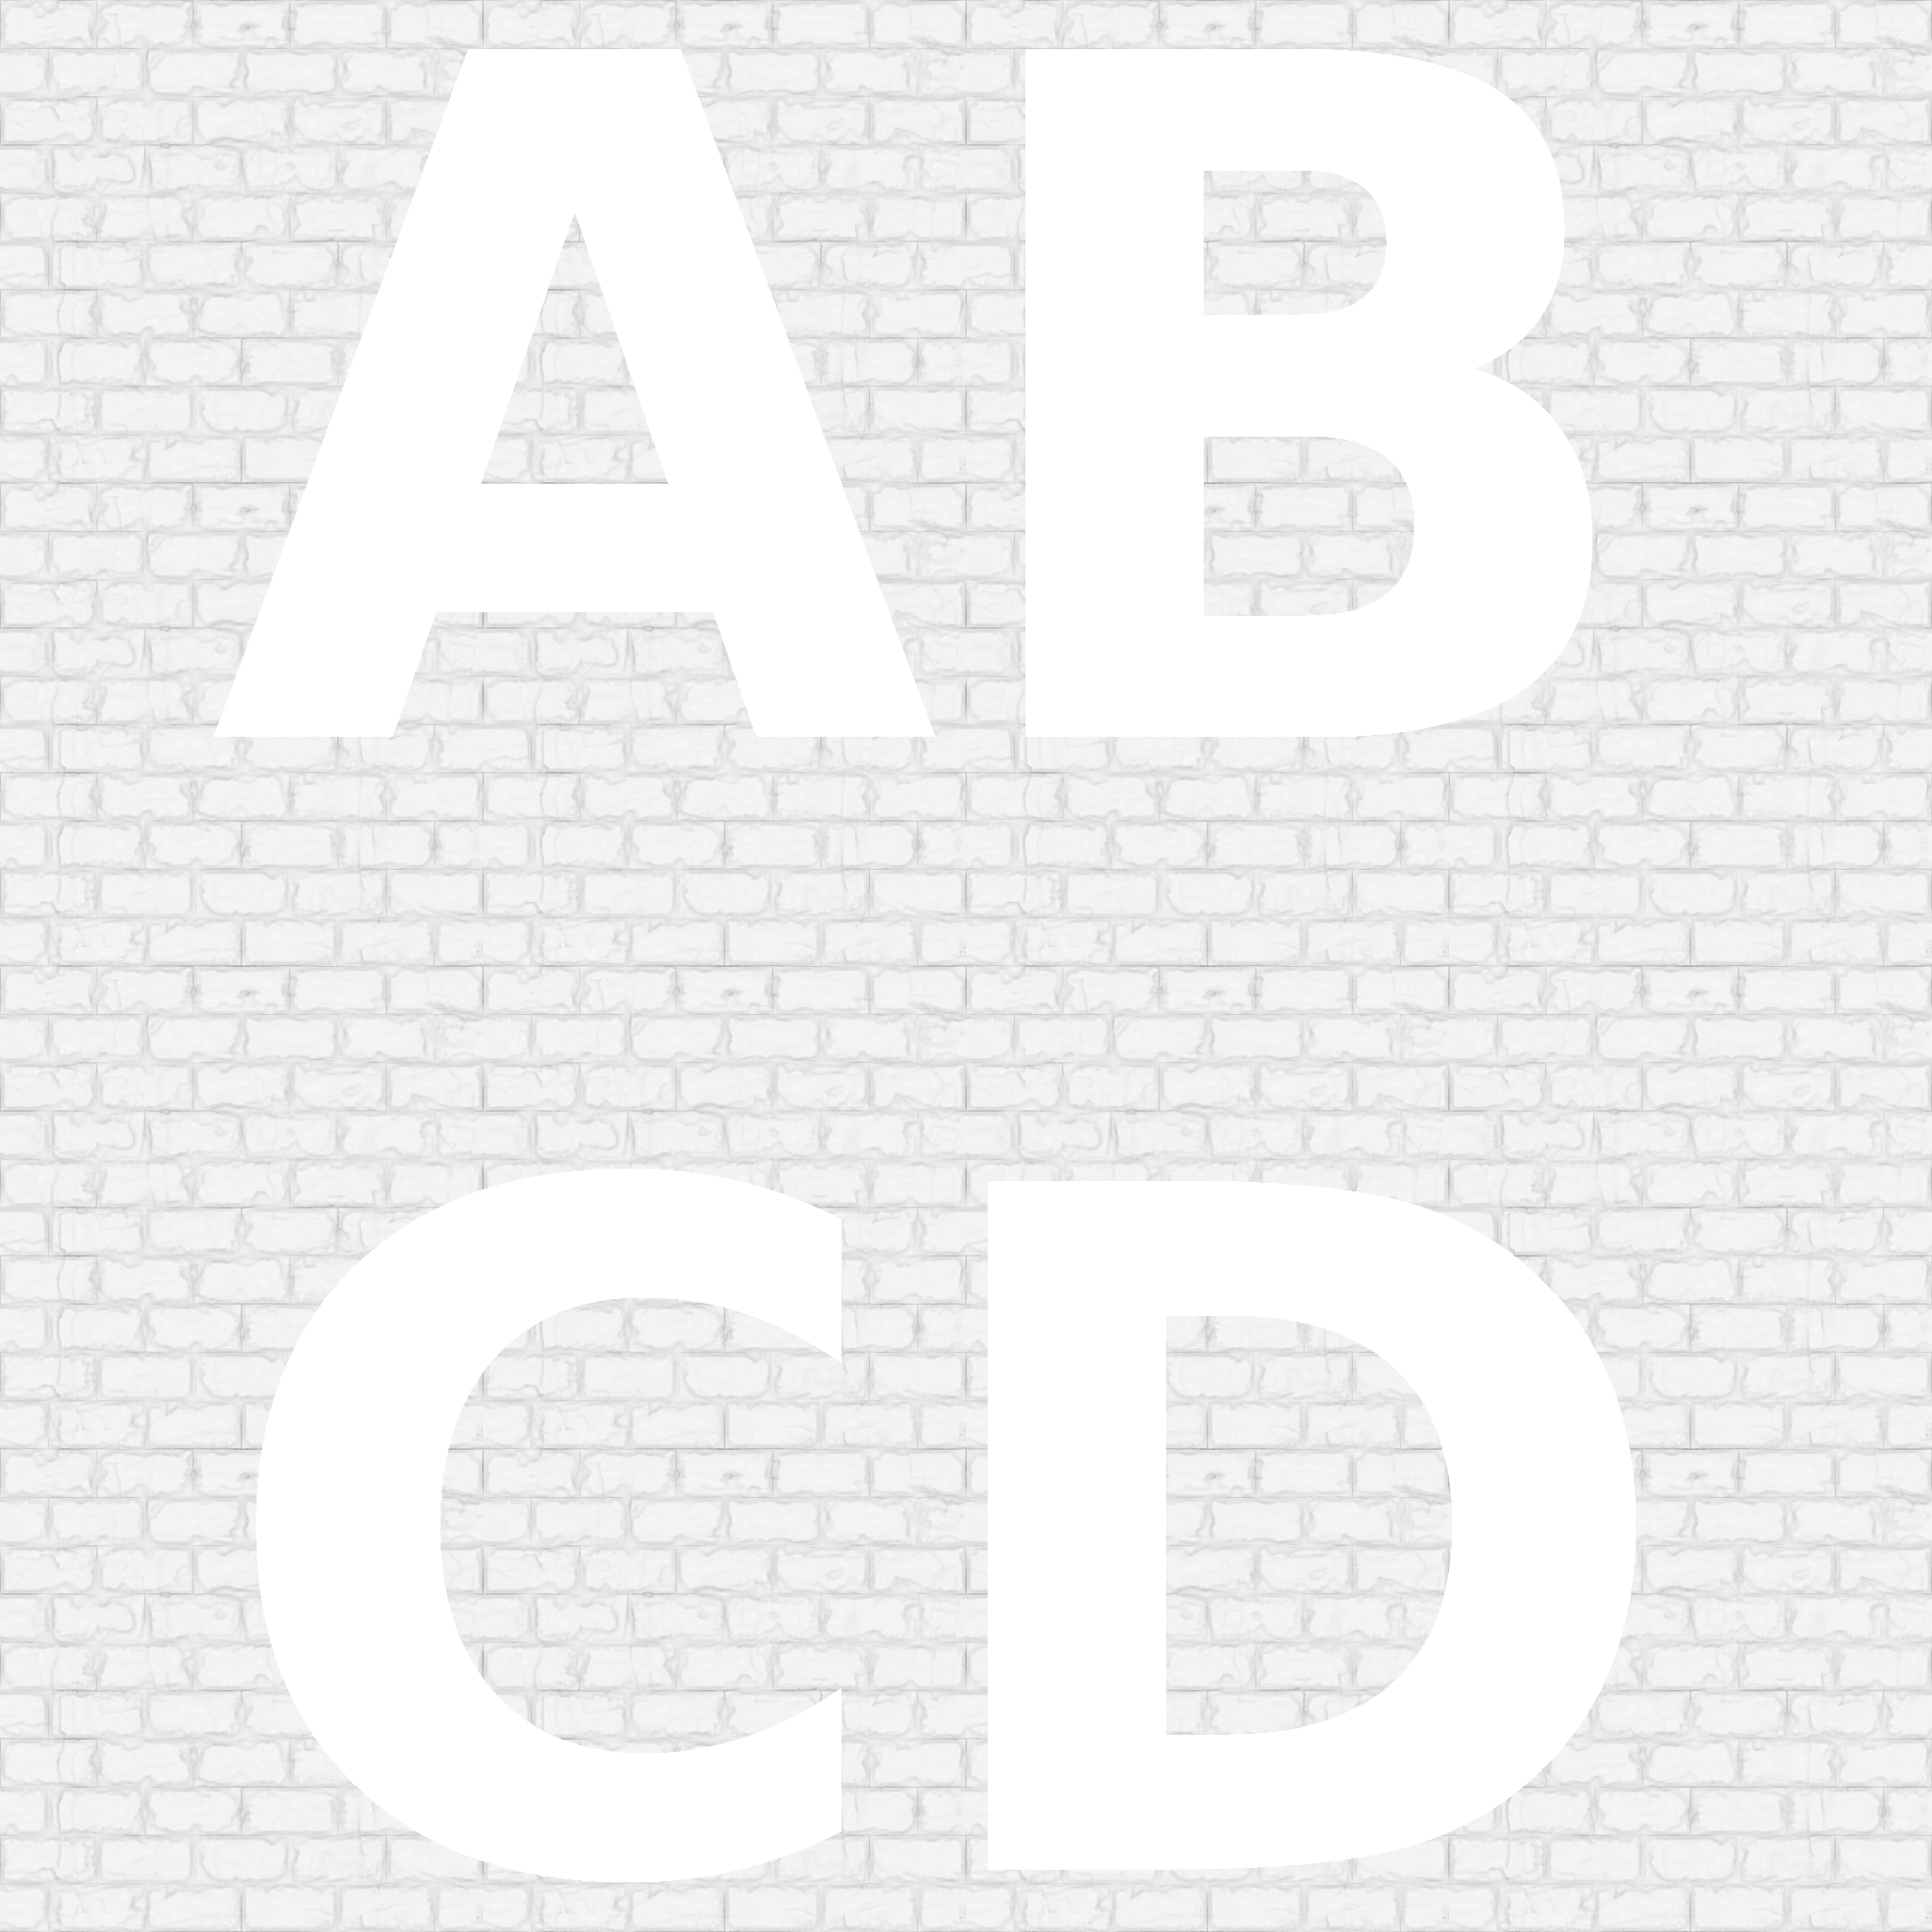
blue > 0.1
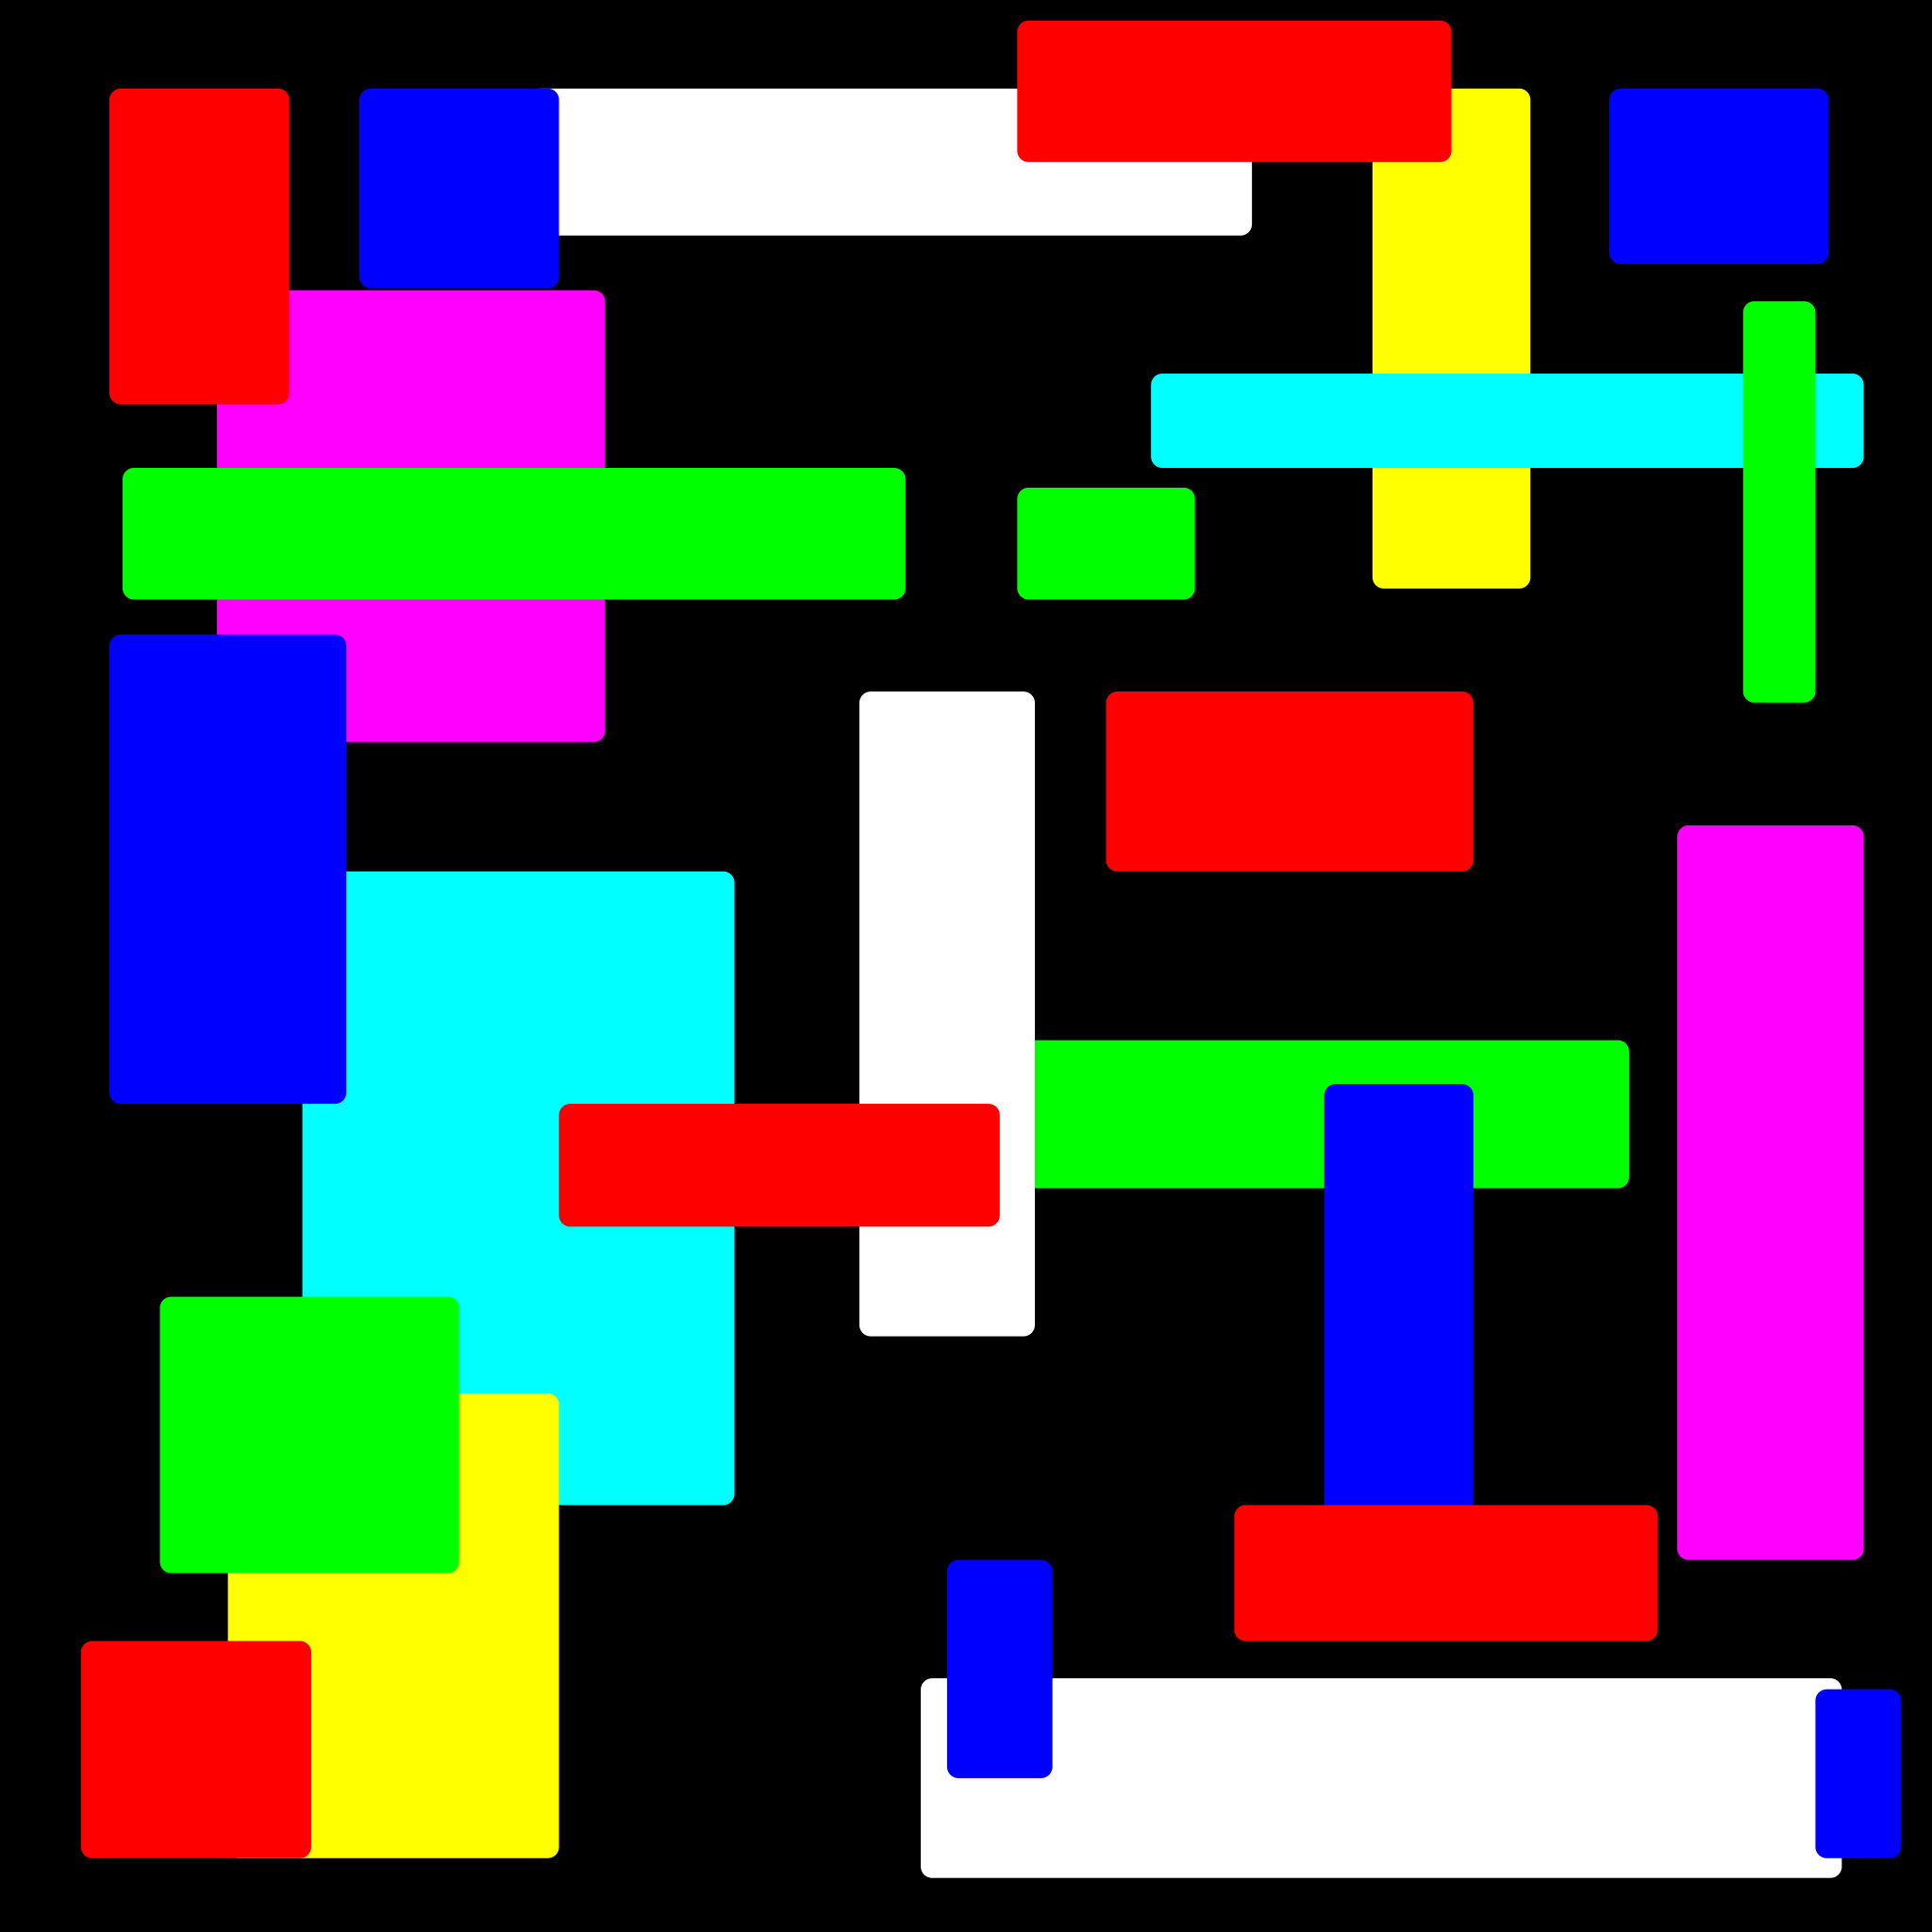
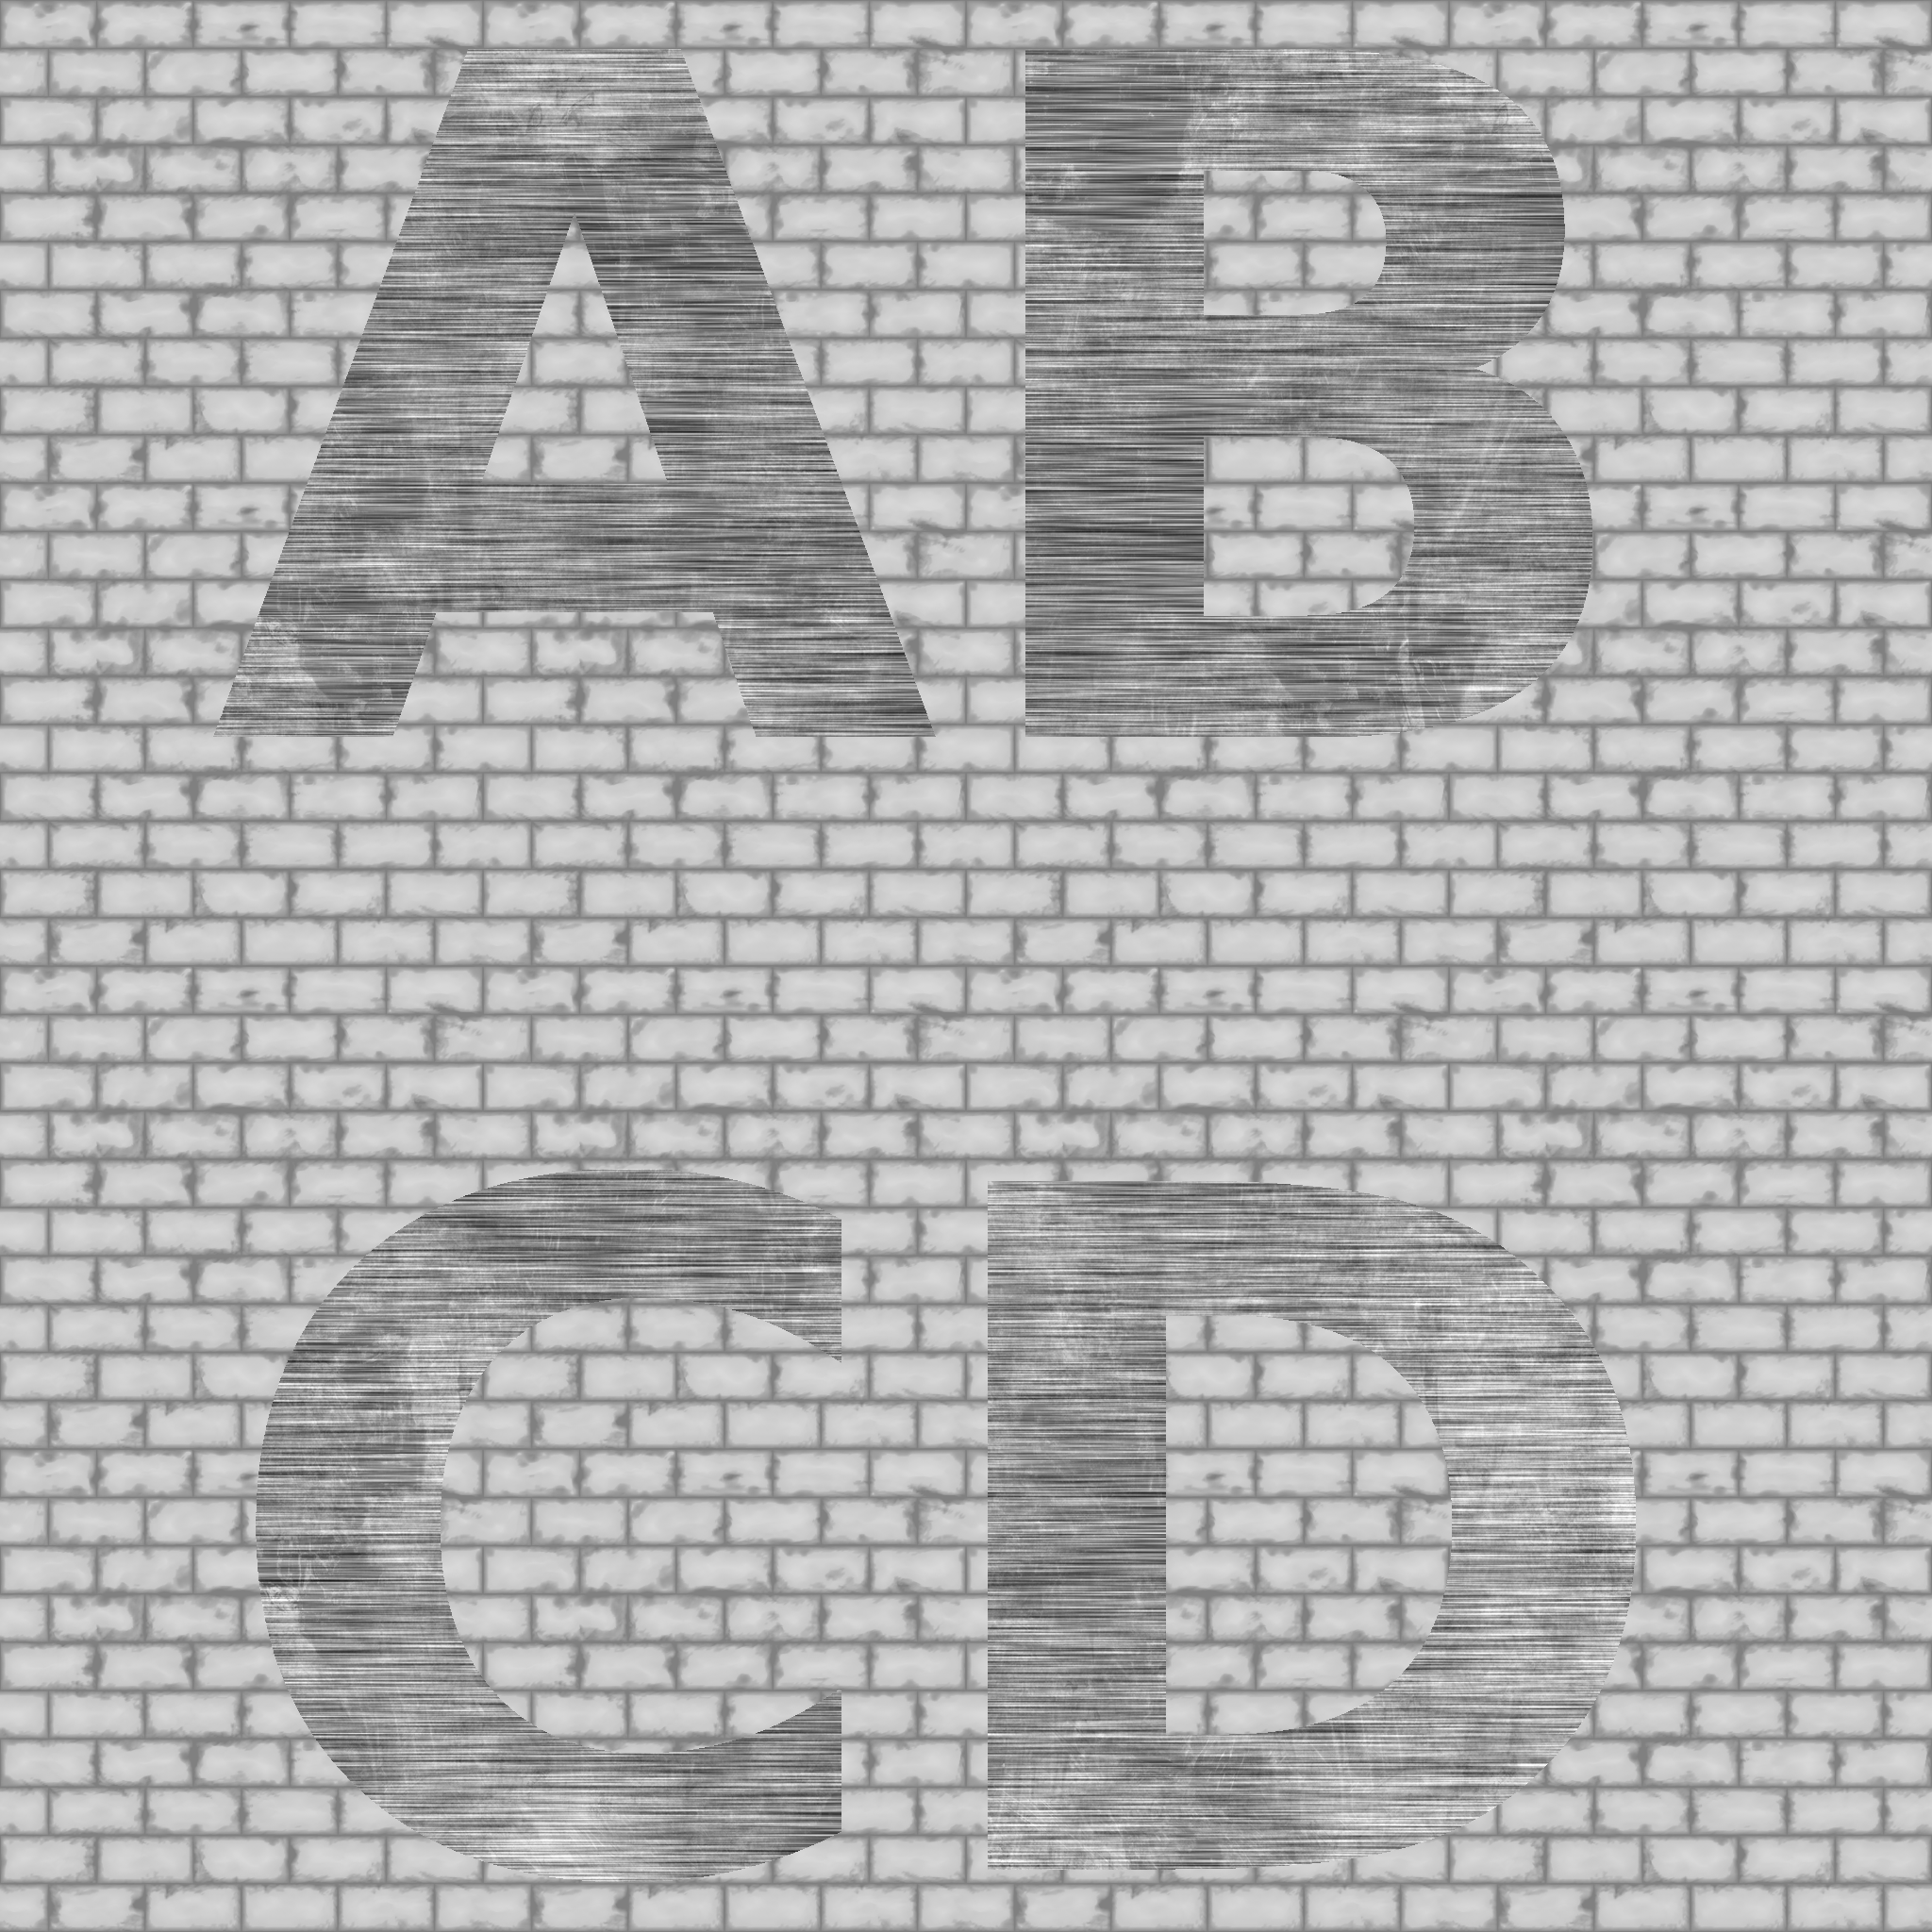
Mask
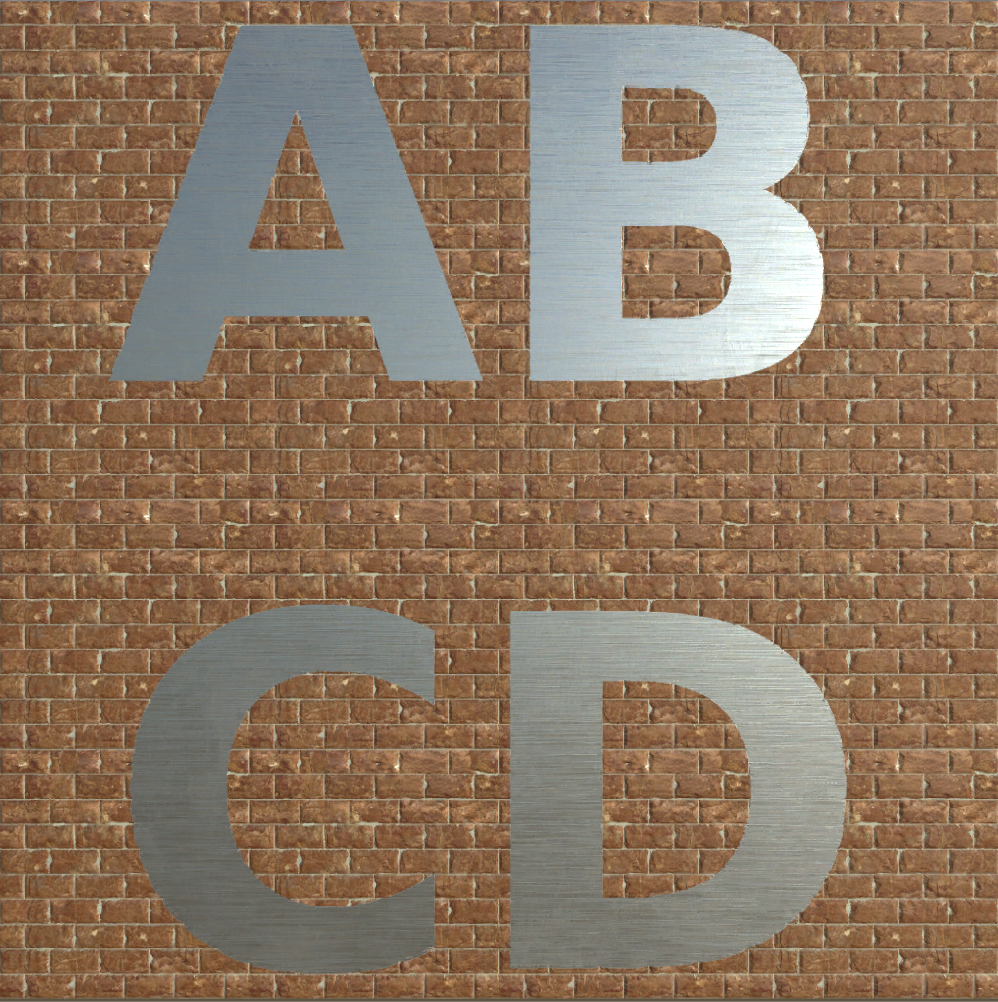
Decal
Base
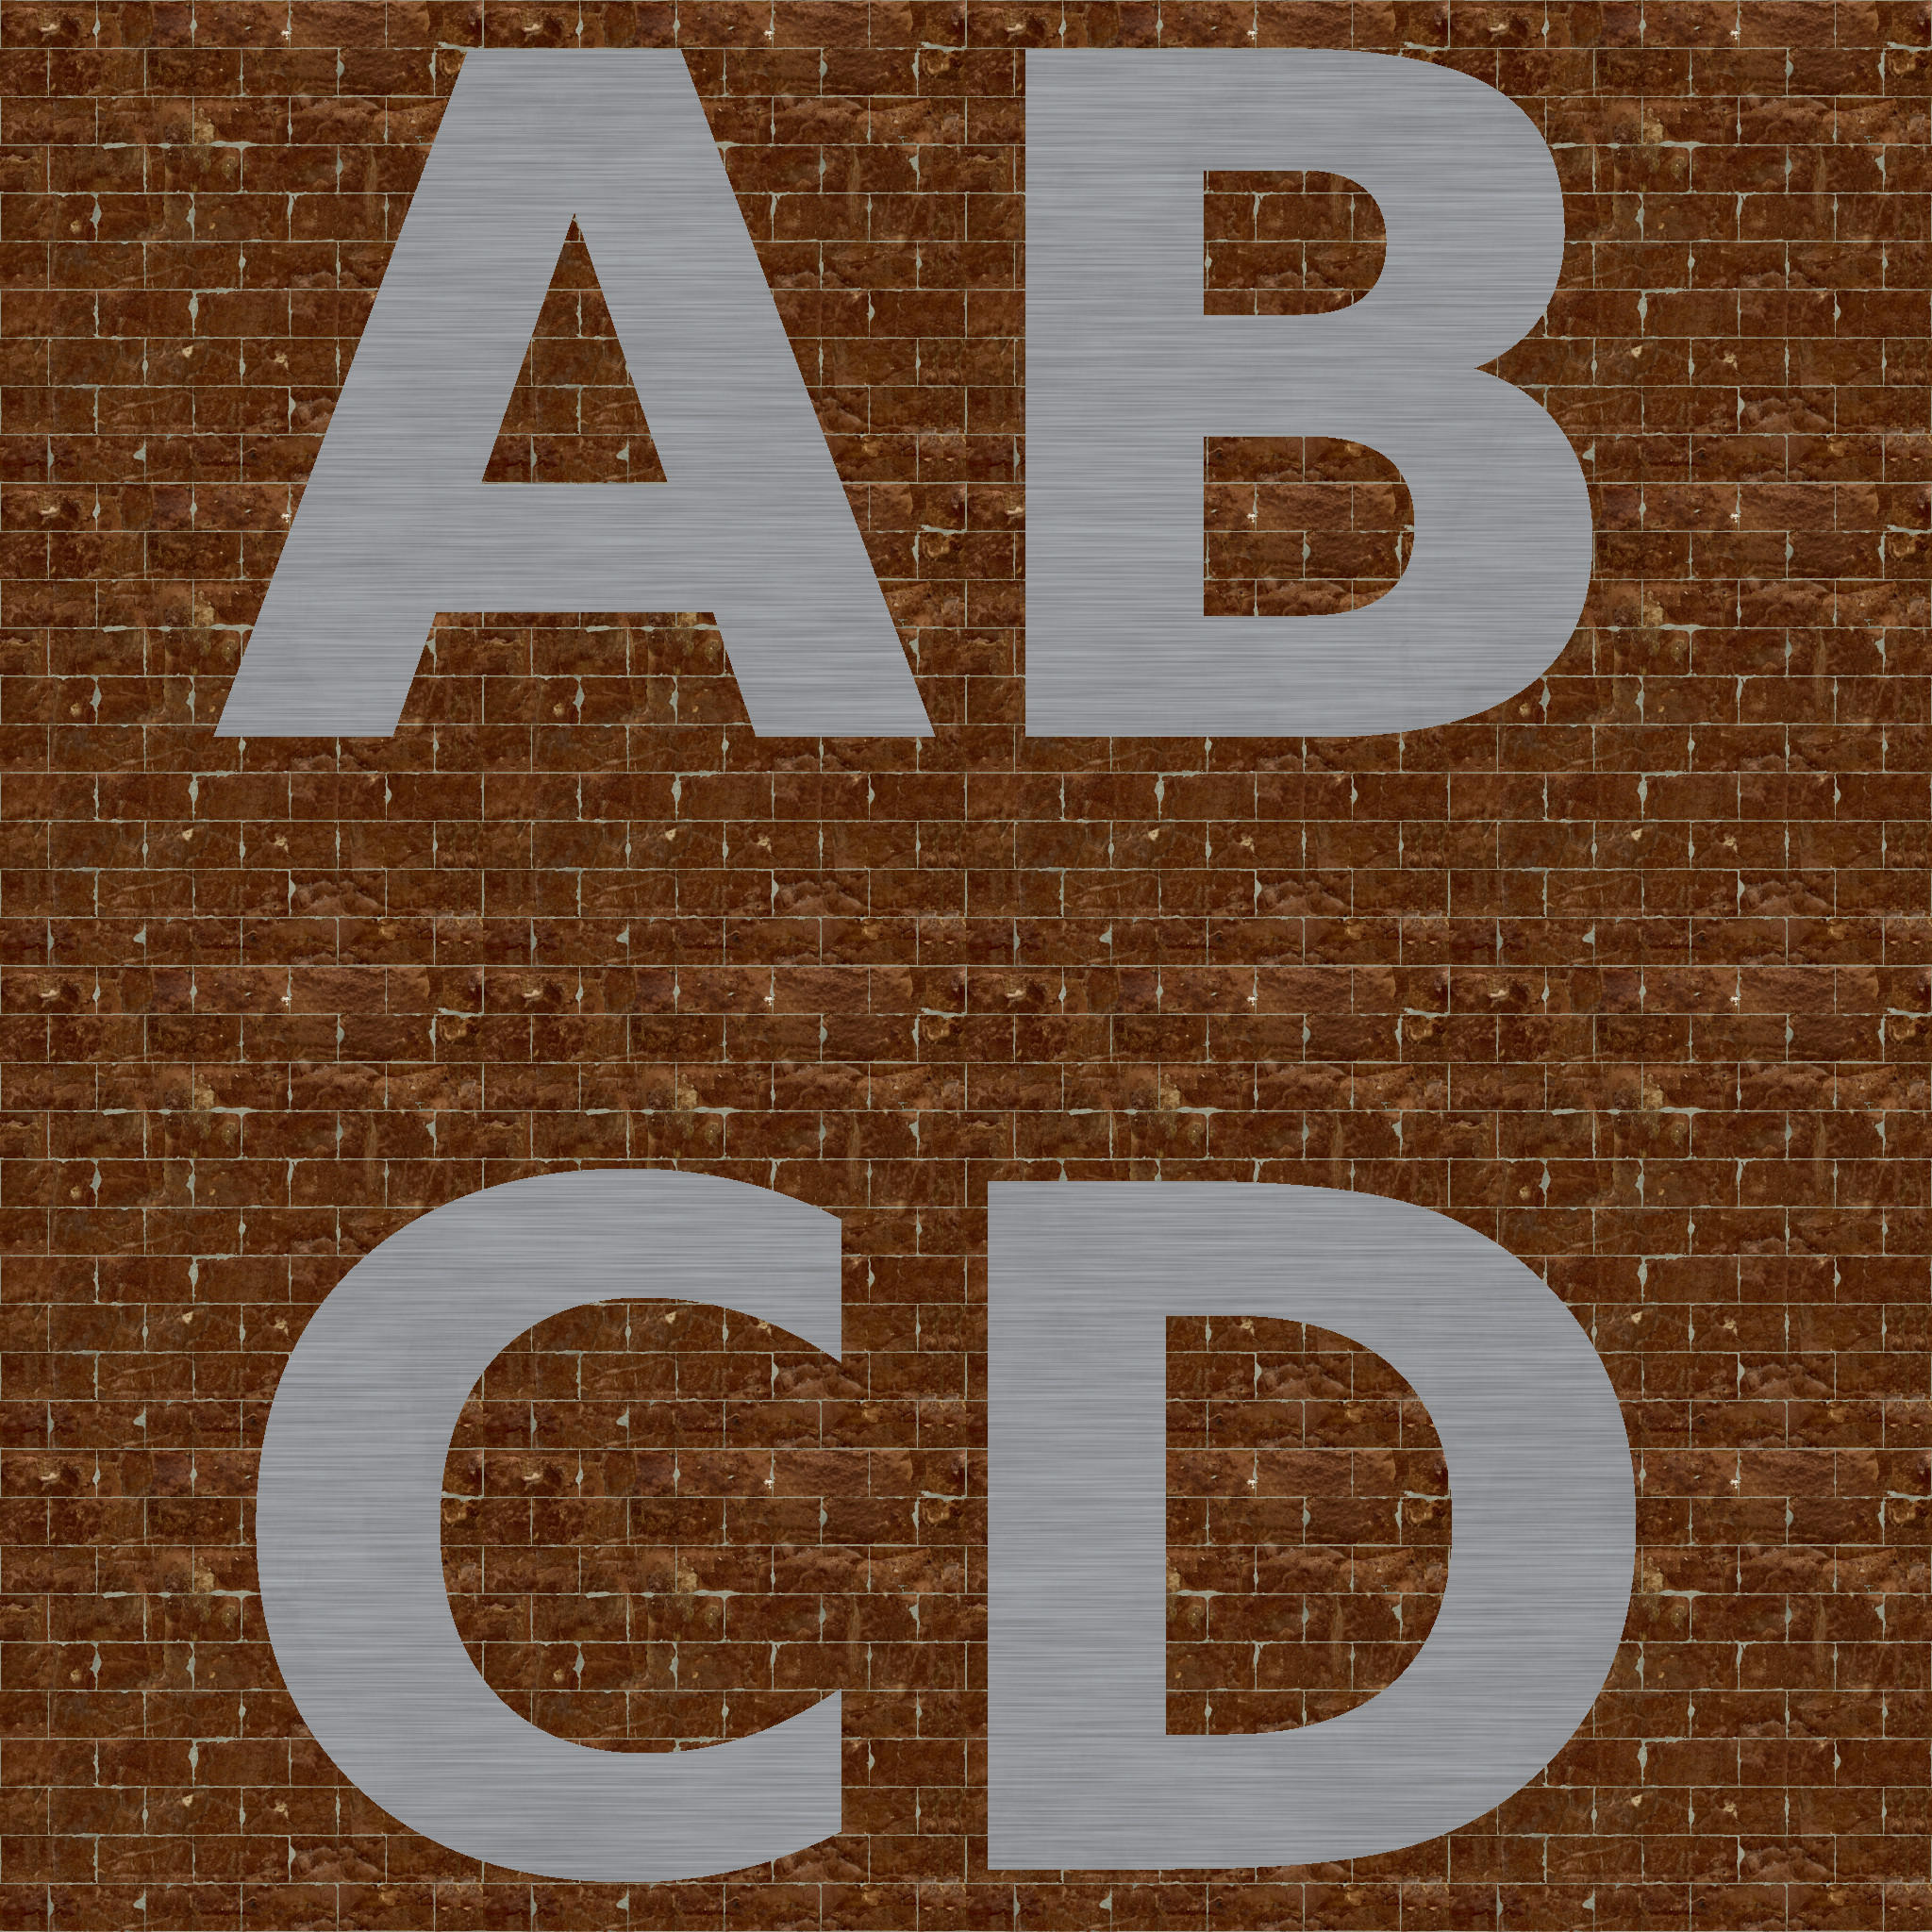
Output


This same masking operation with the same mask can also be done for all nine image types from a unity standard material in one run. The mask is always just one texture, but Decal and Base can be set as Materials.
The following examples employ only the five most commonly used of the image types. Emission, Detail Mask, Detail Albedo, and Detail Normal can be used with material tools but will be left out of these examples.
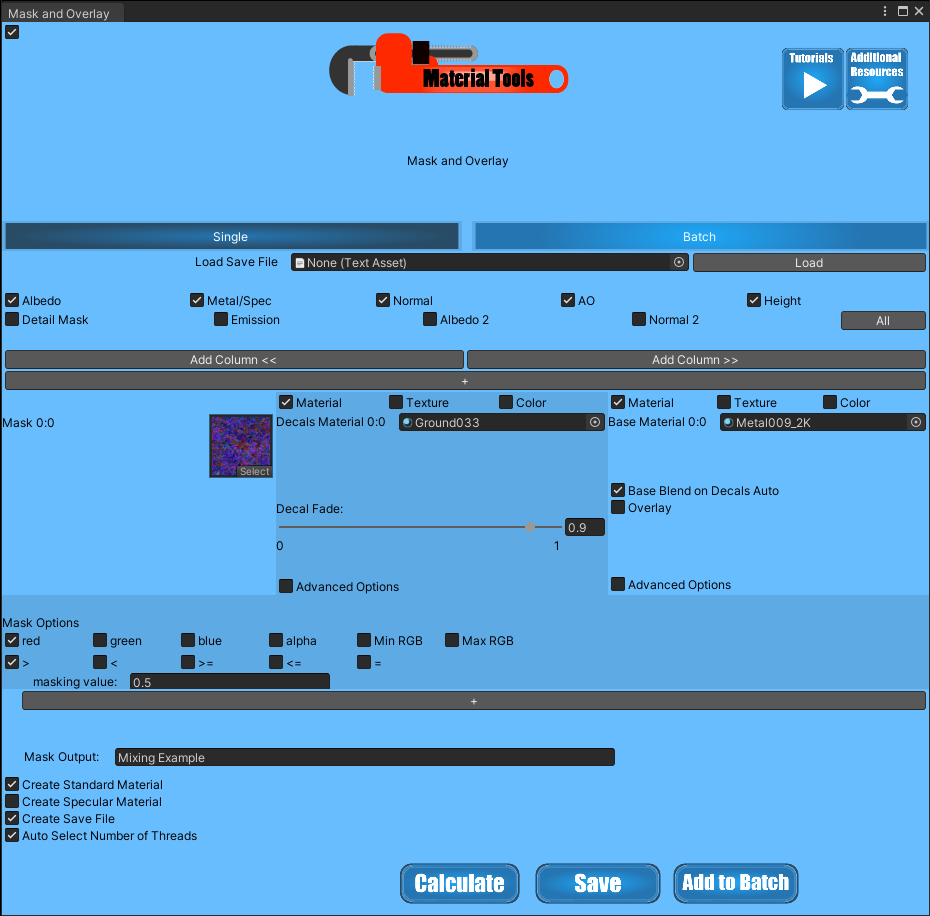
Masking Example
Mask and Overlay
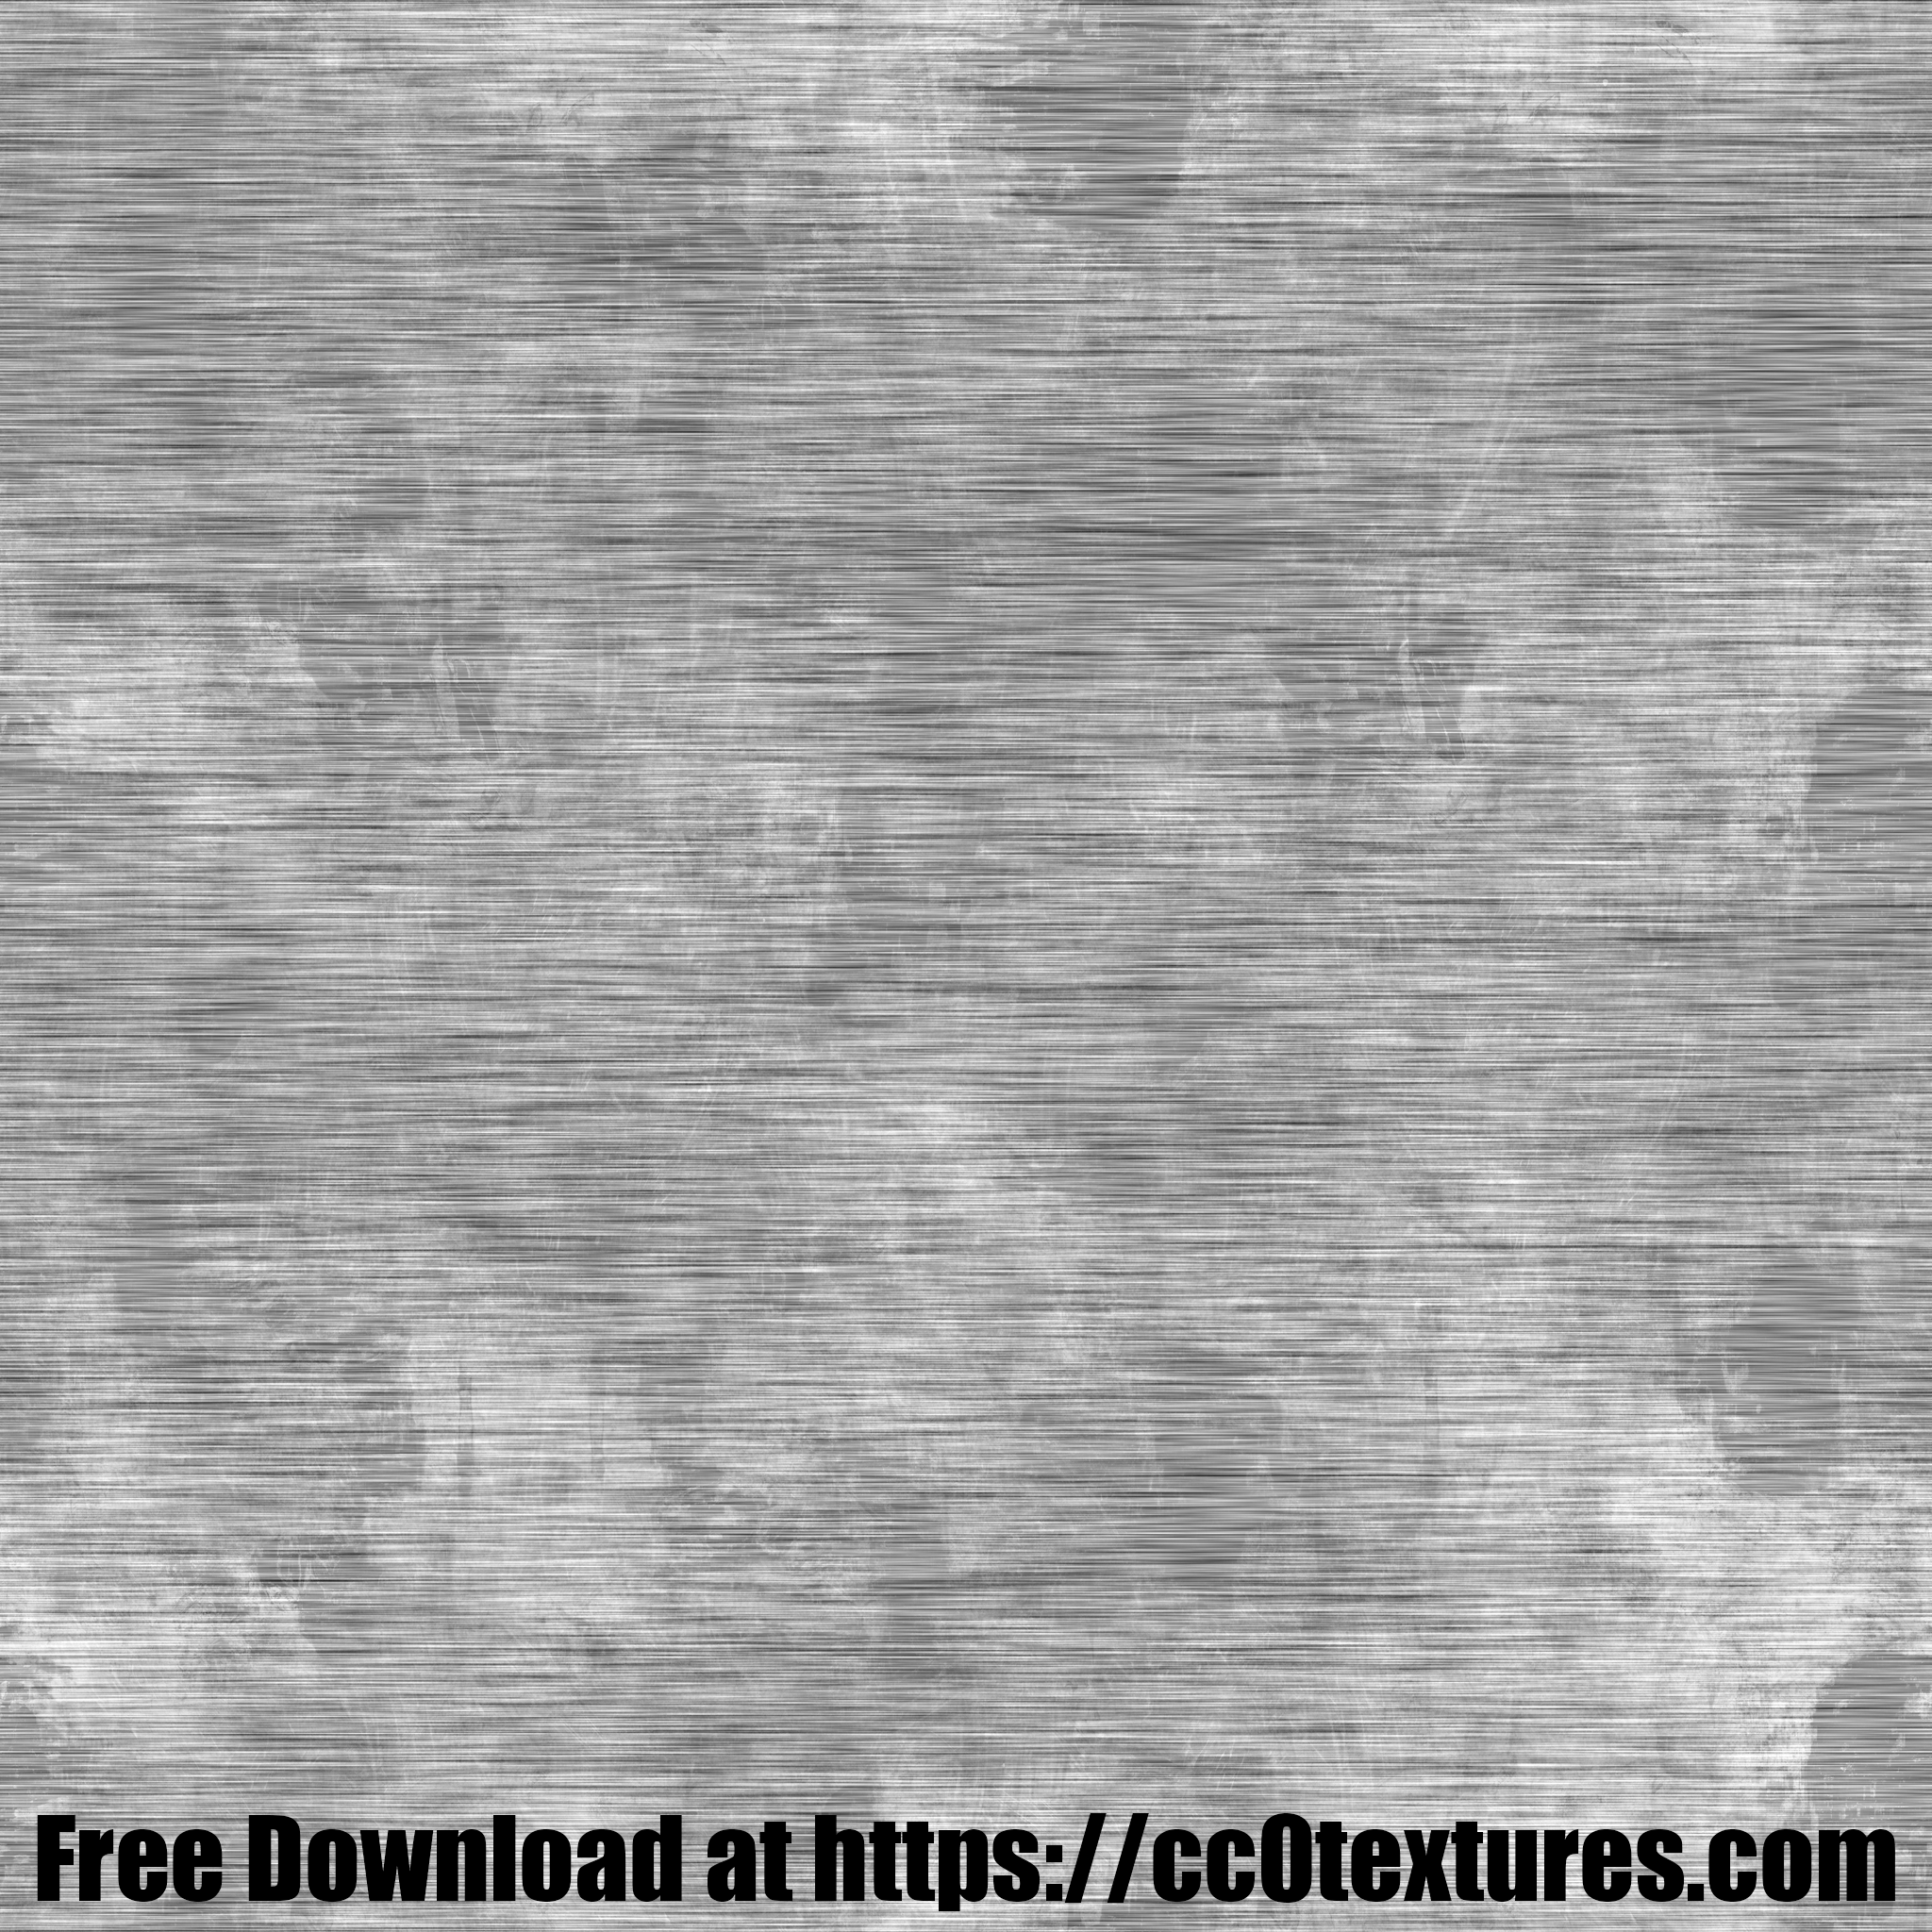
Mask

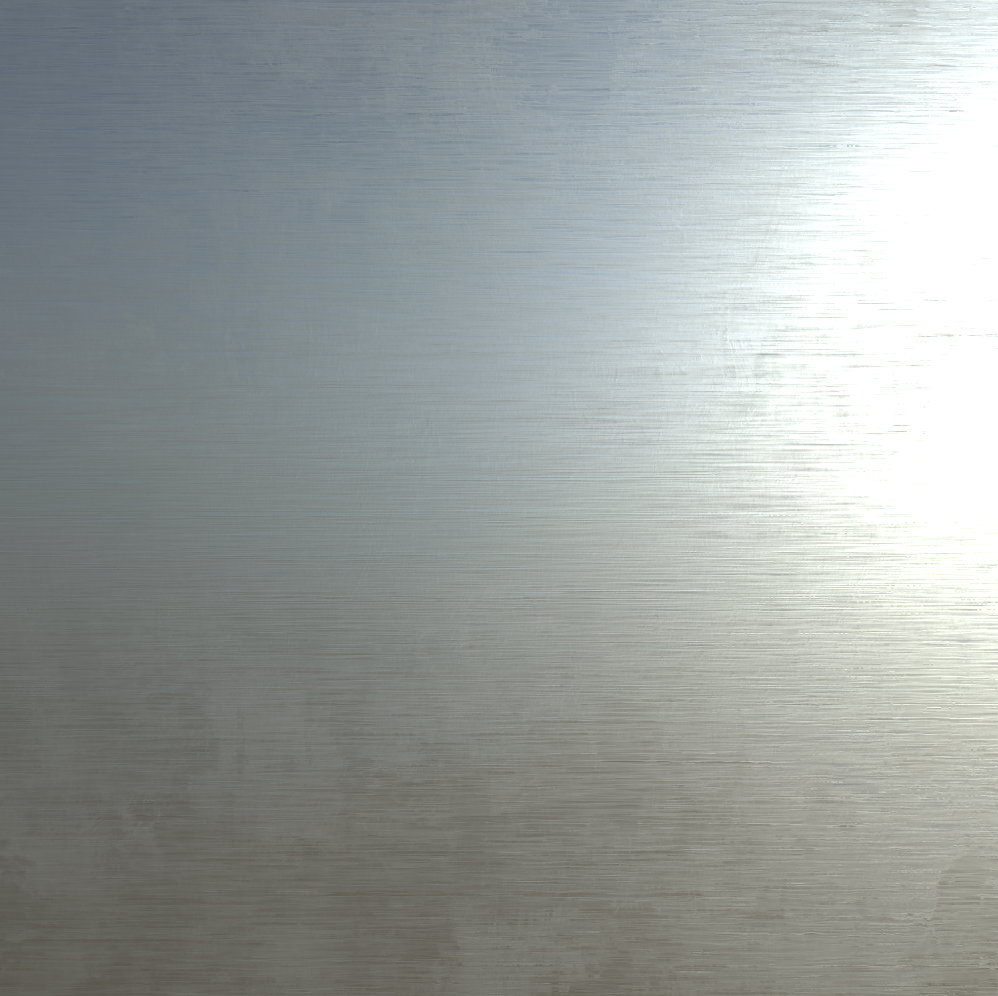
Decal:
Material
Unity Render
Albedo
AO
Height
Metallic
Normal
![]()
![]()


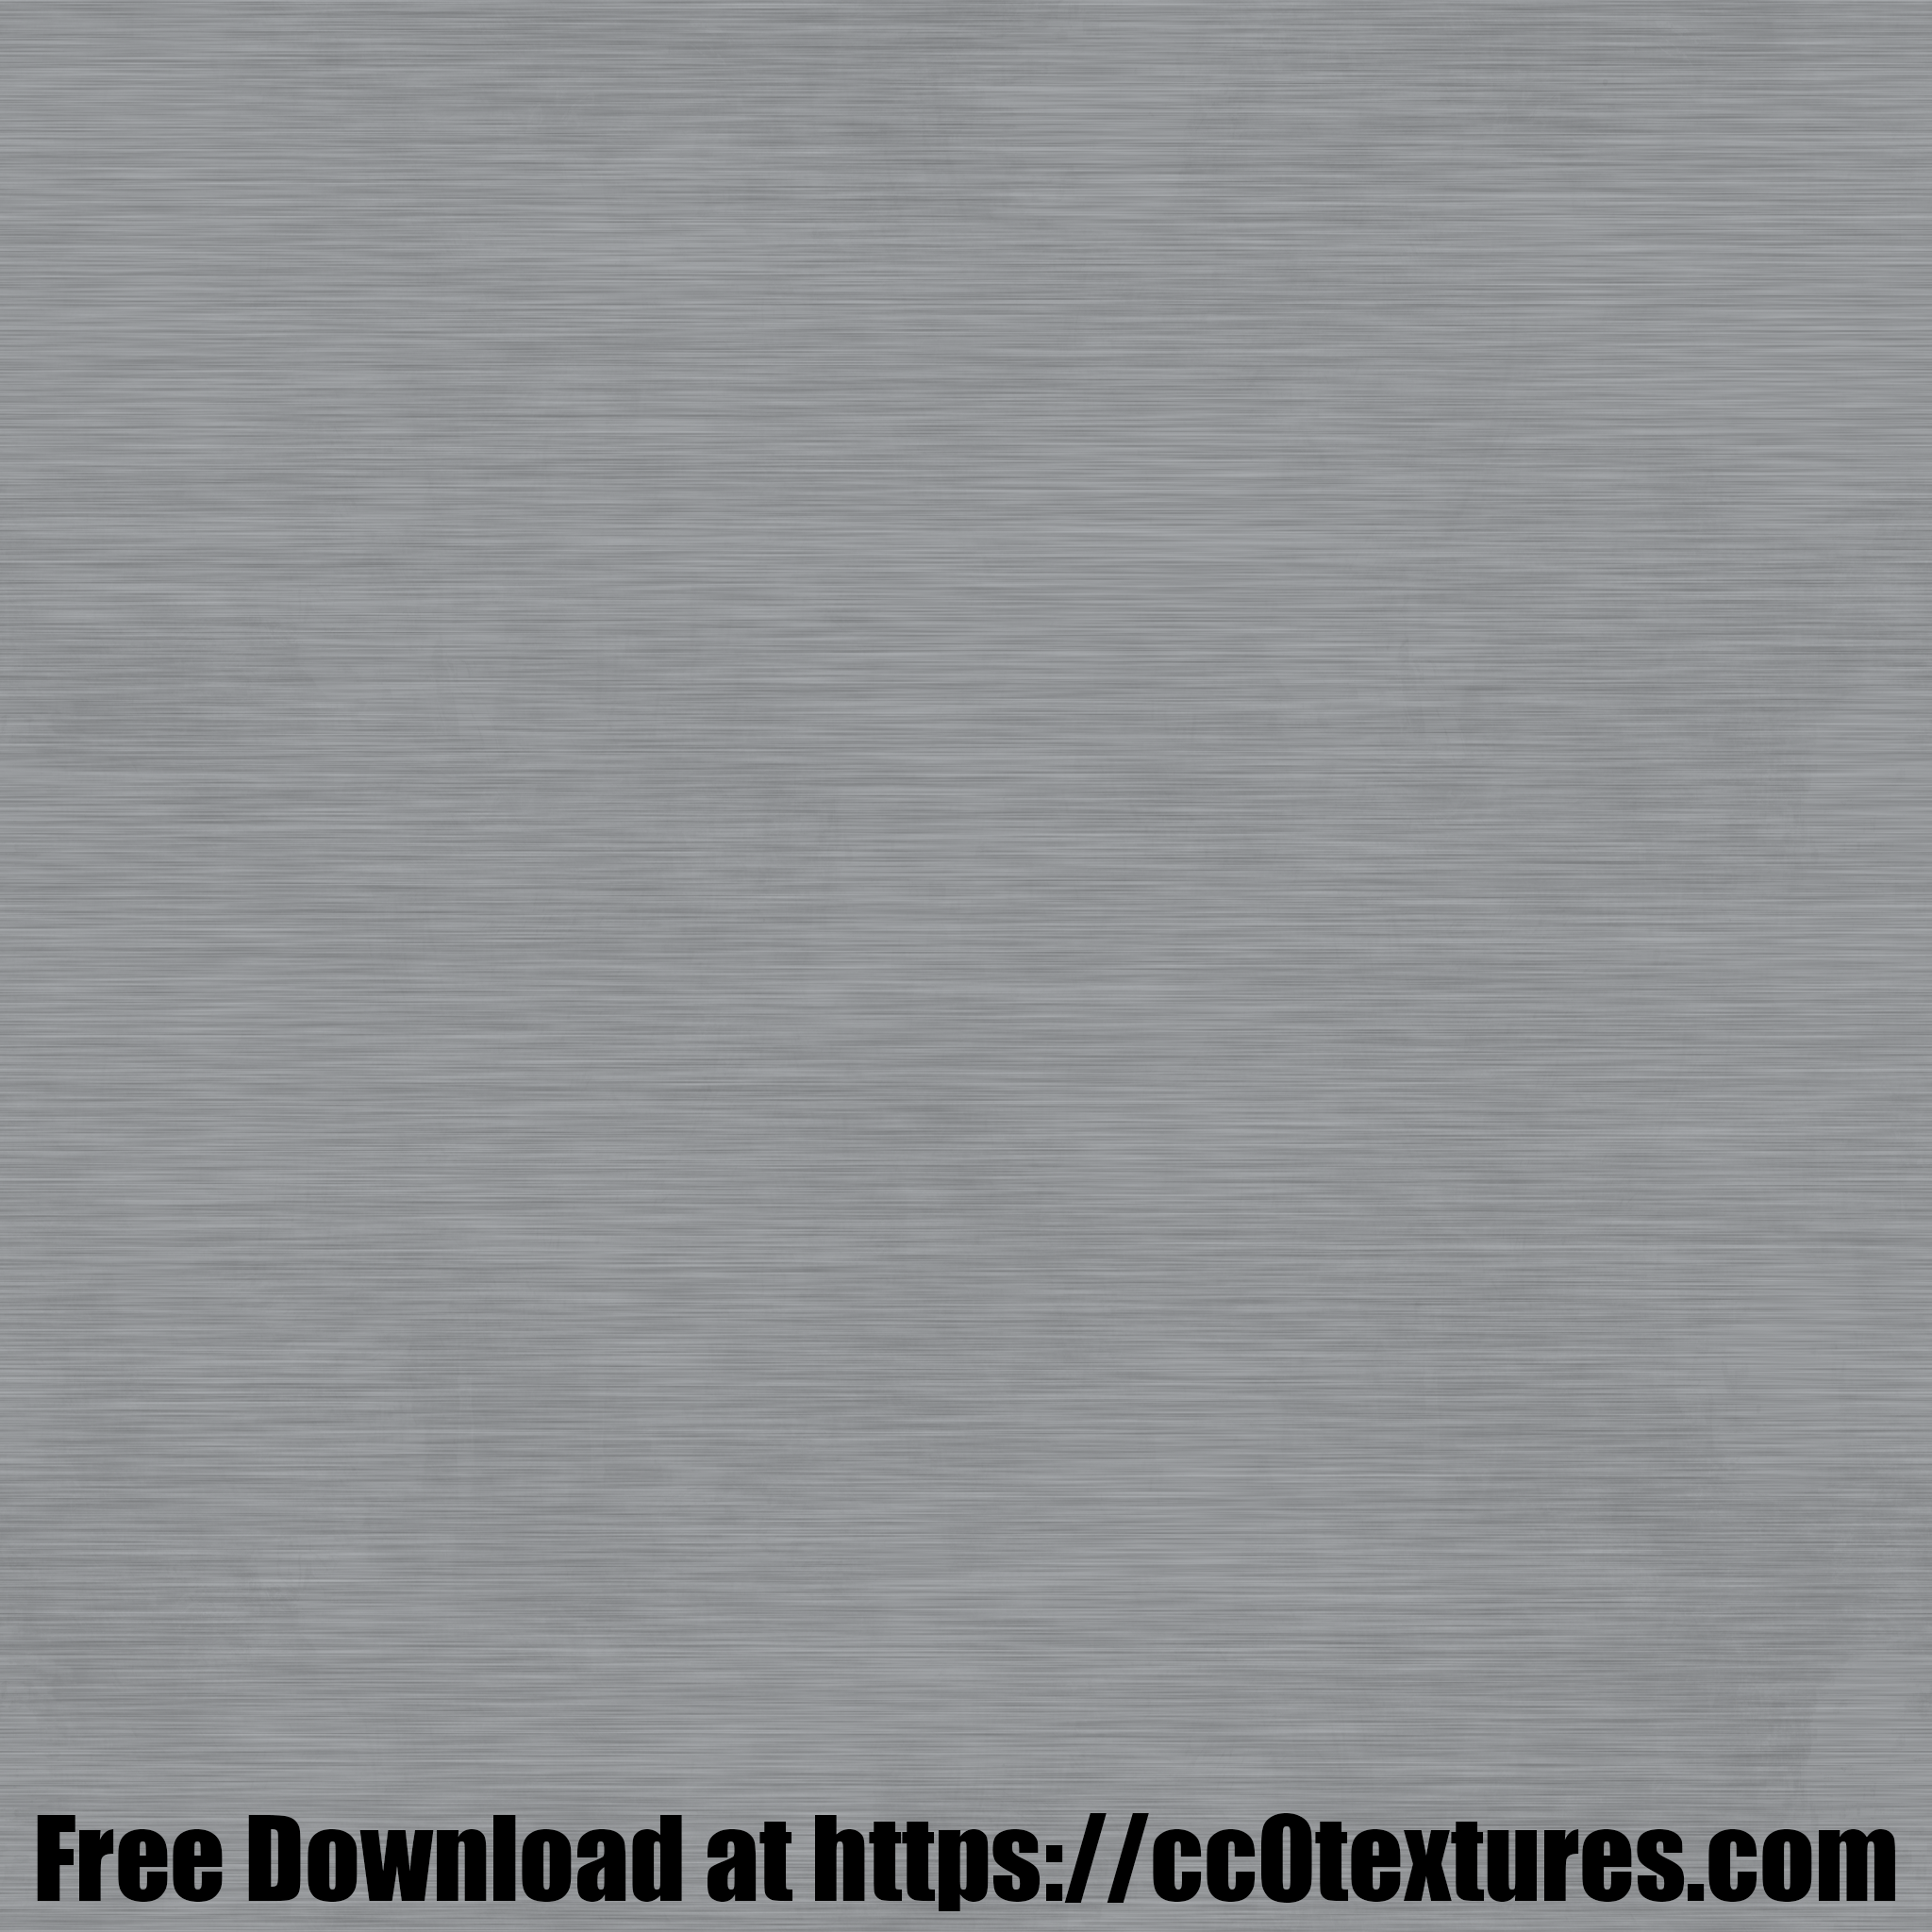
Base:
Material
Unity Render
Albedo
AO
Height
Metallic
Normal
![]()
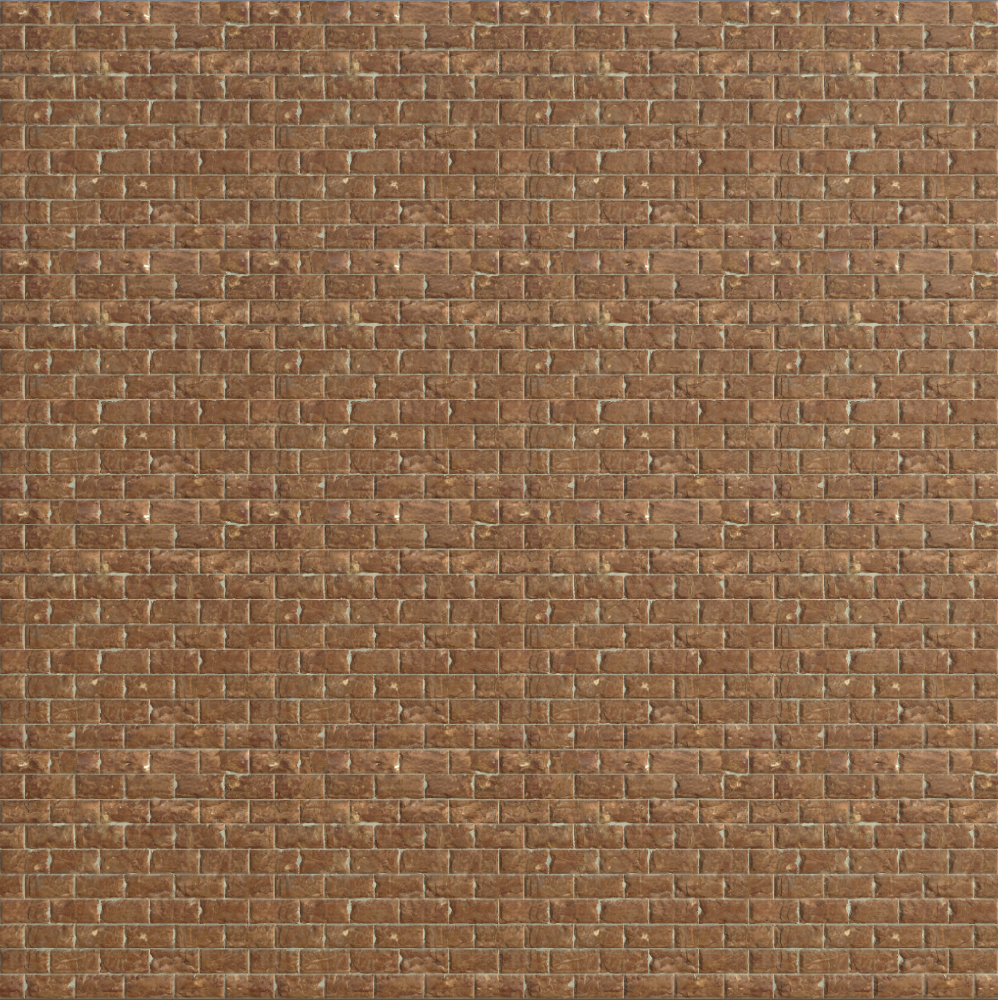


Output:
Material
Unity Render
Albedo
AO
Height
Metallic
Normal
![]()

Overlay
PBR materials fake geometry that isn’t actually in the model you are texturing. They do this by using reflections and shadows. The idea behind an overlay is to keep only the fake geometry, reflections, and shadows, from the base material and add it to the decal material.
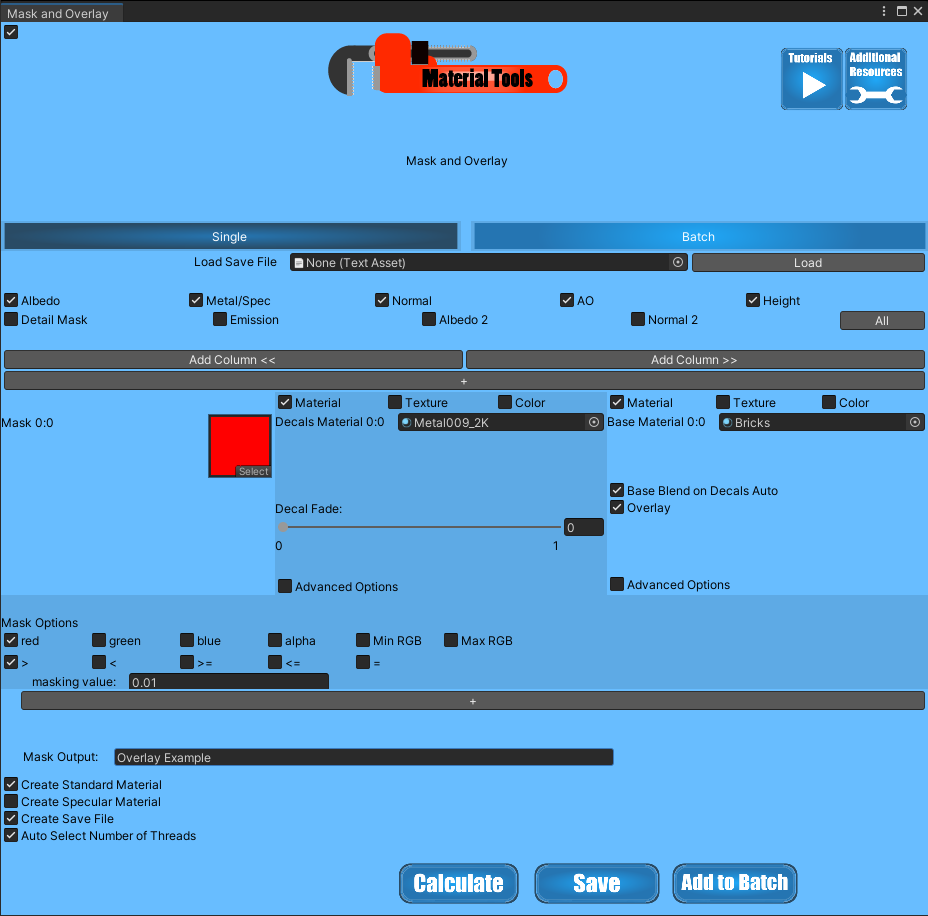
Overlay Example
Mask and Overlay
Mask
![]()
Decal:
Material
Unity Render
Albedo
AO
Height
Metallic
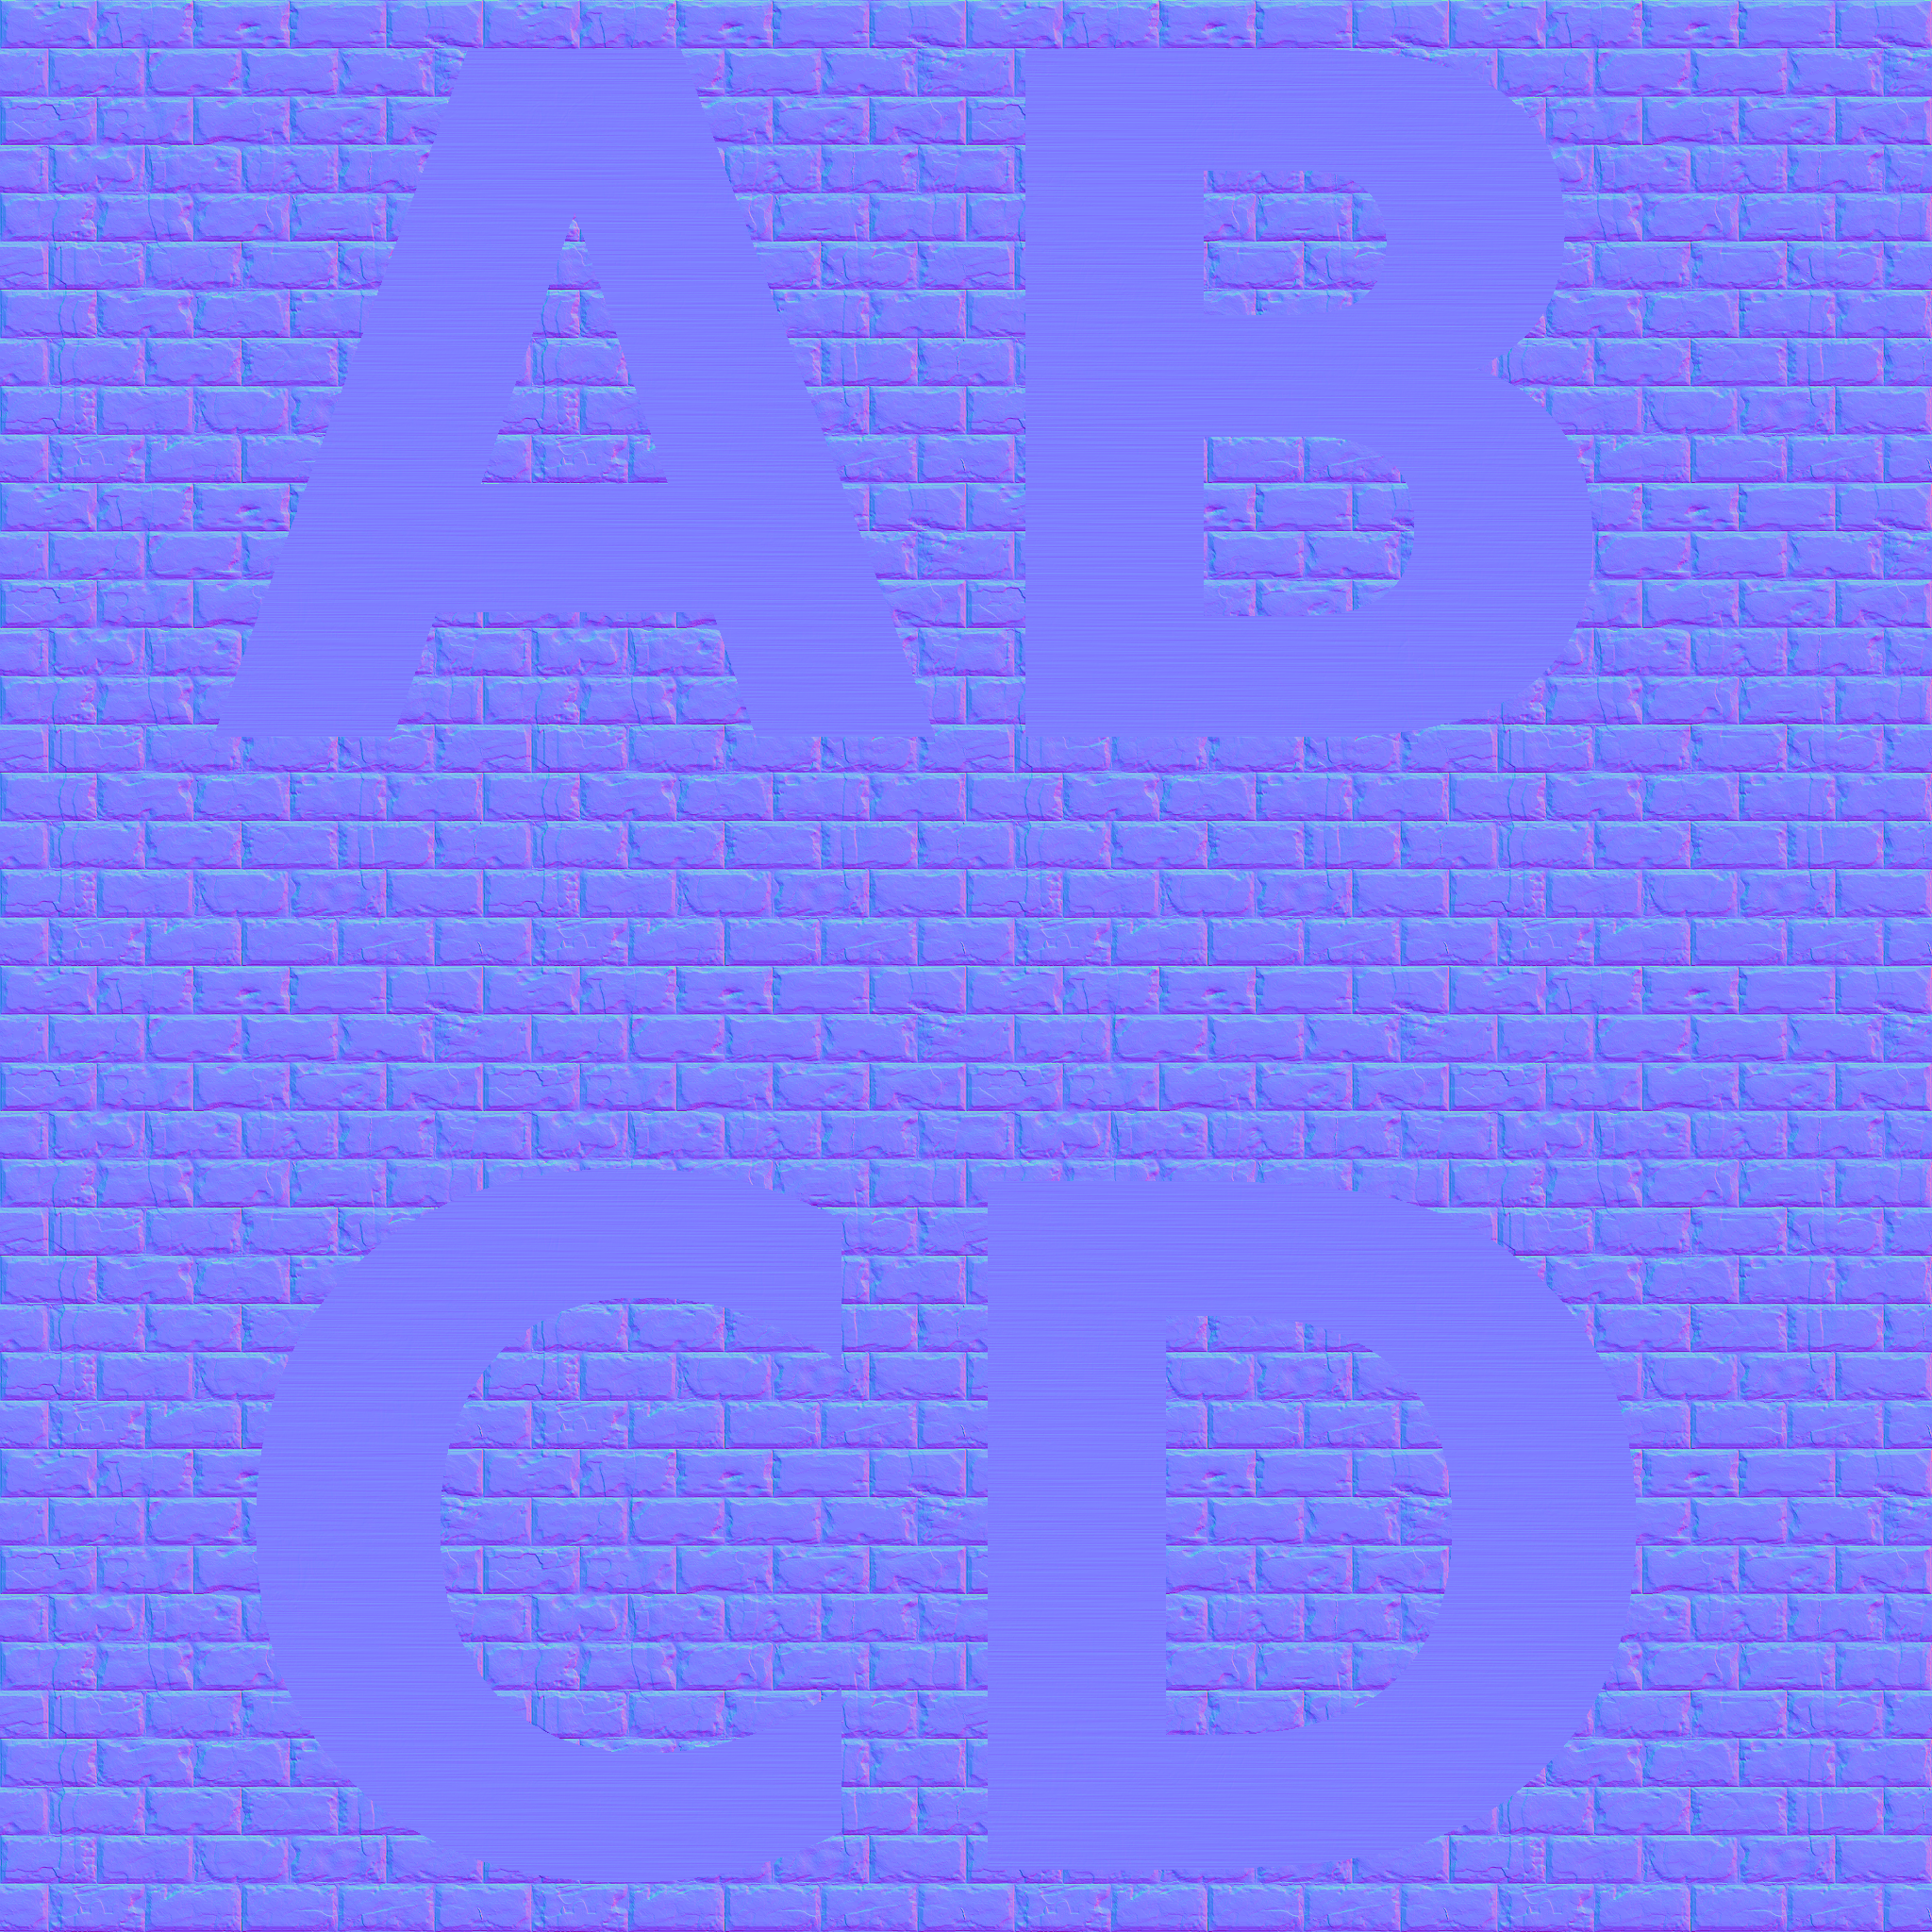
Normal
![]()
![]()
Base:
Material
Unity Render
Albedo
AO
Height
Metallic
Normal
![]()
Output:
Material
Unity Render
Albedo
AO
Height
Metallic
Normal
![]()
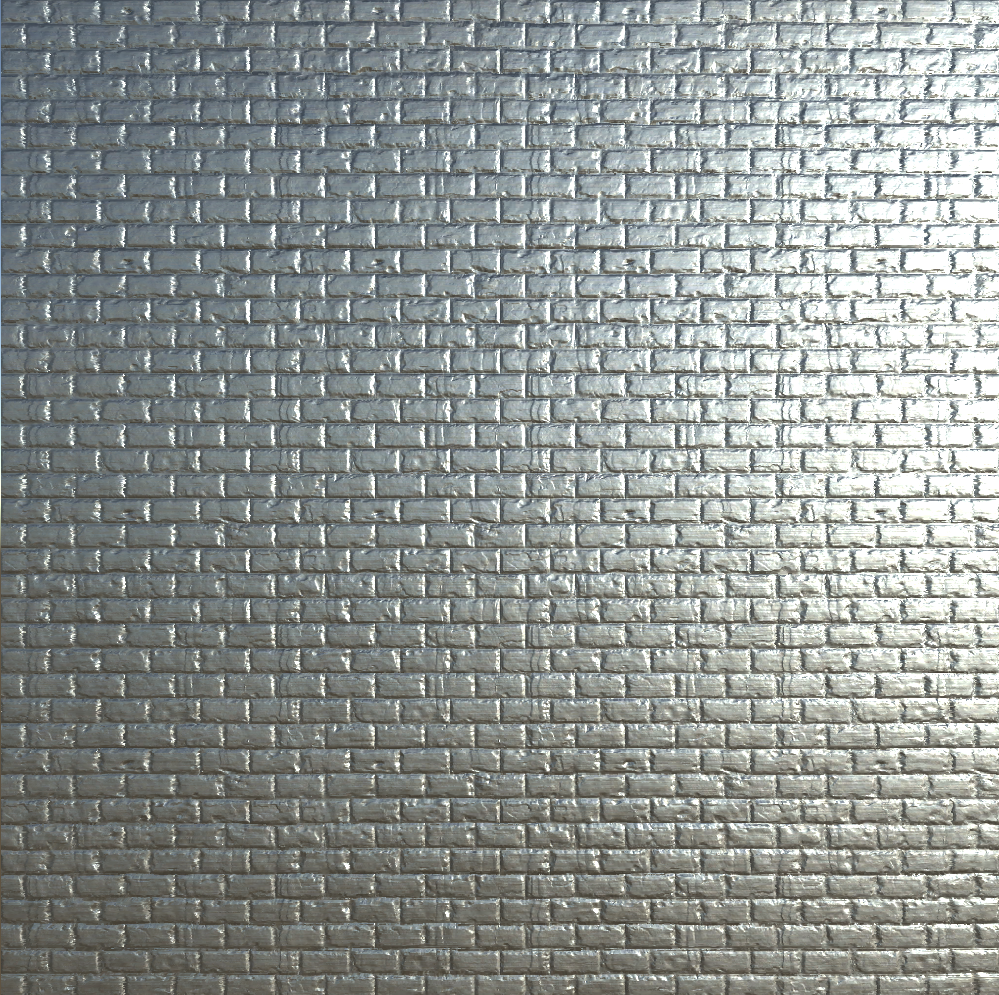


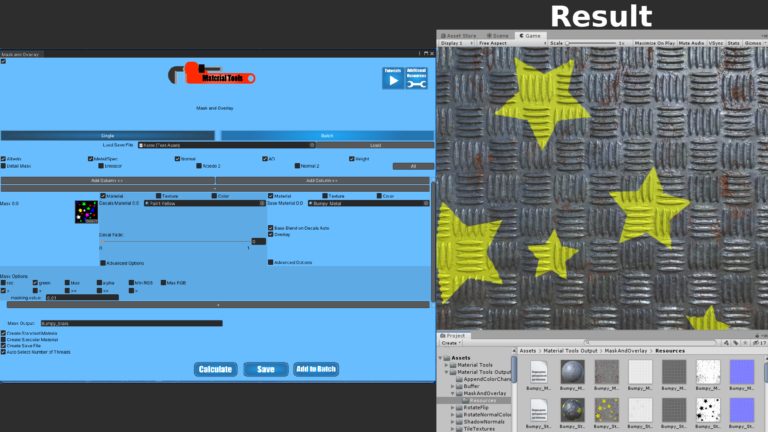
An overlay operation returns the decal albedo map and metallic map unchanged. All other output maps used different methods described later on this page, in the overlay section, to incorporate features from both the decal and base maps. In the overlay example, one can see in the Output Unity Render is metal with brick shapes. Still, if you look closely, you can see that it also keeps the horizontal striations from the metal input decal material.
Mixing
The other operation Mask and Overlay Tool can do is mixing, which is similar to overlay, but all textures are affected. Also, you can control how much you want to mix the base textures into the Decal textures.
Mixing is useful for things like making a material look dirty. The following example shows one layer of dirt on the metal material.
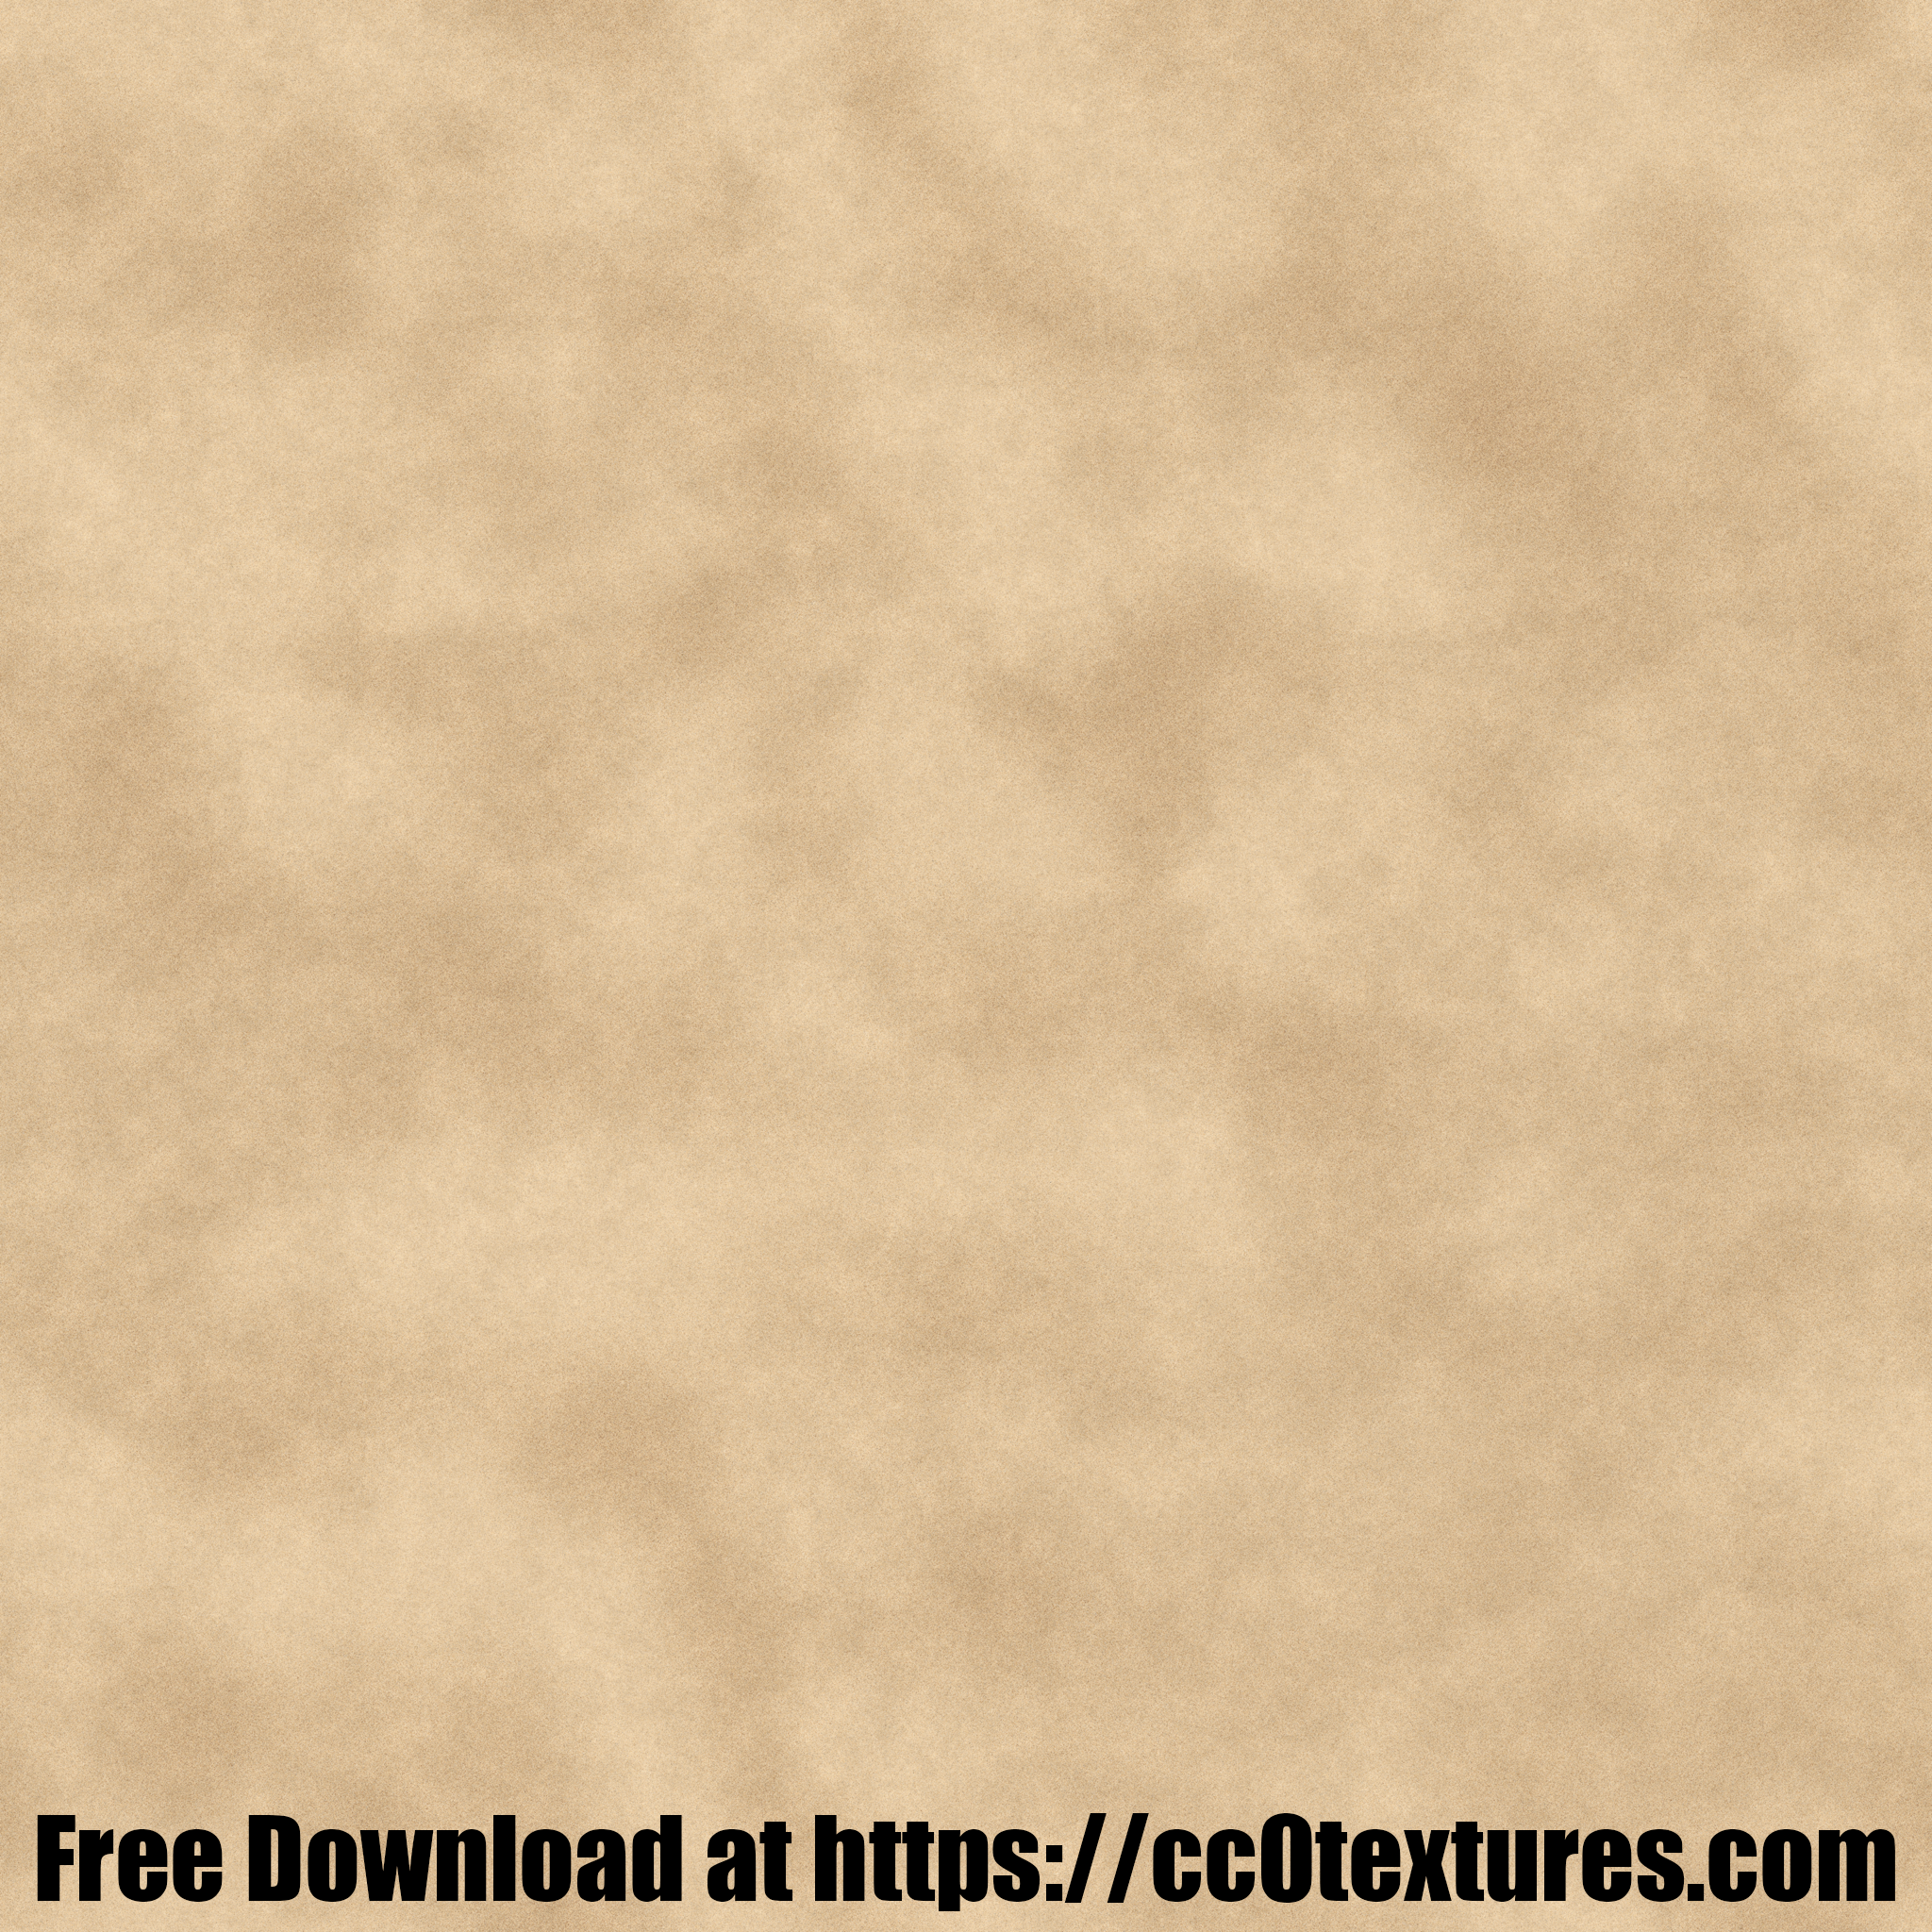
Mixing Example
Mask and Overlay
Mask

Decal:
Material
Unity Render
Albedo
AO
Height
Metallic
Normal
![]()


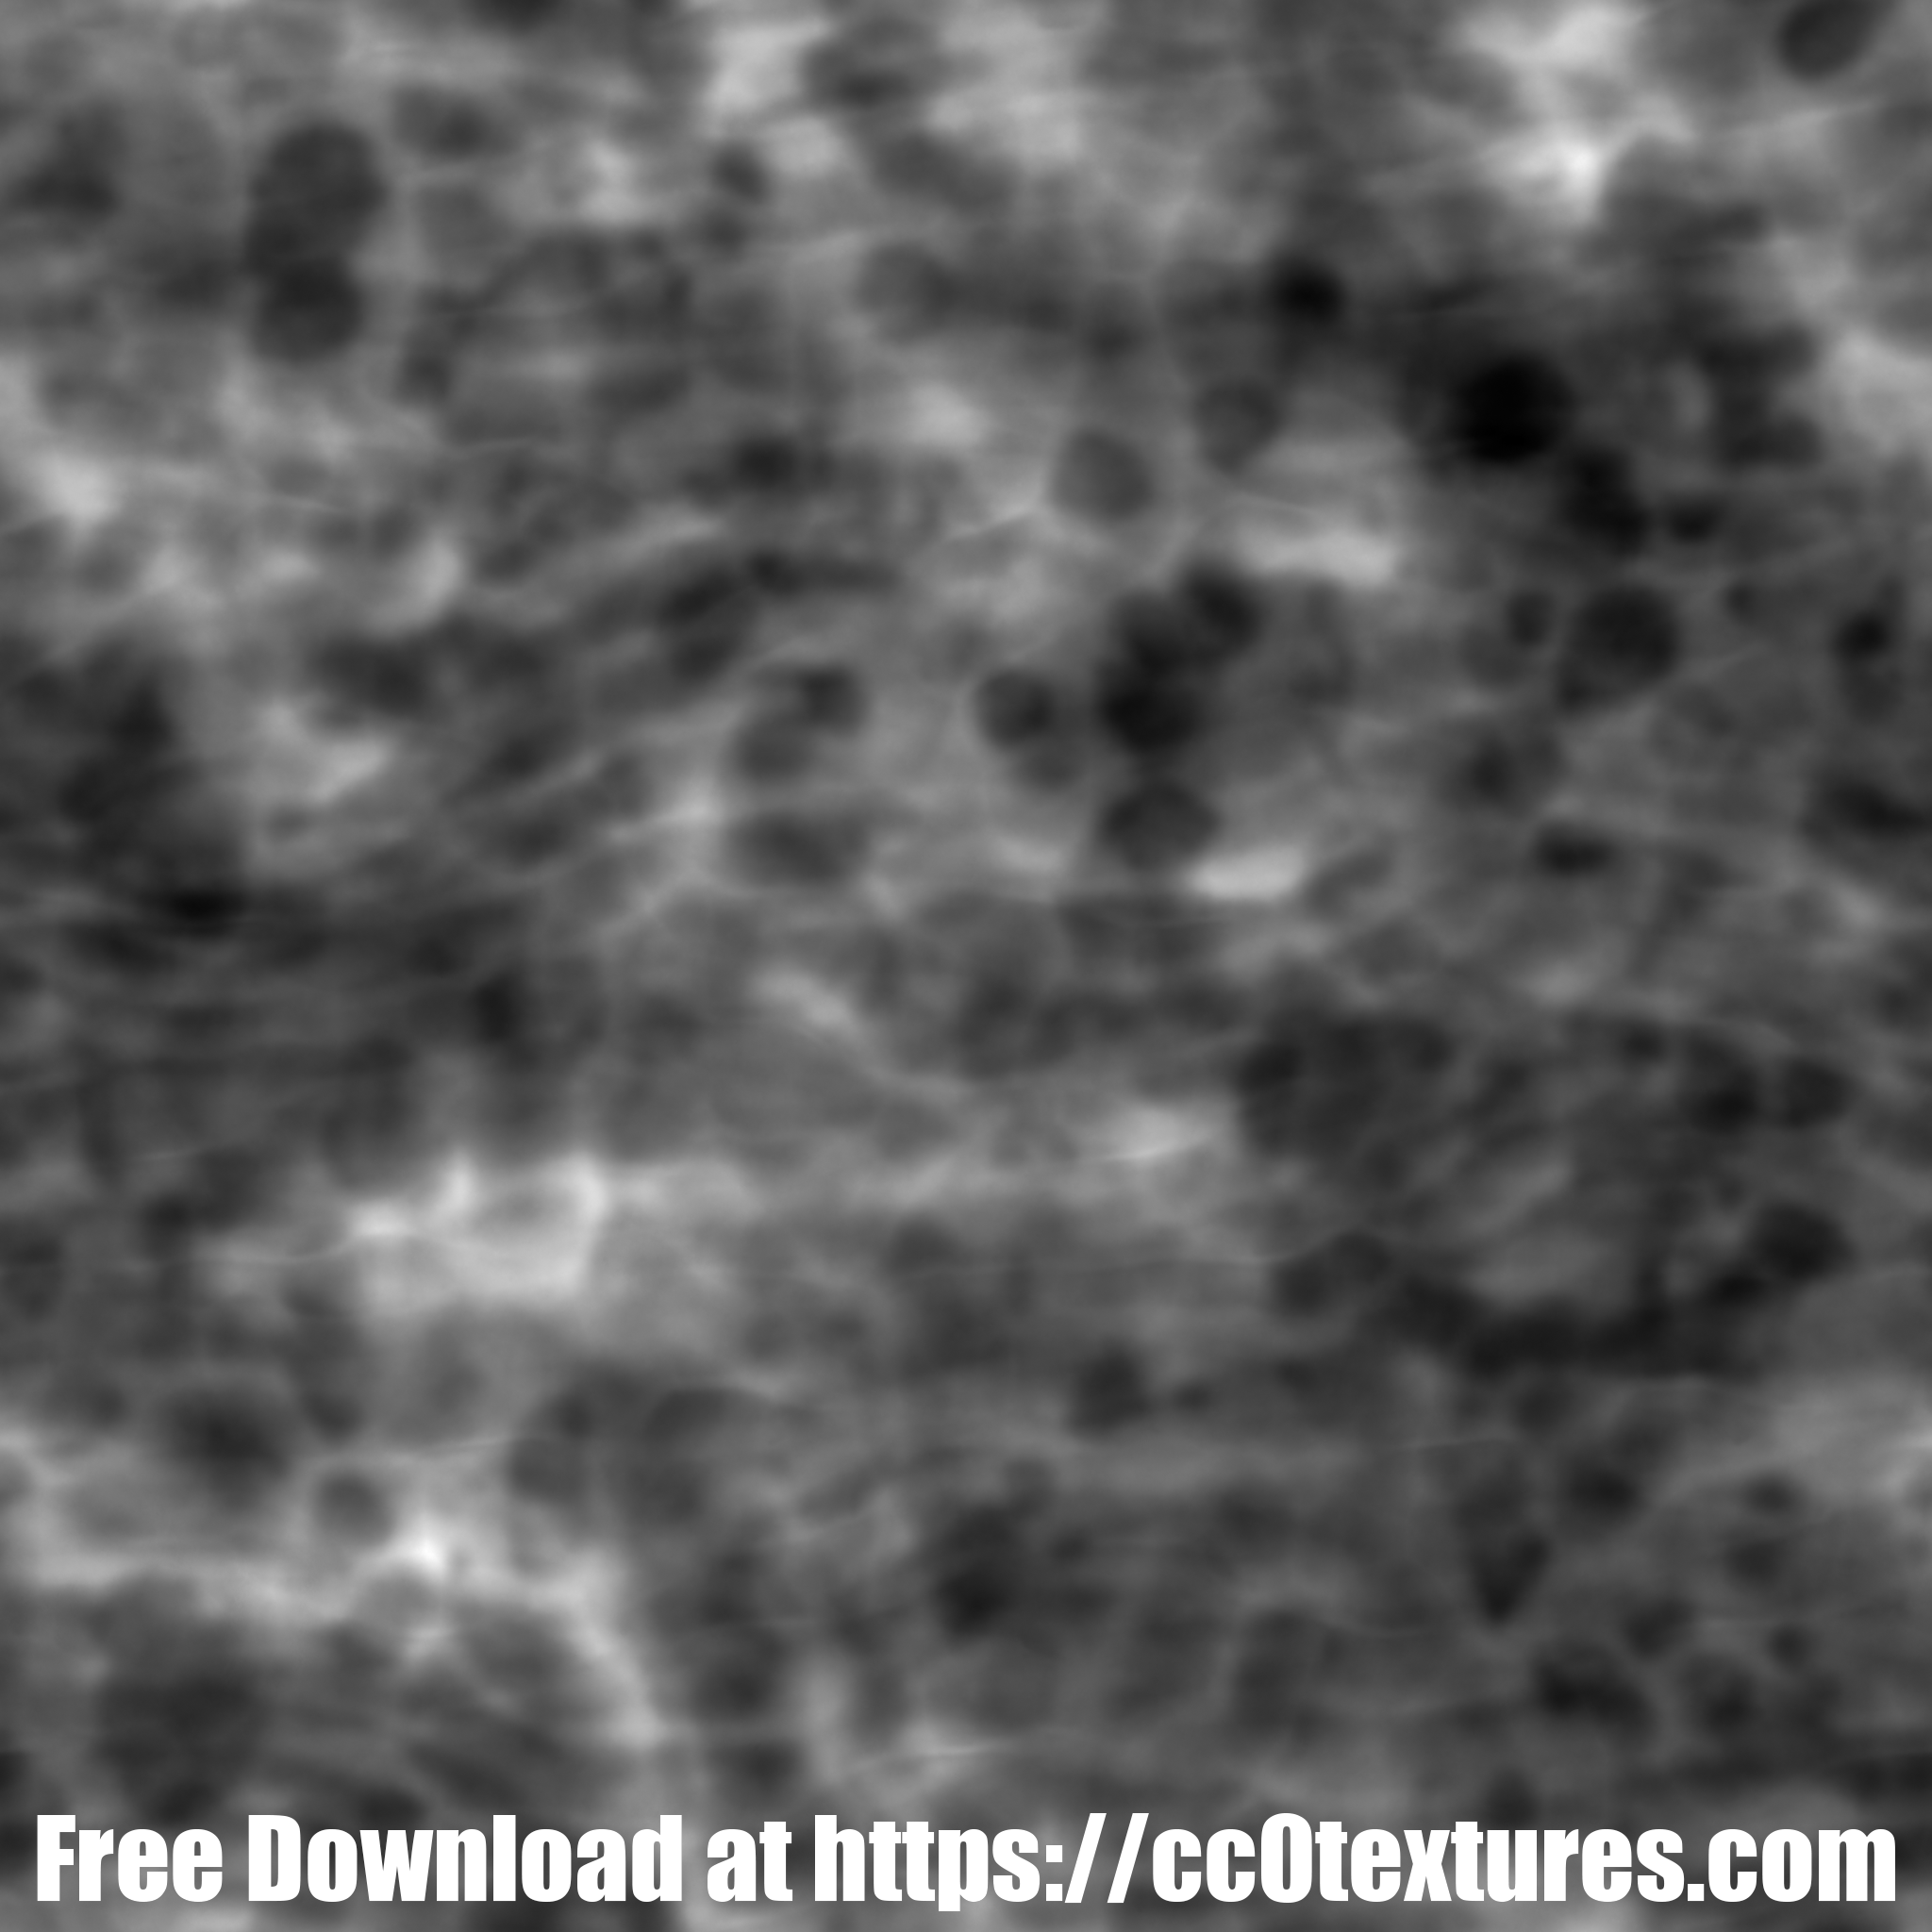

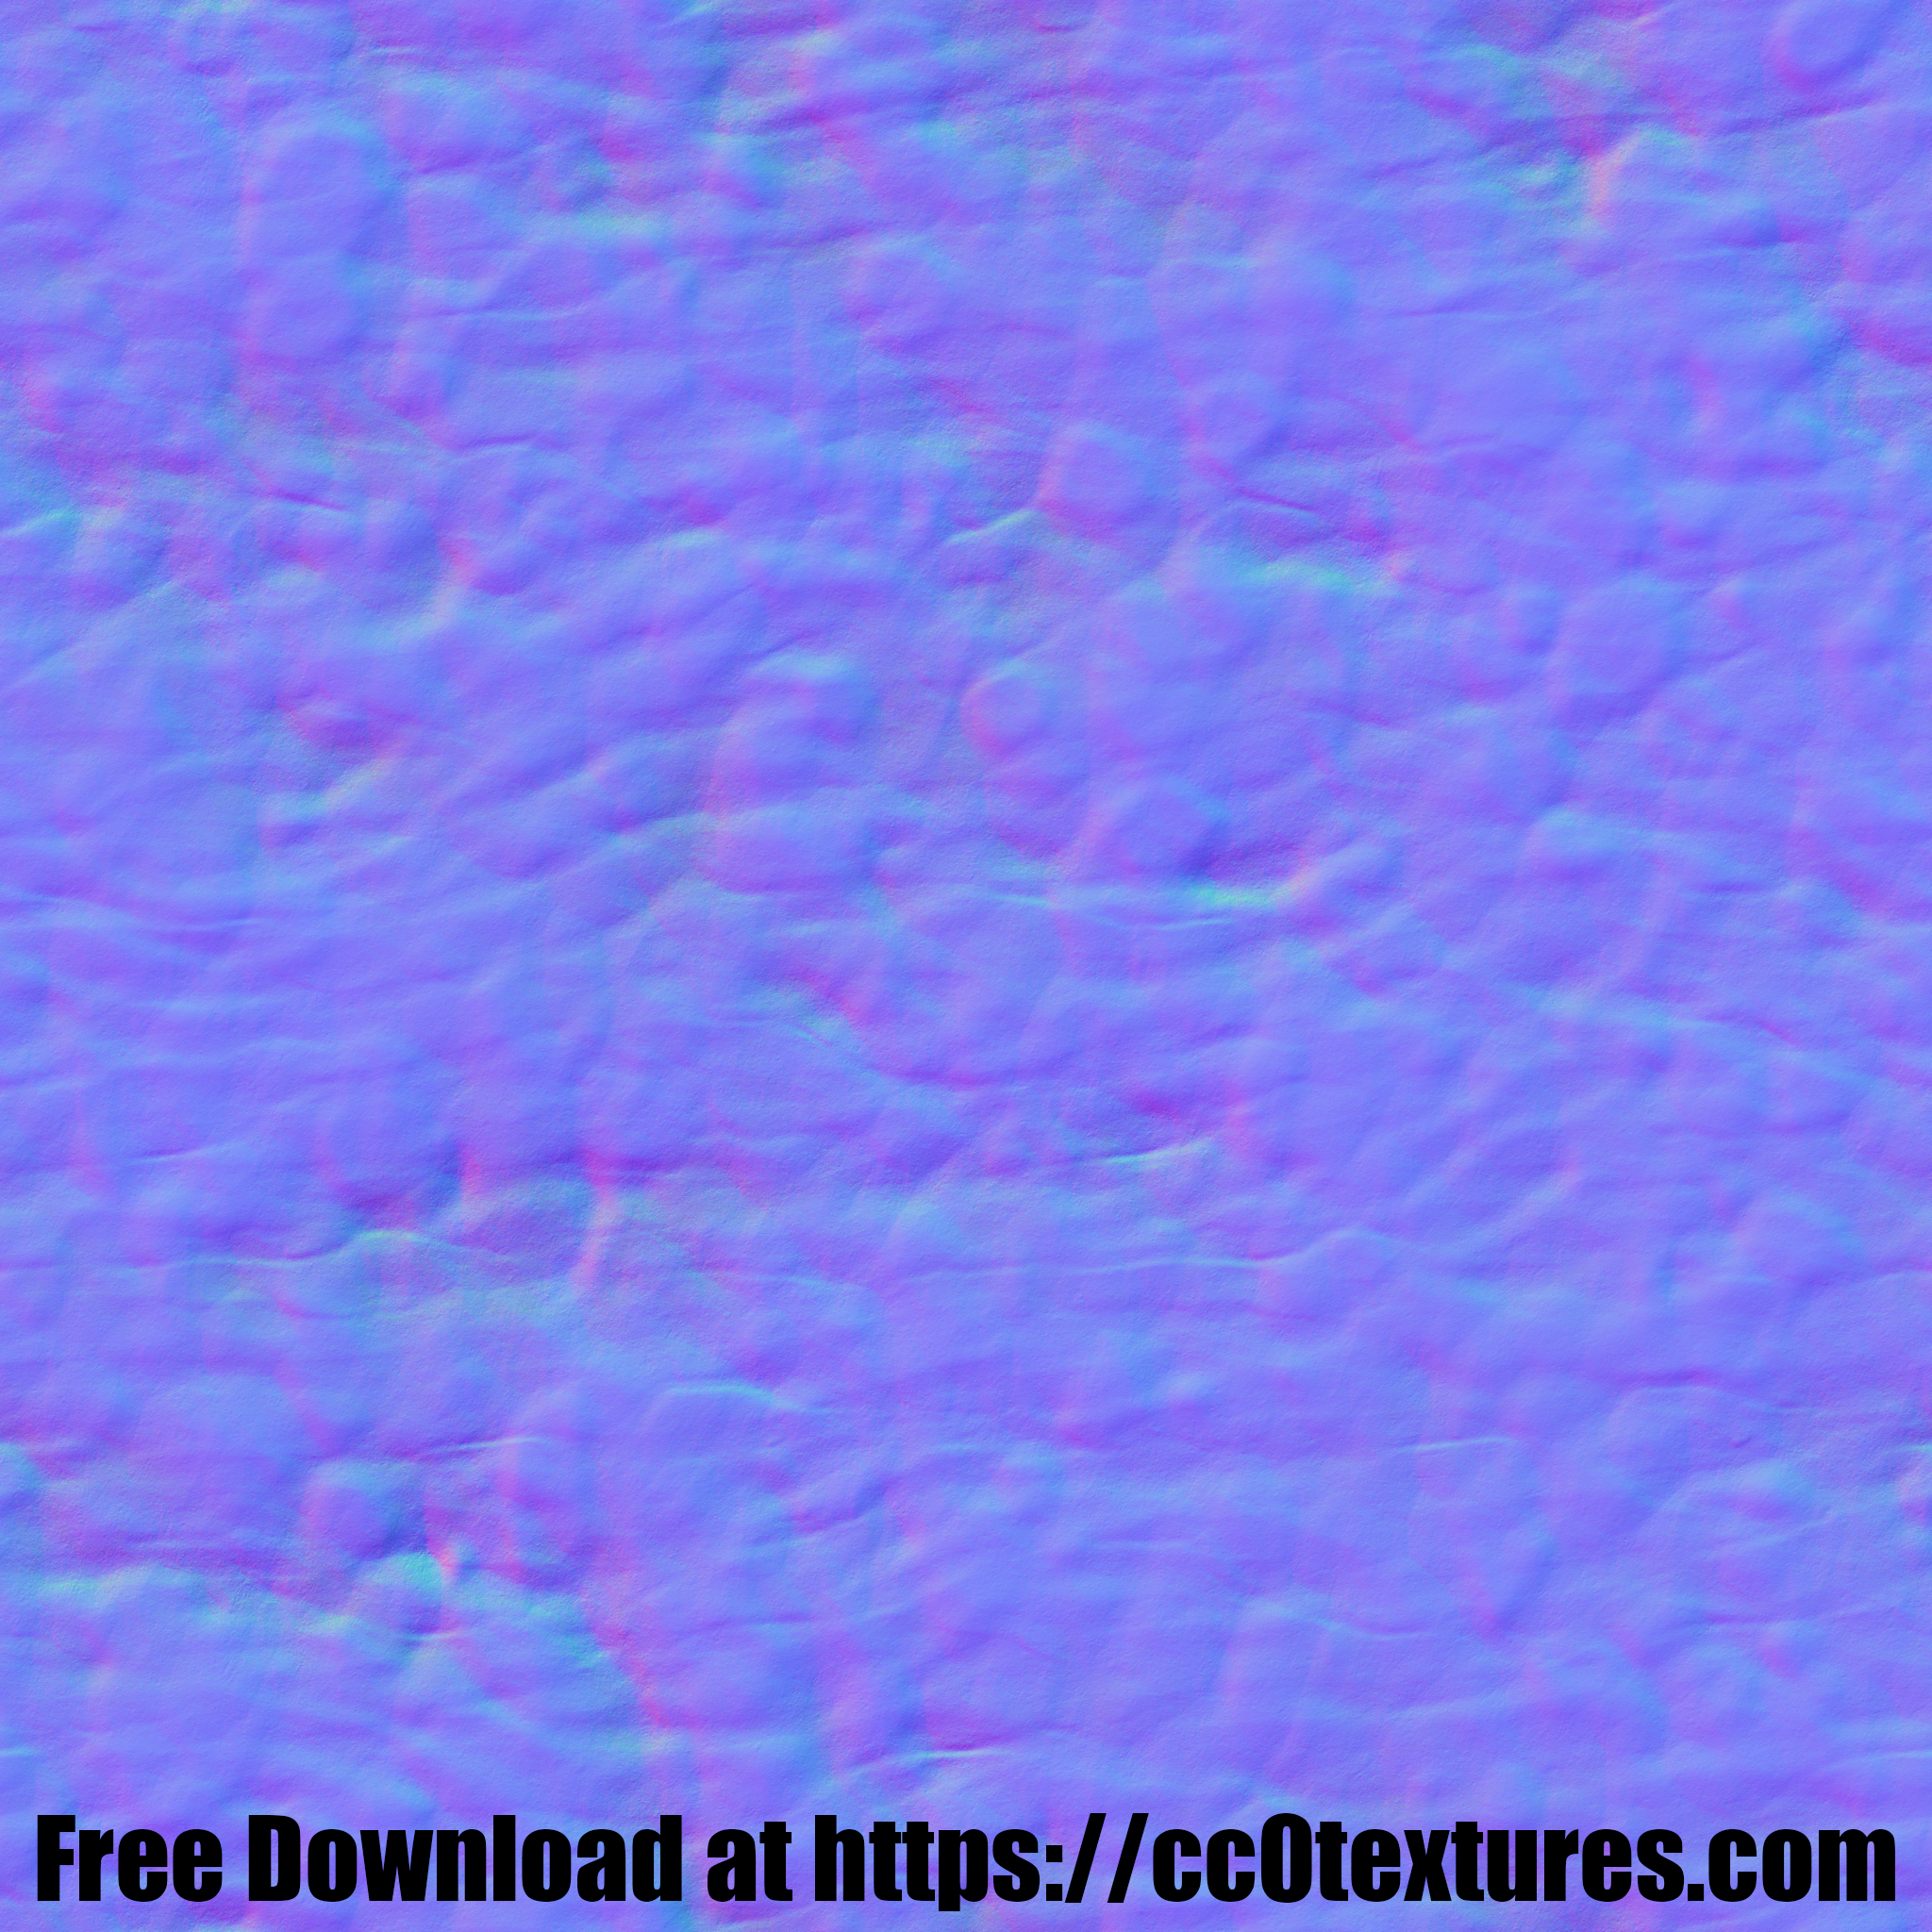
Base:
Material
Unity Render
Albedo
AO
Height
Metallic
Normal
![]()
![]()
Output:
Material
Unity Render
Albedo
AO
Height
Metallic
Normal
![]()


By repeated mixing while adjusting the Masking value parameter and the Decal Fade parameter. You can get a better result for a dirty surface. It creates an image with spots of concentrated grime that taper off into light dustings of grime.
Options
Single
This is the default way of using the Mask and Overlay window. It creates one material.
Batch
Instead of calculating and creating materials one at a time, you can create many save files without running them, add them all to The Batch and run them sequentially. I hated waiting for each run to end before I could queue up the next run. Now you can set up all your runs and do something else while they run.
Albedo, Metal, Normal, AO, Height, Detail Map, Emission, Albedo 2, Normal 2
At the top of the window, nine boxes represent the nine types of textures making up our PBR Materials. Only the texture types that are checked are created as output.
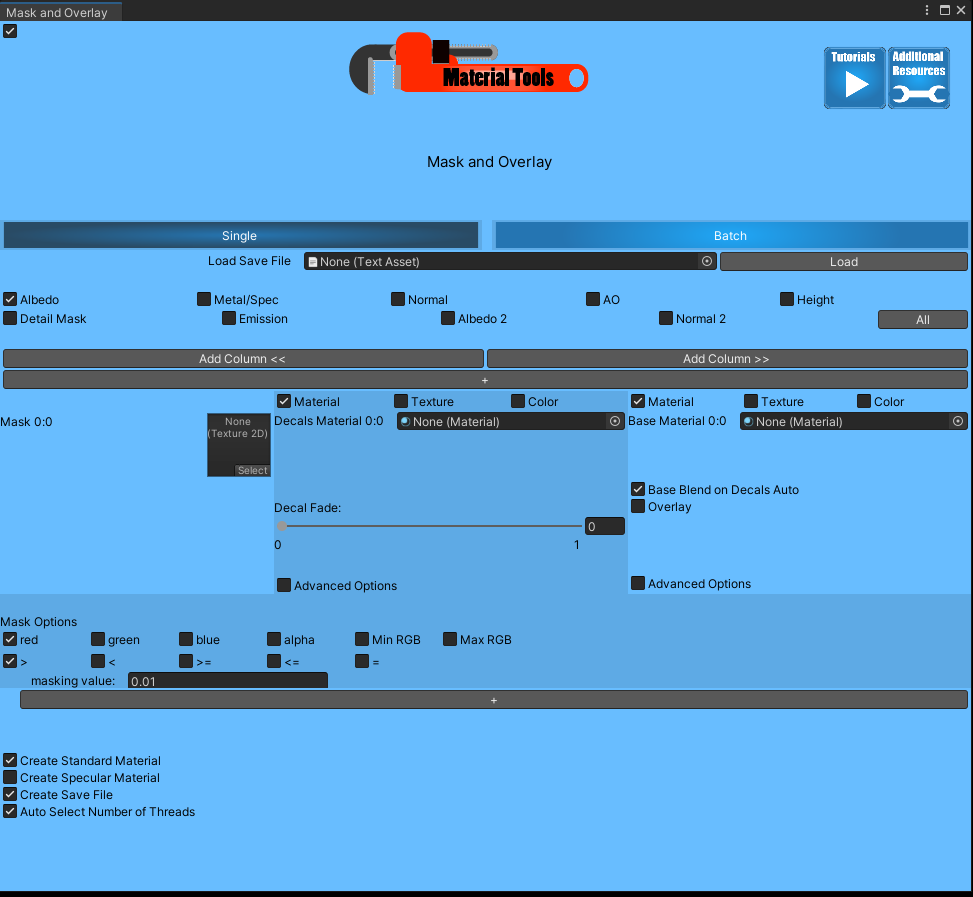
Mask
The Mask is the texture whose pixel values are compared to the masking value. Based on the other settings you choose, the mask is converted into an area of true or false values for each pixel of the mask. The output will receive a Color from either the decal if true or the base if false. This operation is repeated for each pixel in the output image.
The size of all your output images matches your mask’s size in Row 0 Column 0. All textures and materials are either tiled or cropped to fit this size for calculation purposes. The actual input images are not altered.
Decal
This is the true condition for the masking operation. If a pixel from the mask meets the masking operation’s requirements, the output receives the corresponding pixel from the decal texture.
If the decal input is a material, the calculation repeats for each of the nine textures the material uses.
If the decal is a color, a texture is created with all pixels set to that color. This solid color texture is used as the Decal Texture.
Base
This is the false condition for the masking operation. If a pixel from the mask fails the masking operation’s requirements, the output receives the corresponding pixel from the base texture.
If the base input i is a material, the calculation repeats for each of the nine textures the material uses.
If the base is a color, a texture is created with all pixels set to that color. This solid color texture is used as the Base Texture.
Rows and Columns
For a complex series of masking operations, you can add rows and columns to Mask and Overlay. These allow the output from one masking operation to be used as input for another.
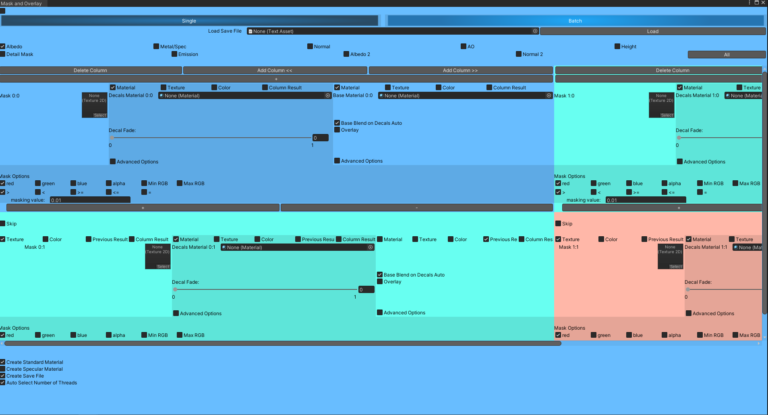
Calculations start at the top of the furthest right column and proceed down the column to the bottom. Calculations then move left one column and start at the top again, proceeding to this column’s bottom. This pattern continues until all masking operations are completed.
The input parameters Mask, Decal, and Base can use Previous Result and Column Result options to utilize results of other rows and columns.
Add Column <<
Adds a Column of operations to the left.
Add Column >>
Adds a Column of operations to the right.
+
Adds a cell in the row below the button.
Previous Result
This option utilizes the result of the masking operation one row above this location, within the same column.
Column Result
This option utilizes the result of the bottom row masking operation of whichever column is specified along with this parameter input.
Note that the numbering scheme for Columns starts with 0 on the far left and increases moving to the right.
Mask Channels
A pixel from the Mask Texture is a color, essentially four numbers (an array) with values ranging from 0 to 1. Each number represents the color channels red, green, blue, and alpha (opacity). To compare this pixel to the masking value with an inequality, you have to select which of these four numbers you want to use. Your choices are red, green, blue, alpha, MinRGB, and MaxRGB.
inRGB is the lowest value of the red, green, and blue channels. MaxRGB is the highest value of the red, green, and blue channels.
Masking Value
This is the value compared with each pixel of the Mask Texture. Usually, you should pick a value from 0 to 1 since that is the range of possible mask values.
You can choose a value outside this range. Your result always to be true or always be false regardless of the Mask Texture. I often use a mask value of -1 and a Mask operation of > when I am using the overlay option because I want the decal AO, height, and normal data overlaid on the base ao, height, and normal data for all pixels.
Masking Operation
This parameter lets you select the mathematical inequality used to compare each pixel from the Mask to the Masking Value. Your options are <, >, <=, >=, and =.
Output
This is used in all your output files filenames with subscripts appended to the end of the output text. The subscripts are as follows.
- The albedo texture’s subscript is “-albedo.png”.
- The ambient occlusion texture’s subscript is “-ao.png”.
- The height texture’s subscript is “-height.png”.
- The metal texture’s subscript is “-metalic.png”.
- The normal texture’s subscript is “-normal.png”.
- The Emission texture’s subscript is “-emission.png”.
- The detail mask texture’s subscript is “-detailMask.png”.
- The detail albedo texture’s subscript is “- detailAlbedo.png”.
- The detail normal texture’s subscript is “- detailNormal.png”.
- The material’s subscript is “.mat”.
- The save file’s subscript is “.txt”.
Output files can be found in “Assets/MaterialToolsOutput/MaskAndOverlay/Resources”.
Parallel Threads
Mask and Overlay only allows nine parallel child threads to run at a time. These are the nine output textures associated with a single material. The entire material must be finished before threads are started from the next material. This limitation may seem like a slower way of working than other Material Tools programs. Still, Mask and Overlay can use so many inputs that loading multiple sets of inputs quickly causes memory overloading. See the Warning Memory Crashes for further information.
Create Material
This parameter is located near the bottom of the window. If this box is checked, a Material is created and Textures created are assigned to the material.
Load Save File
This parameter allows you to import a save file previously created in the Mask and Overlay Window.
Mistakes happen, and you don’t always notice them right away. Maybe you change your mind on what you want, or you liked what you did with one run, and you want to use it as a template for texturing another object. It saves you a ton of time to import the input settings from a previous run.
Note: If you move an asset to a new location in your project, that asset may not be found when you load your save file. After you load your save file, make sure none of the Masks, Decal and Base fields are empty. You get weird-looking results or an error if you have an empty field for one of your Masks, Decals, or Bases.
Create Save
This parameter is located near the bottom of the window. If this box is checked, upon calculation, a save file is created. Save Files are a binary file with the subscript .txt and have the same name as the created material. This file stores all the parameter values currently contained in this window.
Calculate
Runs the Calculation
Save
This button creates a save file without running the Calculation. Calculating can take a while, so if you don’t have time for it but want to save your work, use this button.
Add to Batch
This button Saves your input and adds it to the batch window.
Decal Specific Options
Decal Fade
This option decreases the intensity of the red, green, blue, and alpha channels of your input channels. This decrease is done in different ways appropriate for each type of PBR Map. Fade only occurs on only the decal map.
This parameter is used in conjunction with Base Blend on Decals to blend your base texture into the decal texture. This operation only happens in pixels where the masking operation is true. The base texture is blended into pixels that would otherwise show values from the decal texture as output. The decal texture is never blended into pixels that have a masking result of false.
The height maps are transformed, added, and then transformed back.
Ambient occlusion maps are multiplied. Normal map red and green channels are added with constraints, and then the blue channel is calculated from red and green.
Albedo & Metalic
Decal Pixel * (1 – Decal Fade) + Base Pixel * Base Blend on Decals = New Decal Texture
Height
((1 – Decal Fade) * (Decal Pixel-0.5)+ Base Blend on Decals * (Base Pixel-0.5))+0.5
Normal
Decal Pixel Red Channel * (1 – Decal Fade) + Base Pixel Red Channel* Base Blend on Decals = New Decal Texture Red Channel
Decal Pixel Green Channel* (1 – Decal Fade) + Base Pixel Green Channel * Base Blend on Decals = New Decal Texture Green Channel
New Decal Texture Blue Channel is calculated with Correct Normal Colors.
Base Specific Options
Base Blend on Decals Auto
This option auto-selects a value for Base Blend on Decals equal to Decal Fade.
This parameter sets the value of base the Base Blend on Decals equal to Decal Fade value. This condition essentially gives you a weighted average of your decal texture and your base texture with the weight controlled by Decal Fade. When this parameter is not selected, the parameter Base Blend on Decals becomes visible for manual assignment.
Overlay
The Overlay parameter overrides Base Blend on Decals when running AO, Normal, and Height calculations using a value of 1 instead of the Base Blend on Decals parameter value.
The change’s effect is that only “faked” geometry features from the base texture are included on the Decal Texture. By “faked” geometry features, I refer to reflections and shadows cause by the ambient occlusion, normal and height maps that simulate geometry that is not actually in the 3D mash that the material is texturing. Albedo, metallic, and smoothness properties are unaffected by an overlay.
It is recommended that you set Decal Fade to 0 and Base Blend on Decals Auto to true in most cases. This configuration of parameter settings results in a combination of “faked” geometry information without any albedo, metallic, or smoothness blending. These are the conditions shown earlier on this page in the Overlay Example.
Base Blend on Decals
This option creates a copy of your base map with decreases the intensity of the red, green, blue, and alpha channels that is blended into your decal map. This operation is done in different ways appropriate for each type of PBR Map.
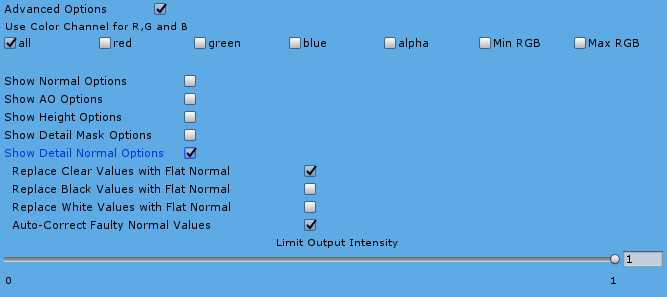
Advanced Options
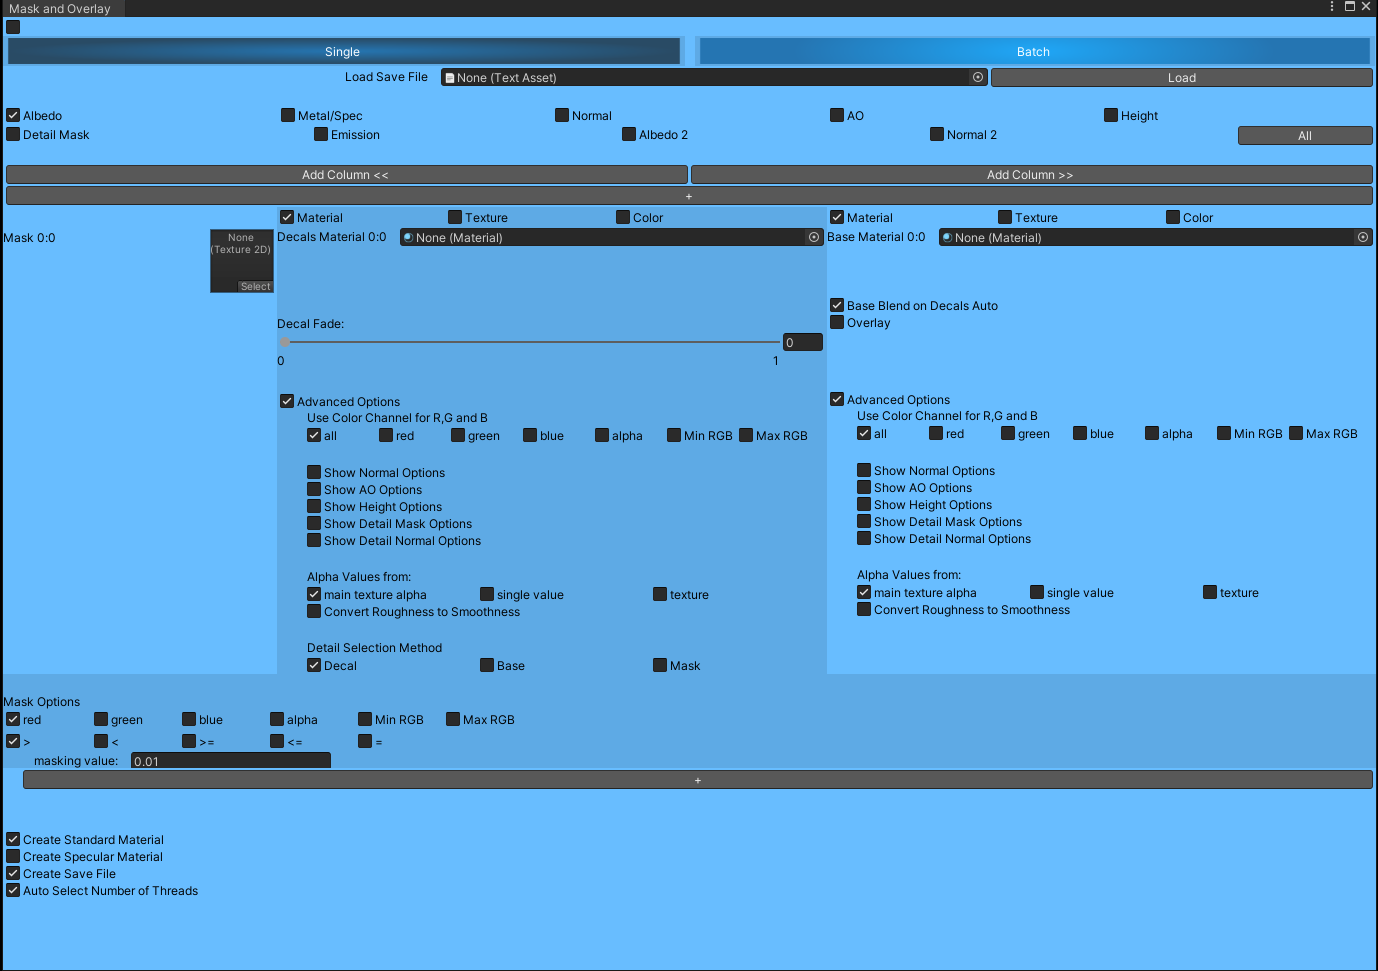
Use Color Channel for R G and B
This option selects a single color channel to use in place of the other color channels. It creates a grey image. Normal, Normal 2, and Albedo 2 do not use this option. AO and Height by default override this setting with similar controls in their specific advanced setting sections.
Normal Options
These options only affect the normal map.
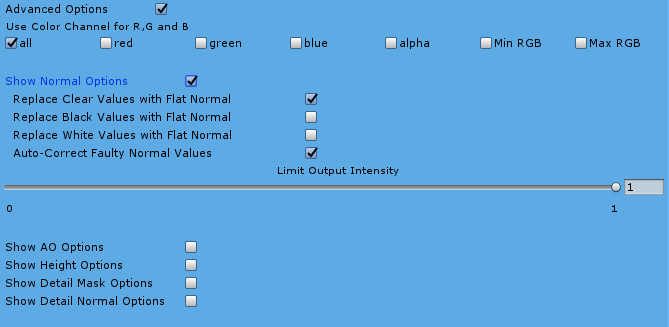
Auto-Correct Faulty Normal Values
See Correct Normal Colors in Key Concepts
Replace Clear Values with Flat Normal
This method replaces all pixels that have an alpha value = 0 with flat normal color [0.5, 0.5, 1, 1].
Replace Black Values with Flat Normal
This method replaces all pixels that have red channel value = 0, green channel value = 0 and blue channel value = 0 with flat normal color [0.5, 0.5, 1, 1].
Replace white Values with Flat Normal
This method replaces all pixels that have red channel value = 1, green channel value = 1 and blue channel value = 1 with flat normal color [0.5, 0.5, 1, 1].
Limit Red and Green Color Output
This parameter sets a cap on how far red and green values can be from 0.5. Putting this cap flattens out the extremes in apparent geometry.
This parameter can be relevant when you are overlaying or mixing. Limit Output Intensity can fix impossible or exaggerated normal values when mixing with a low Decal Fade and a high Base Blend on Decals. In such cases, Limit Output intensity by default smooths out values higher than 1, and Auto-Correct Normals scale down evenly red and green channel values until they fit the ideal normal function. See Normal Maps in key concepts.
AO Options
These options only affect the Ambient Occlusion Map.
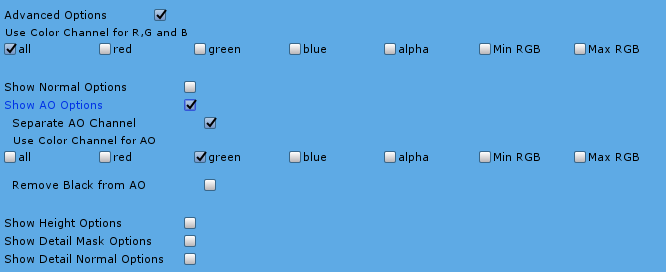
Separate AO Channel
This Parameter allows you to use a different color channel of the input texture for creating your ambient occlusion map than the color channel(s) all the other PBR textures are using. You would want to do this for either ambient occlusion or height maps because they only use one color channel. Some artists like to store ambient occlusion and height as different color channels in the same texture. By default, ambient occlusion is set to the green channel.
Use Color Channel for AO
If Separate AO Channel is selected, this parameter appears. This parameter allows you to choose which color channel you want to be used from the input ambient occlusion map to make the output ambient occlusion map.
Remove Black from AO
When this parameter is selected all pixels with red = 0, green = 0 and blue = 0 are set to white [1,1,1,1]. Sometimes in creating an ambient occlusion map, you end up with surrounding areas set to black(fully shadowed) when they should be set to white (fully light). Black is a fair value for ambient occlusion maps, but pure black only occurs in extreme cases like crevices. Still, if your ambient occlusion map has very dark areas, avoid using this parameter.
Height Options
These options only affect the heightmap.
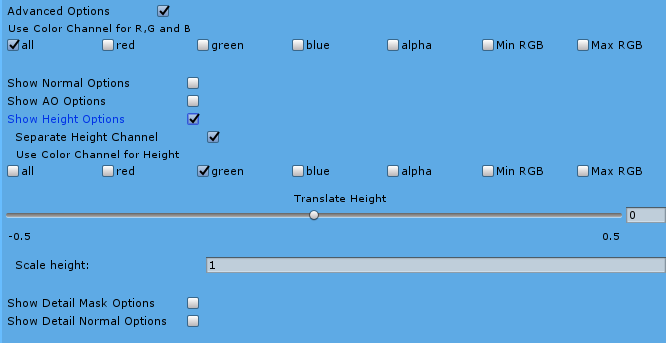
Separate Height Channel
This Parameter allows you to use a different color channel of the input texture for creating your height map than the color channel(s) all the other PBR textures are using. You would want to do this for either ambient occlusion or height maps because they only use one color channel. Some artists like to store ambient occlusion and height as different color channels in the same texture. By default, the height is set to the green channel.
Use Color Channel for Height
If Separate Height Channel is selected, this parameter appears. This parameter allows you to choose which color channel you want to be used from the input heightmap to make the output heightmap.
Translate Height
This allows you to shift height values in different ways. It can be used to fix a bad height map under some circumstances, but this parameter is not terribly useful. If the height values around the edges of a model do not equal 0.5, you get weird-looking black marks at the edges of your rendered object. Note I refer to the locations where the image corresponds to edges, not the edges of the image. This condition makes transforming your data problematic, but you can use this to fix a bad height map.
Scale Height
This allows you to scale using the following equation with a manually selected multiplier.
Multiplier *(Pixel Input Value – 0.5)+0.5 = Pixel Output Value
Detail Mask Options
These options only affect the Detail Mask.
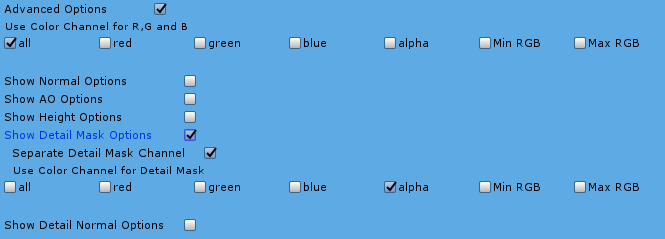
Separate Height Channel:
This Parameter allows you to use a different color channel of the input texture for creating your detail mask than the color channel(s) all the other PBR textures are using from their respective inputs. By default detail mask is set to the alpha channel.
Use Color Channel for Detail Mask:
If Separate Detail Mask Channel is selected, this parameter appears. This parameter allows you to choose which color channel you want to be used from the input detail mask to make the output detail mask.
Detail Normal Options
These options only affect the Detail Normal Map. They are the same options that are in the Normal Options section.
Alpha
Alpha Values from
This parameter allows you to substitute other things for the input texture’s alpha channel. It is handy for Metal Maps that don’t include a smoothness map as the alpha channel but have a separate image, or you can approximate alpha with a value. The options on this parameter are Main Texture Alpha, Single Value, Texture.
Main Texture Alpha is the default. It assumes your texture’s alpha channel doesn’t need to be changed.

Single Value assigns one value for all pixel’s alpha values in the texture. Assigning a single value for alpha is suitable for solid substances before adding scratches, blemishes, dirt, or generally any detail.

The final option is Texture. This option is where you can add a separate smoothness map.
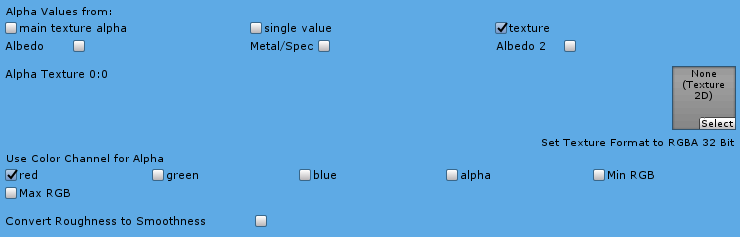
Albedo, Metal/Spec, Albedo 2
This options make your choice which texture types will use a single value or texture input type for alpha. All other parameters related to alpha only apply to these Texture. The rest of the textures you are creating use Main Texture Alpha.
Convert Roughness to Smoothness
This option converts roughness to smoothness on the Metal Texture’s Alpha channel. Roughness is the opposite of smoothness. You see textures with roughness instead of smoothness often because Unreal engine uses roughness as the alpha channel on their metal textures. The conversion is relatively simple for each pixel:
Output Alpha = 1 – Input Alpha
In the following example, I create a metal texture for a dirt material using a roughness image. This is a tricky example.
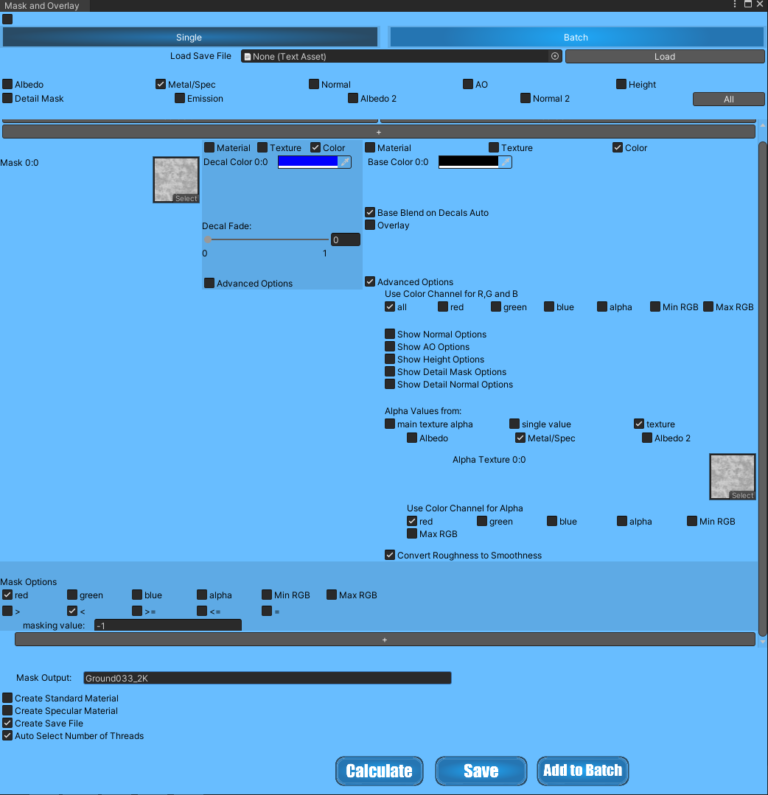
The mask image, Mask 0:0 is used to determine the dimensions of the output. The decal color is never used because the result of the masking comparison is never true. No pixel in the image will ever have a red value less than -1. These pixel values for each color channel can only range between 0 and 1.
The color for the base output is black since dirt is not a metal. You would use white if you were doing this for pure, clean steel material, aluminum, brass, etc.
If the material were some mixture between metal and nonmetal things, an actual texture would be necessary rather than a color for the base input.
The roughness is set as the alpha texture. Metal/Spec must be checked at the top of the window and in the Alpha image section. Also, at the bottom of the alpha section, the Convert Roughness to Smoothness option is checked.
The Convert Roughness to Smoothness operation works in reverse also. You can use it to convert smoothness to roughness.
Decal Only Advanced

Detail Selection Method
Detail Albedo and Detail Normal are meant to tile at a higher resolution than the other images. So, although you can choose to create mask images of each of these, it is usually better to select either the Decal or the Base image to pass on to your result, so it will still be tileable.
The output Detail Mask only includes regions from the detail maps you have selected here. The reason for this is so you don’t have the wrong details tiling on the images you have not chosen. This way, you lose detail, but you do not have incorrect detail.
Additional Program Information
Output Size
The size of all your output images match the size of your mask in Row 0 Column 0. All textures and materials are either tiled or cropped to fit this size for calculation purposes. The actual input images are not altered.
Warnings
Memory Crashes
Use of too many CPU cores on projects with large images and many Columns can use more memory than your computer possesses. Once your ram is fully utilized, the program uses Virtual Memory, which is very slow. Calculations could take several hours if this happens. If so much memory is required that Virtual Memory is used up, Unity crashes, and the input texture currently being read may be corrupted. While you are getting accustomed to using Mask and Overlay’s multi-threading functions, it is recommended that you back up your input textures and materials.
4K Texture Considerations
Large textures can be used in Mask and Overlay, but memory overload is a common problem. These precautions should be taken.
Using only 1 or 2 parallel threads limits the number of textures loaded into memory at any given time.
Use only 1 column. Results from every column are stored in memory until all calculations are completed. With 2K textures and smaller, this extra memory usage usually is not significant enough to matter unless your computer does not have much RAM.
At least 16 GB of RAM is recommended. 8 GB should be enough to work with 2K textures though you may have to take the precautions mentioned above. Your memory usage can be monitored with Task Manager if you use Microsoft Windows as your operating system. Press Ctrl + Alt +Delete, then select Task Manager to open a Task Manager window. I monitor my memory usage with this every time I use Material Tools.