The first step in baking the decal to an object is to position the decal. In this tutorial, we will use the OBJ file below to create two FBX files.
Input Files
Positioning Decal
We are going to use Blender to create and position the plane. This plane will be used as the spatial representation of our decal in later tutorials.
Import main object
Start a new scene and delete all the objects in the scene.
Select File/import/Wavefront (.obj) .
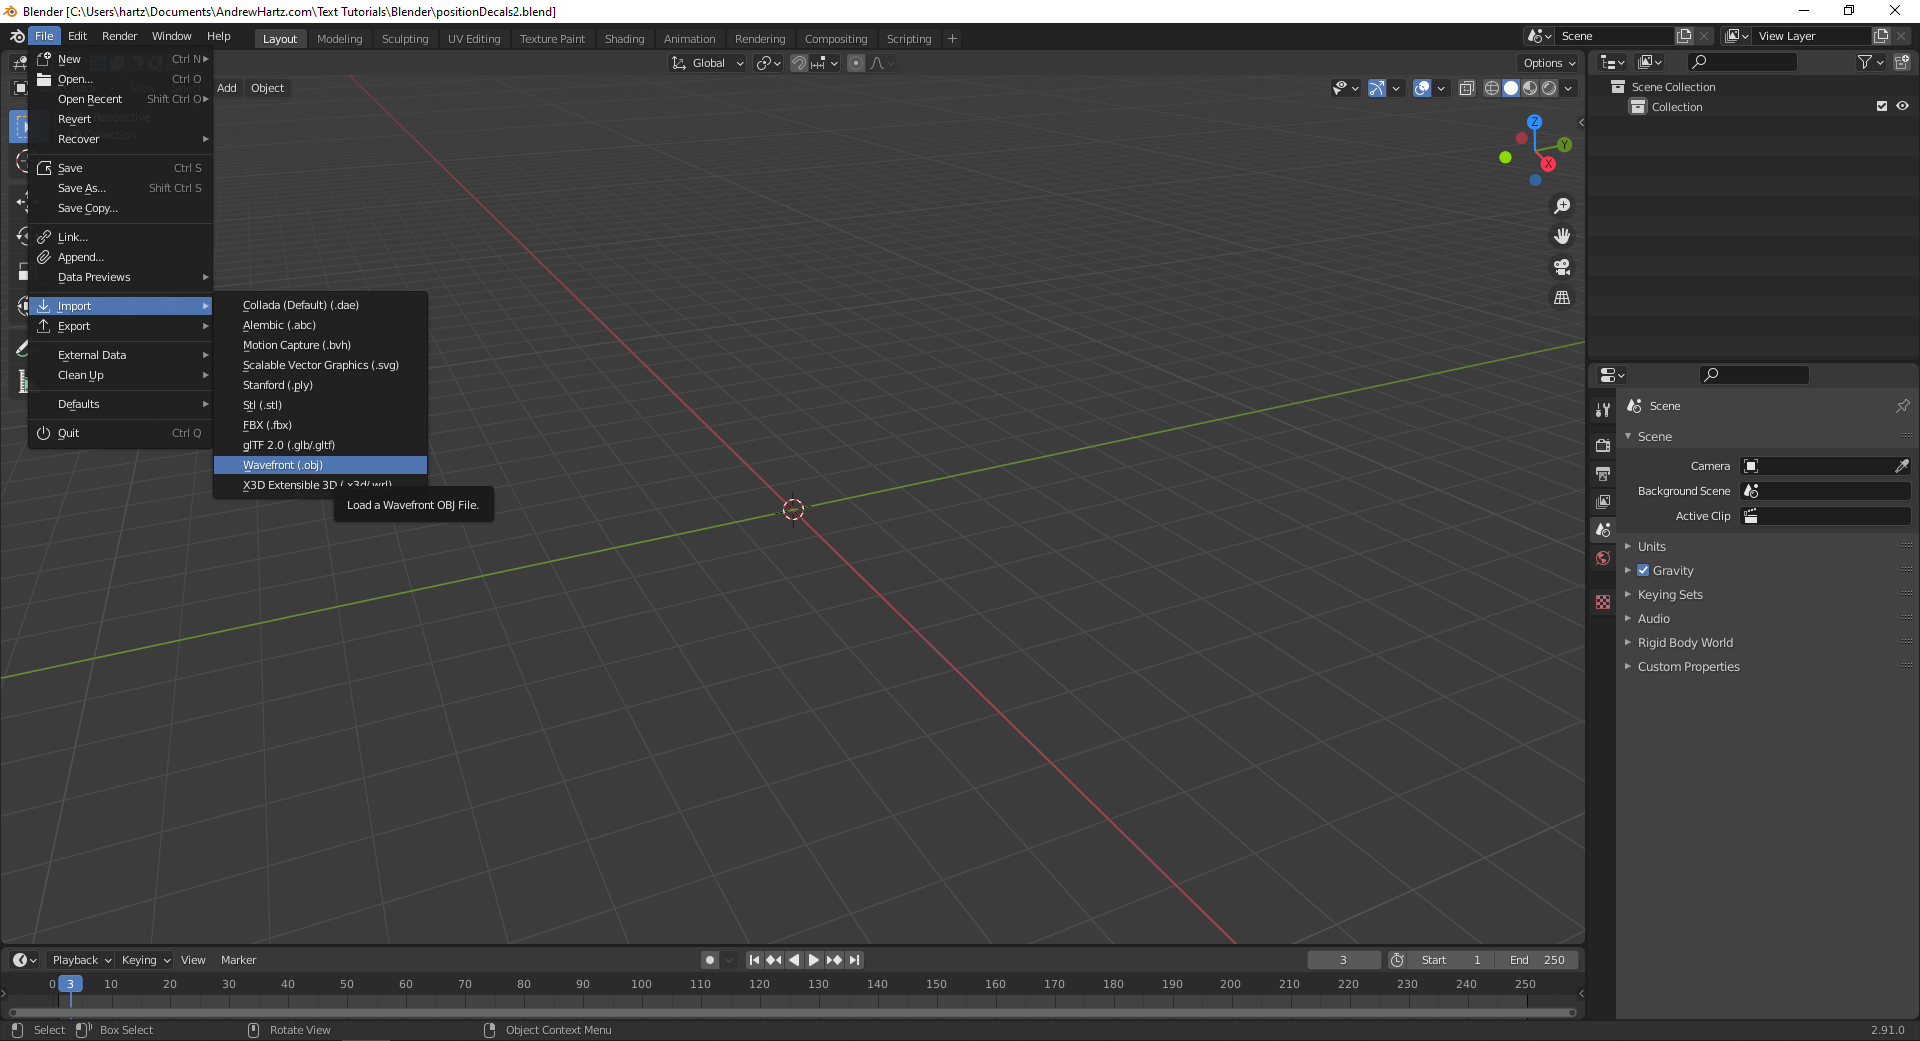
Then select the main object file from wherever you unzipped the input file.

Select the Modeling Tab. We are switching to the modeling layout since it simplifies the interface, removing tools we do not need.

Determine coordinates where the decal will be placed
When modeling, there are two modes Object Mode and Edit Mode. Object mode lets you select and move, rotate, scale, etc., the object as a whole. Edit Mode lets you manipulate the vertices, edges, and faces that make up the object.
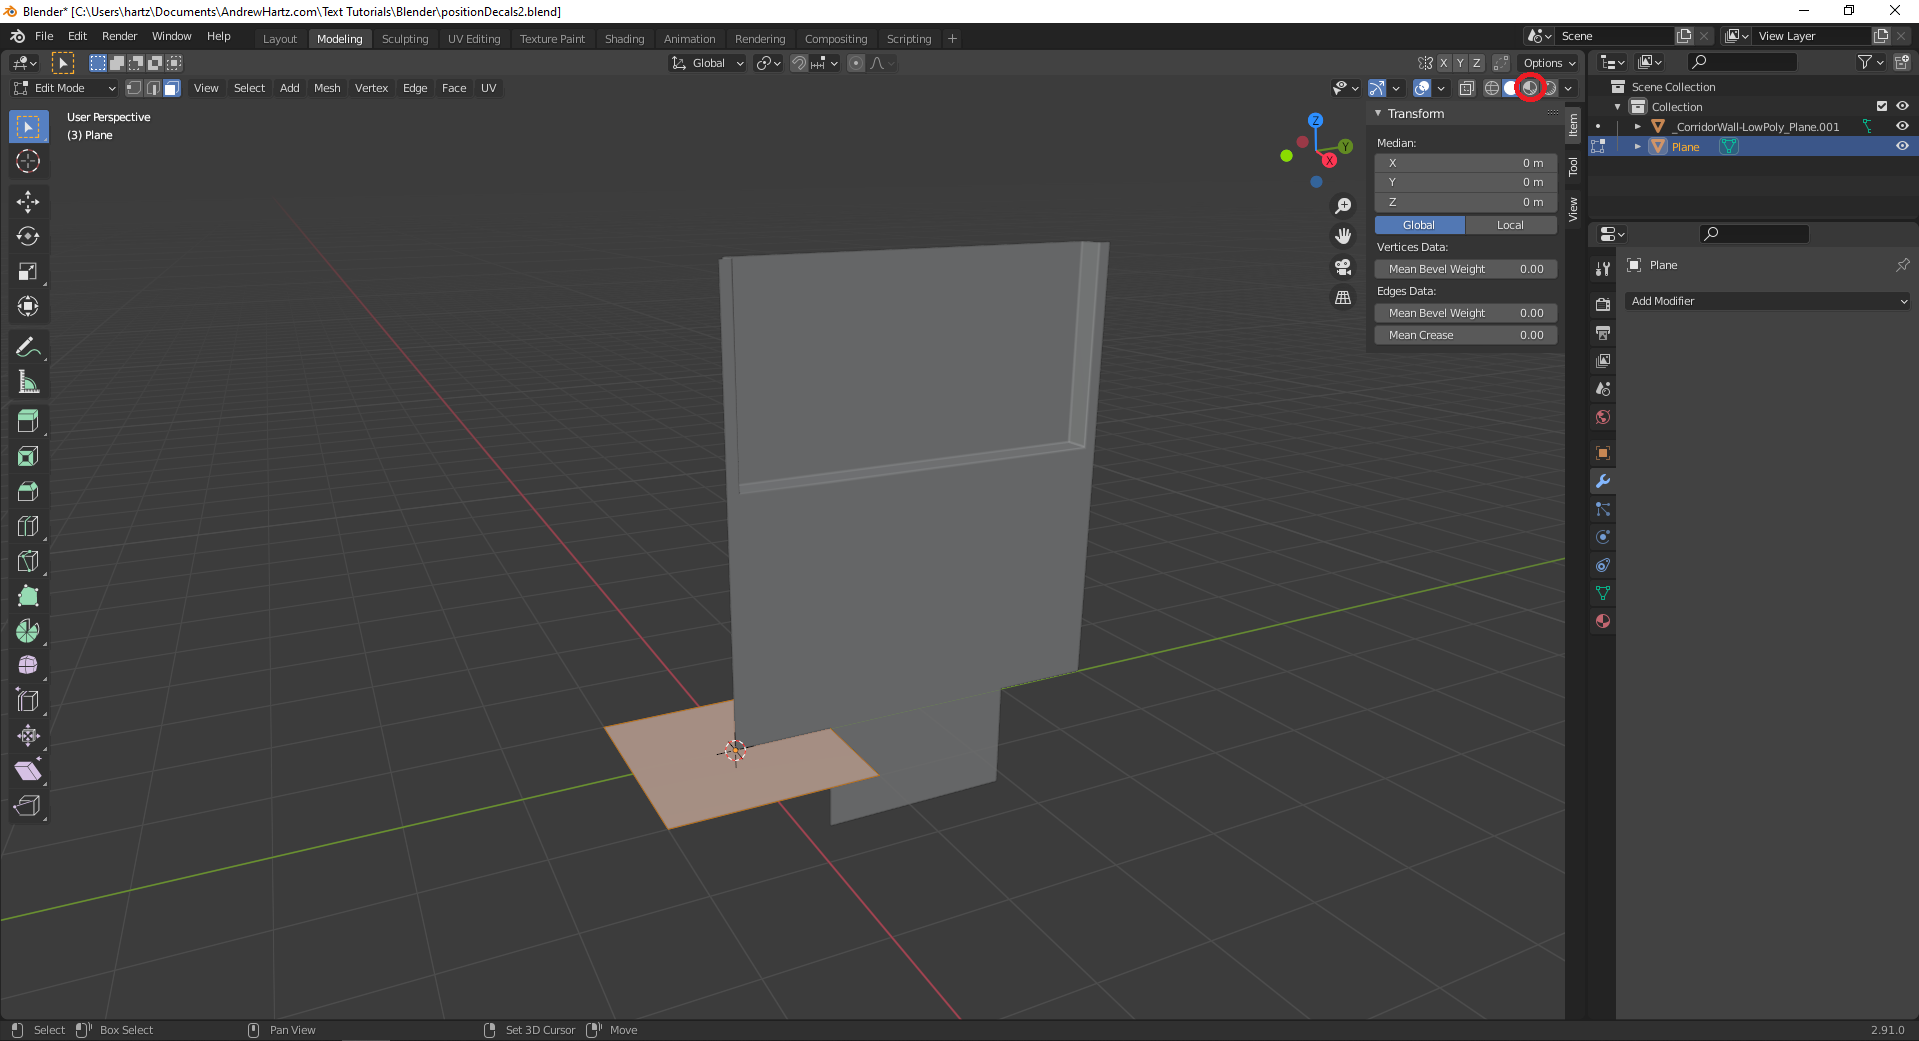
If you are not already in edit mode, enter edit mode. You switch between modes by pressing Tab or using the drop-down control shown circled in yellow in the image below.
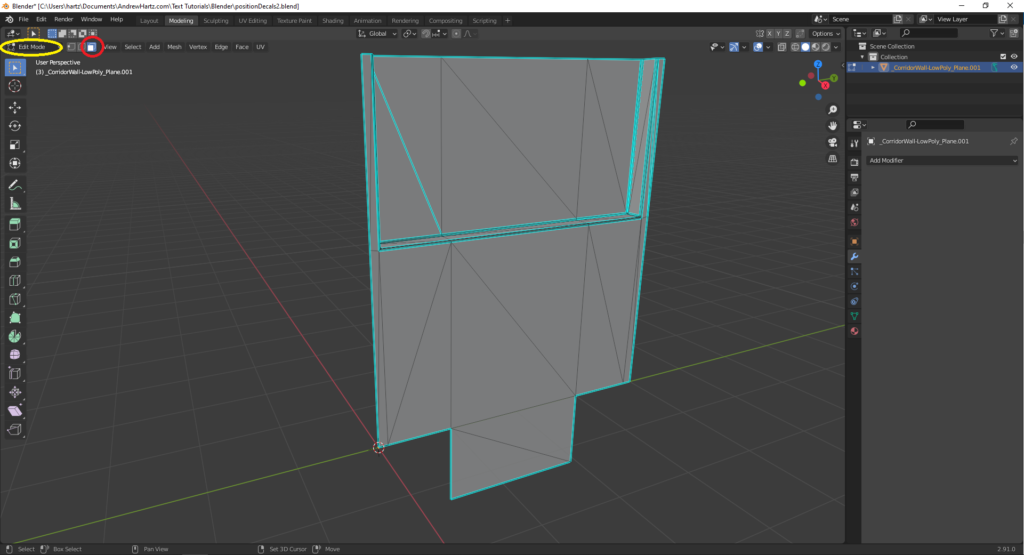
We are going to look at the coordinates of faces within the image. Press the button circled in red in the image above. This button has an icon that looks like a drawing of a cube with the front face filled in white. This button is the control to select faces. Note that this option only shows when you are in edit mode.
In this example, selecting faces is going to help us find the center point the fastest. We are going to place the decal center in the upper section. We need the coordinates of this location.
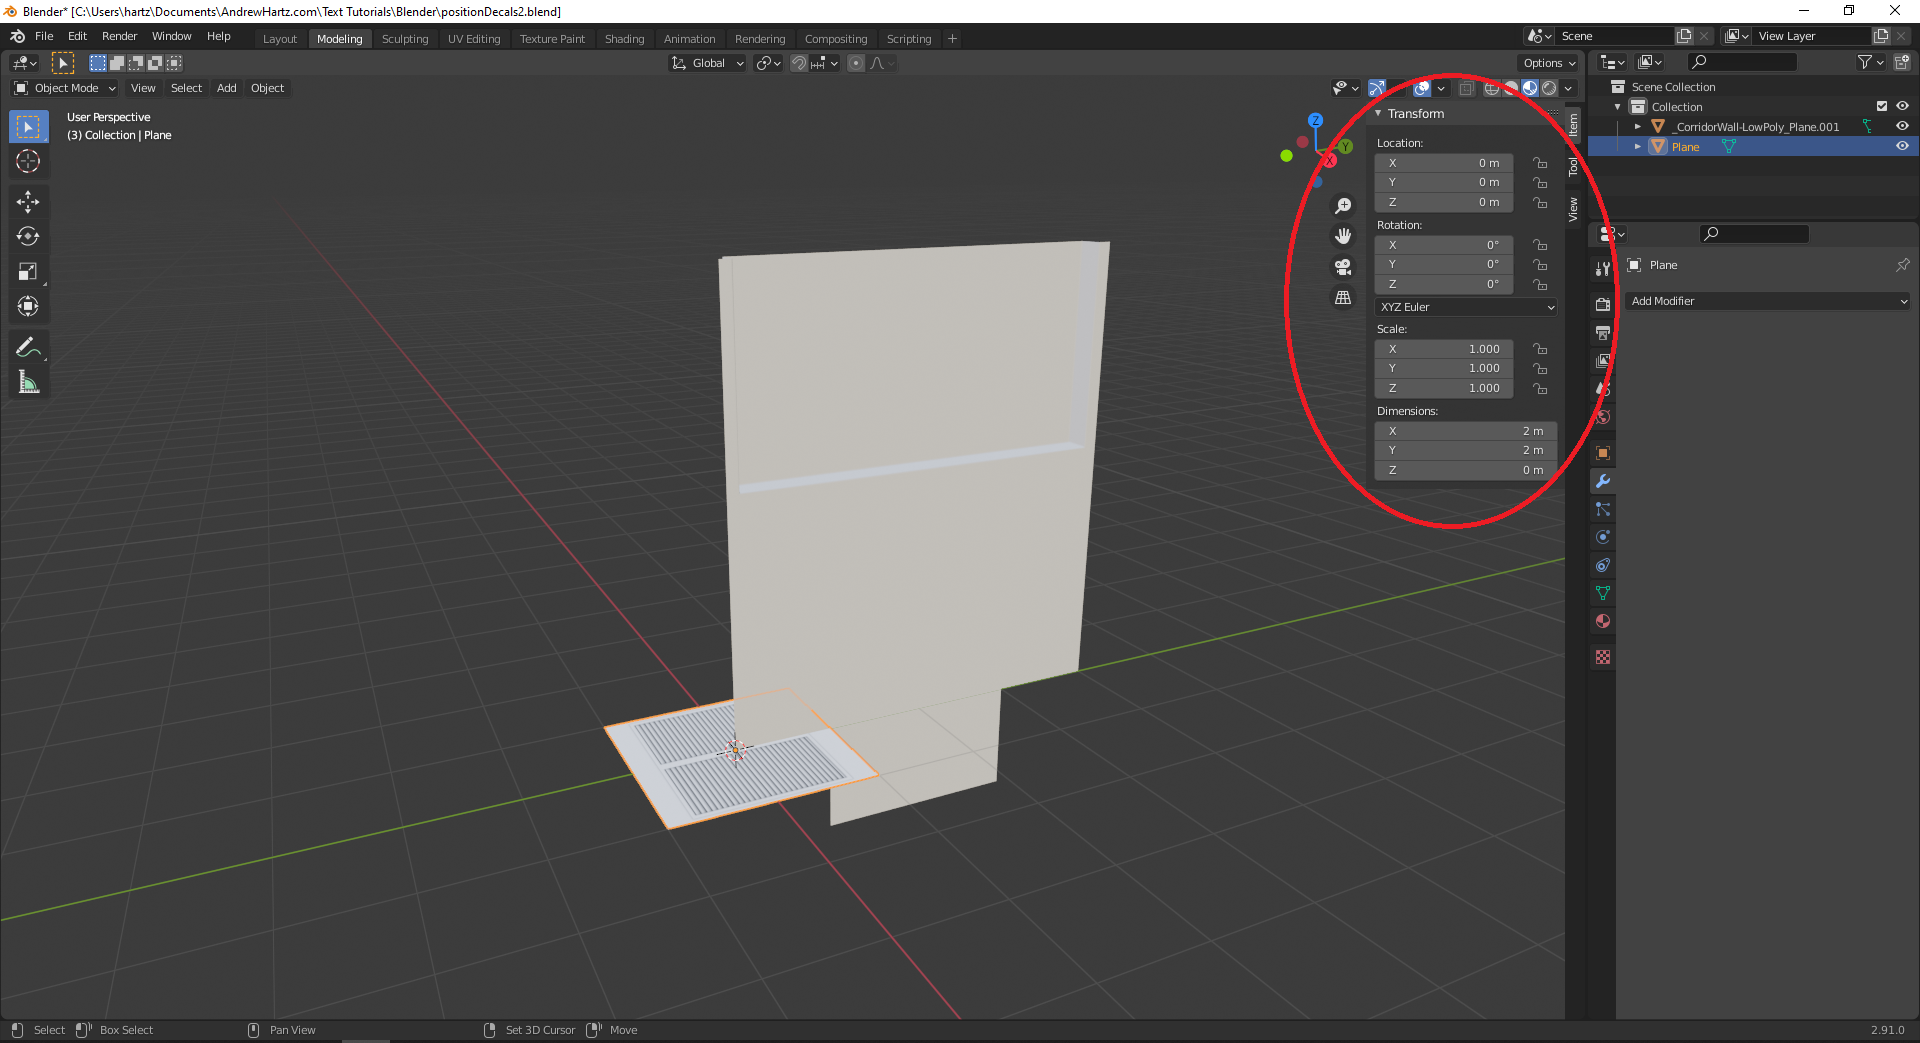
Shift select the two triangles in the center and press the N key. A window will appear on the right side of the scene. Within this window are coordinates of your selection.

These coordinates are the median of what you selected, which in this case is the very center of that upper section.
There are two options under the coordinates Global and Local. We want to use the Global coordinates, select global.

Local and Global
A mesh in Blender has two sets of coordinates, local and global. These two sets of coordinates make it easier to rotate and scale the mesh when it is not centered on the origin.
Write these coordinates down, so you can use them to position your decal plane later.
Press Tab to exit edit mode.
Add a plane
Press Shift S and select the Cursor to World Origin option.

The cursor is where new objects are created. If you moved the cursor away from the origin accidentally, this is how you put it back.
Press Shift A to bring up the add object menu. Hover over mesh and select plane.

Add an image to the plane (Determine plane orientation)
Now we will add an image to the plane to tell which direction it is facing. We want to enter the shading layout.
Select the shading tab at the top of the blender window. This tab is circled in the image below.
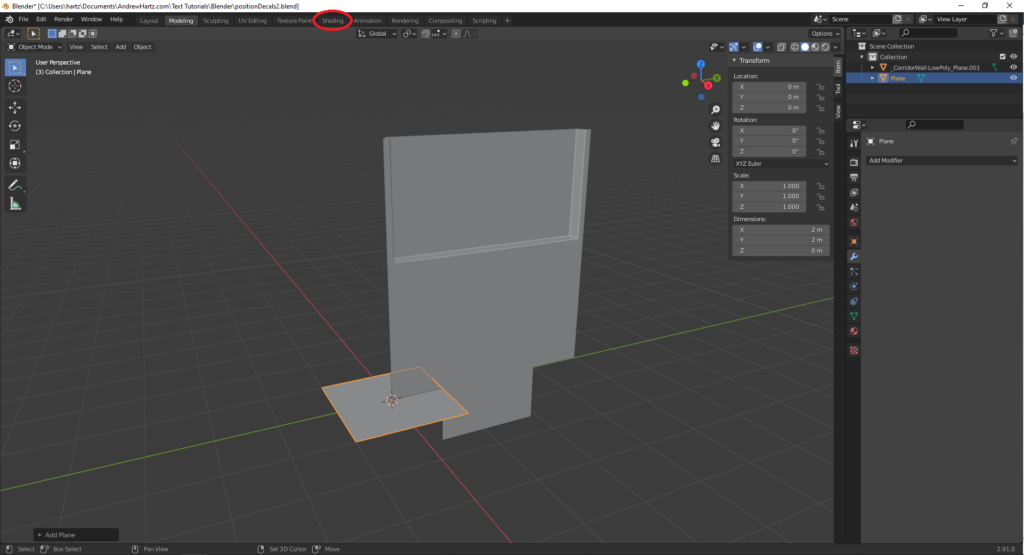
The image below shows the shading layout with a button that is labeled “new”. Make sure you have the plane selected before you push the new button.
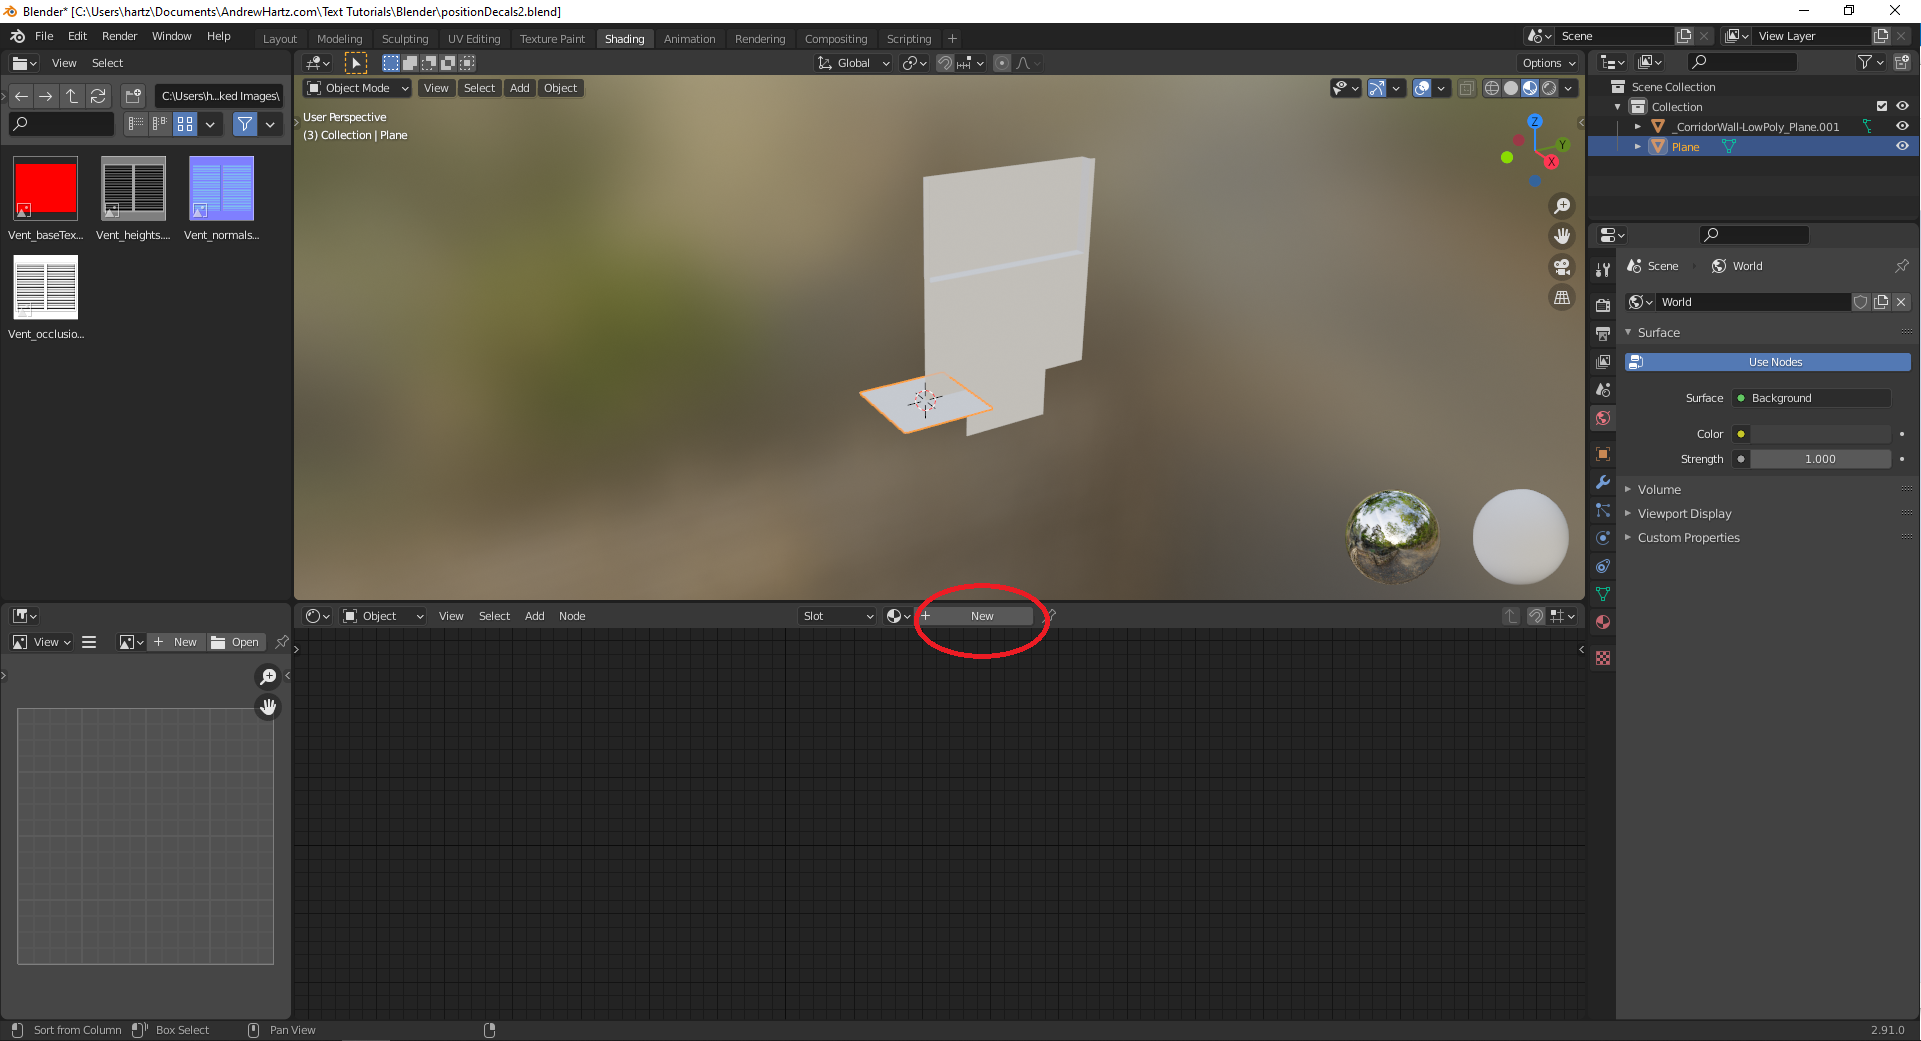
The new button creates nodes in the bottom center window. The nodes need an image as color input.

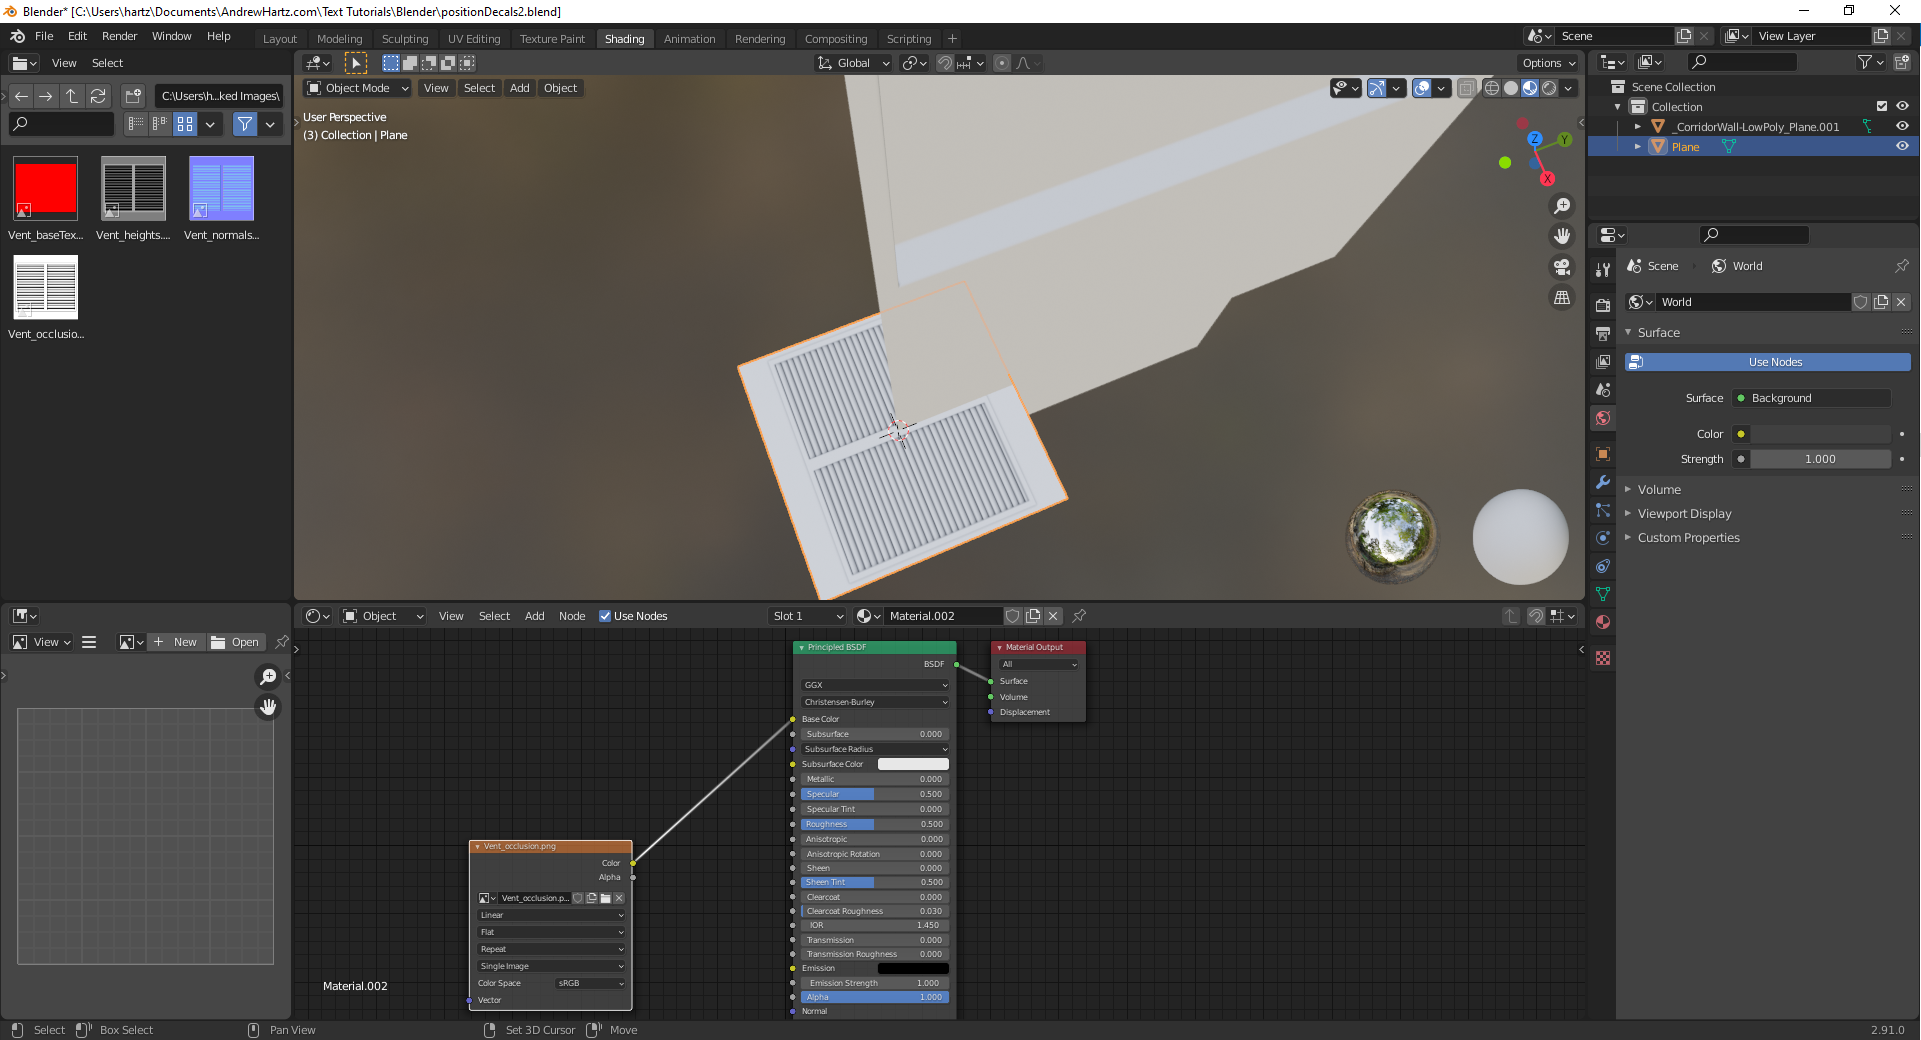
Find an image you want to use in the top-left file explorer window and drag it into the node window.
I am going to use the ambient occlusion image from the vent decal. Though, any image with a distinct orientation will work.

The new input node you just created is not connected to the other nodes. You want to connect the Color of your new input node to the Base Color of the Principled BSDF node.
You are going to be drawing a line between the yellow circles that are next to these options. You do this by clicking and holding the left mouse button while hovering over one yellow circle. Then drag your mouse to hover over the other yellow circle before releasing the left mouse button.
Your texture is visible on the plane while you are in the Shading layout. Press the modeling tab at the top of the page to return to the modeling layout. You will have to change an option before the texture is visible on the plane in the modeling layout.
First, make sure you are in object mode (Tab).
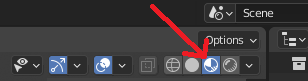
Then look in the upper right corner of the main window. There are four buttons with icons of circles on them. These buttons affect the way objects are displayed in the window. The one currently selected is Solid Shading and has an icon of a circle filled in completely. You want to select the Material Preview Shading button to the right of that. The icon of a circle is partially filled in like a pie slice. This option renders the texture you placed on the object.
Press the button circled in red above and shown with a red arrow below.
Move the Plane
Make sure you are in object mode and the plane is selected.
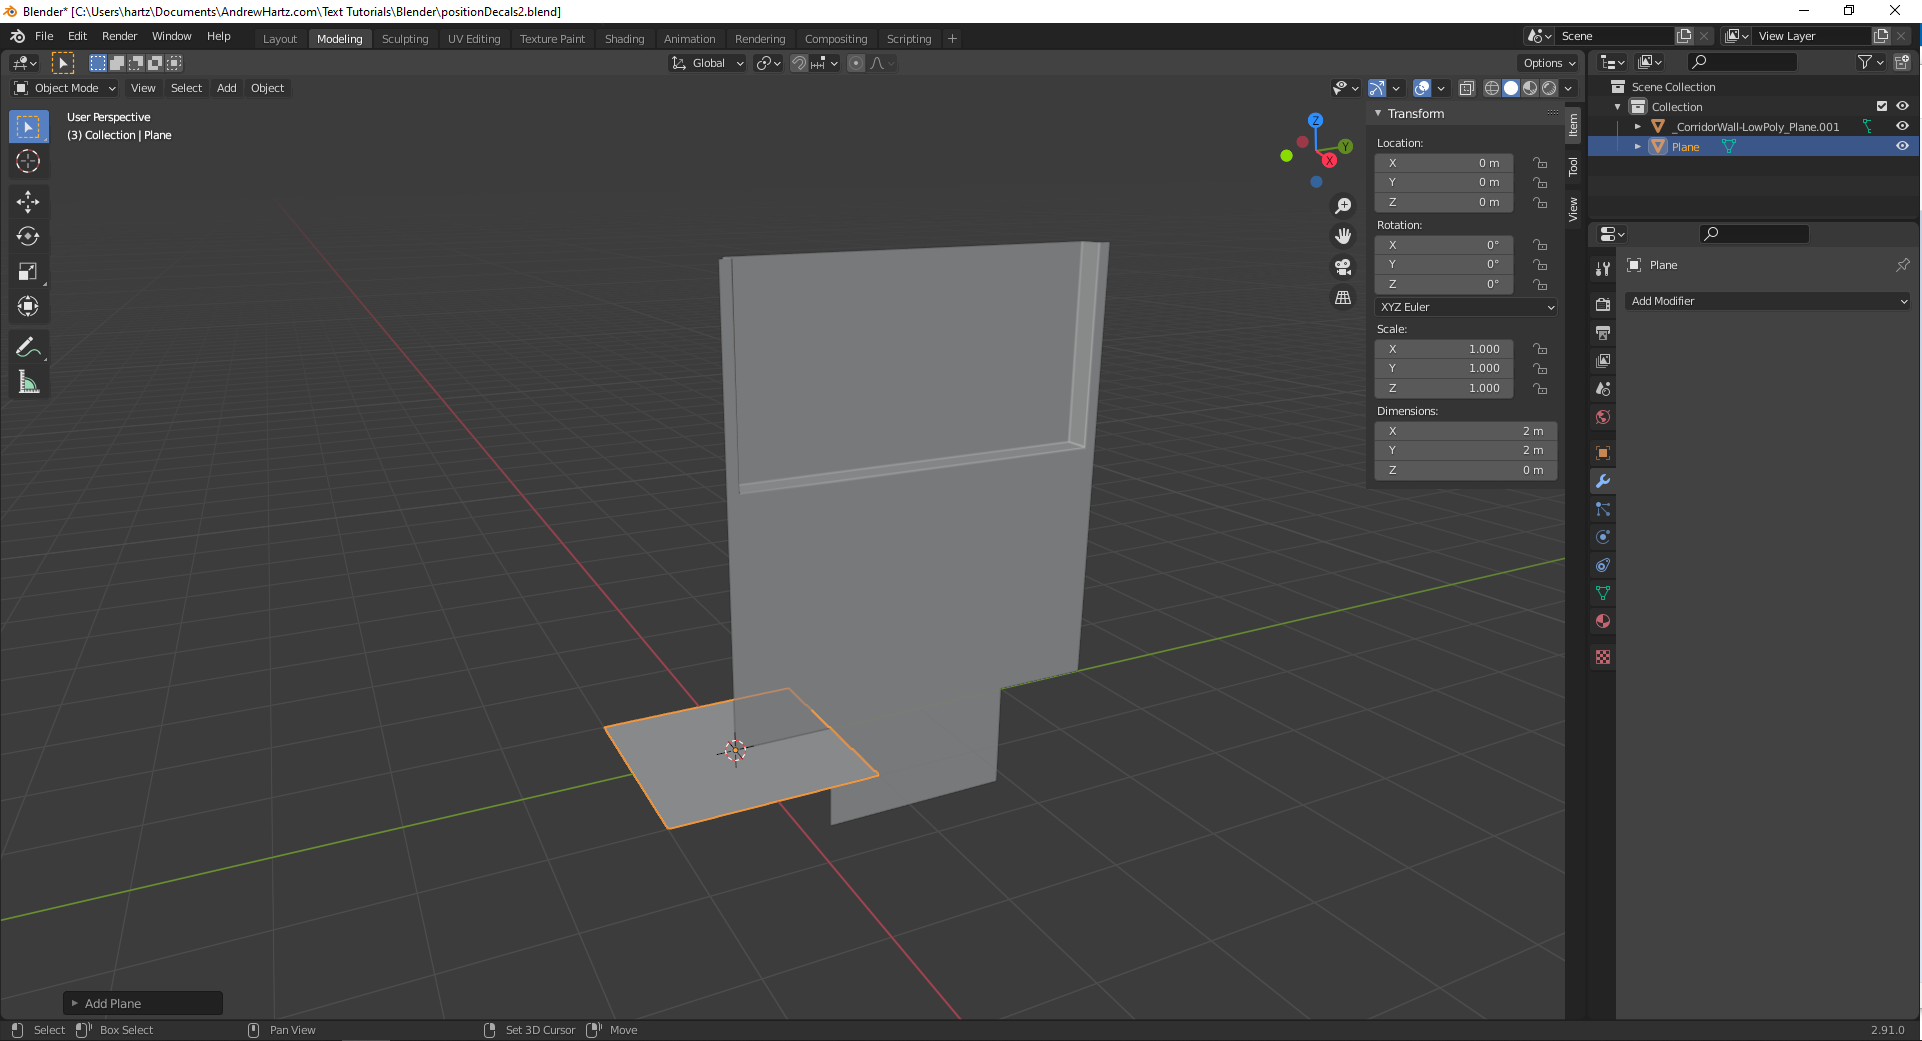
Press N to bring up the Transform Window if this window is not already showing.
The transform window has sections for Location, Rotation, Scale, and Dimensions. Each of those sections has fields to enter values for each axis, x, y, and z. This window allows you to move, rotate and scale your image by entering numbers in the x, y, and z fields.
Change the plane’s location. Use the values you wrote down earlier in this tutorial (Determine coordinates where the decal will be placed).
Also, use this window to rotate and resize your plane.
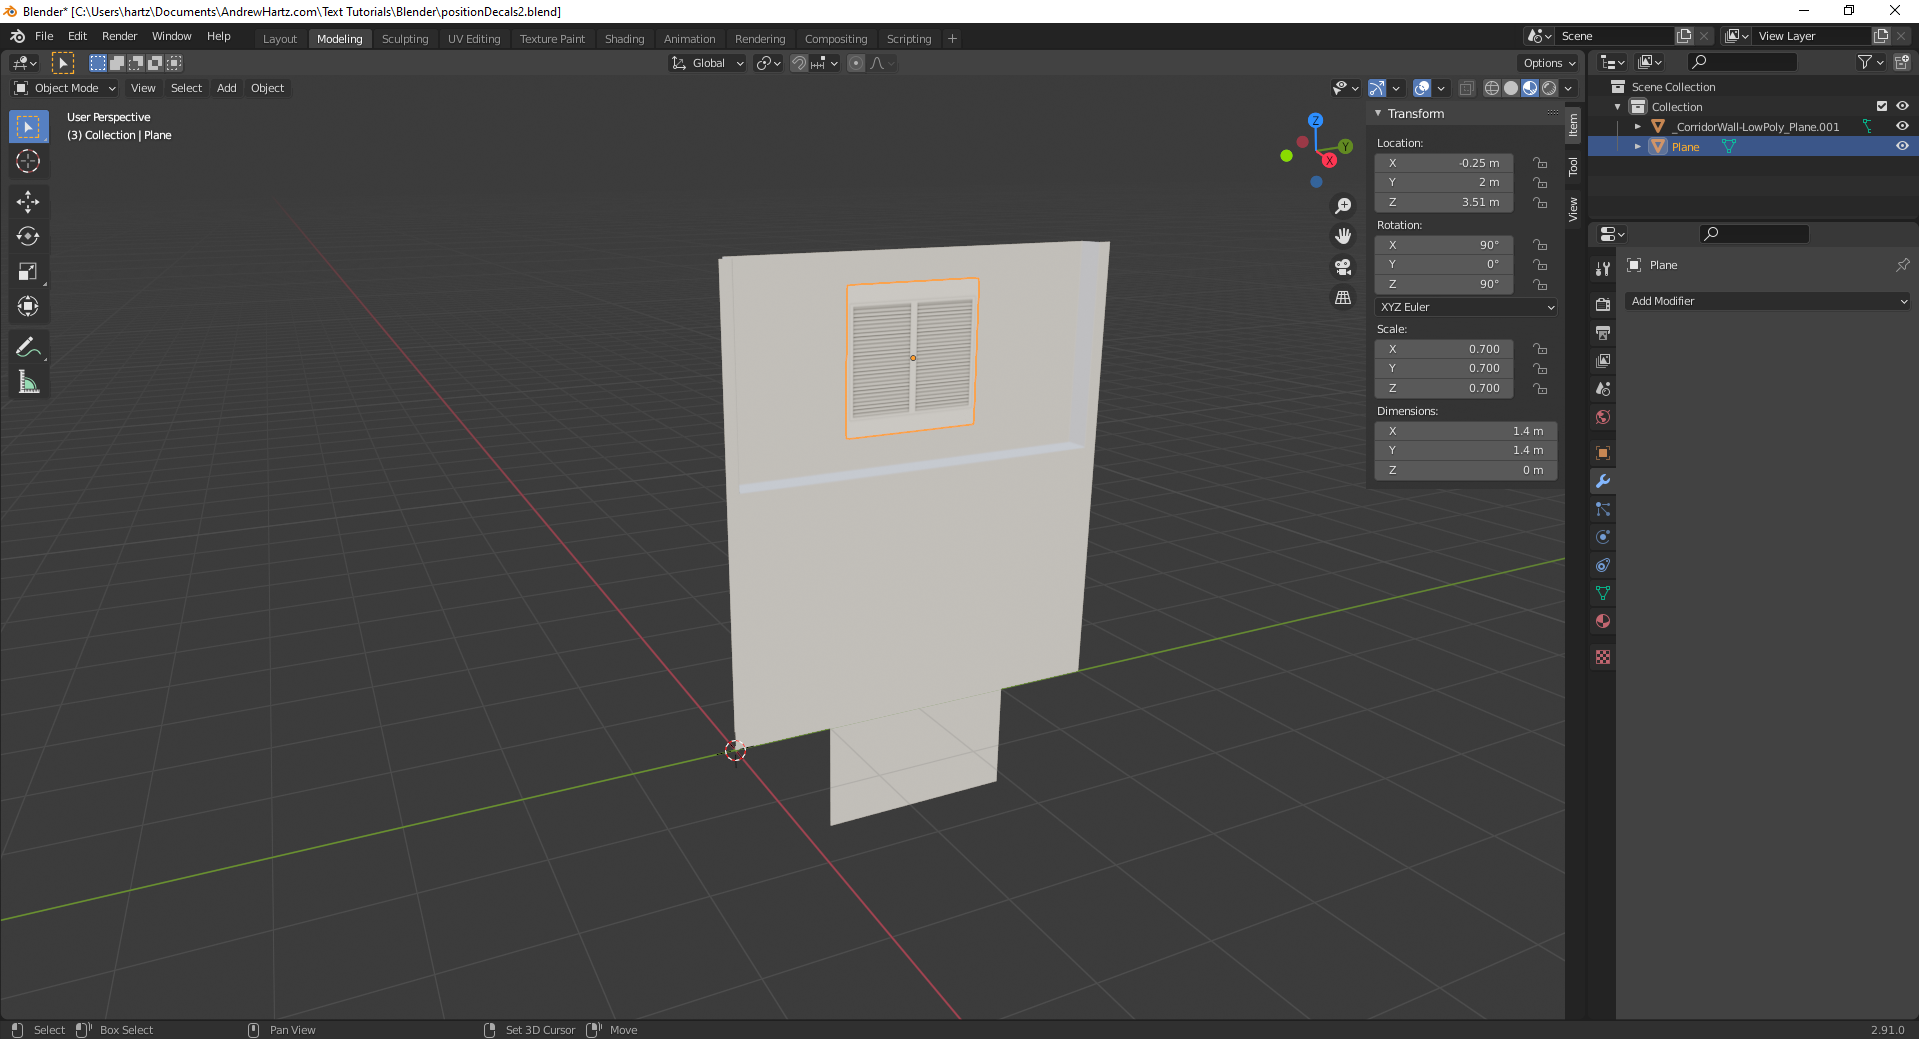
That looks good, but we will rotate the plane 135 degrees, so it looks like a drunk contractor installed the vent. We are just doing this to practice rotating the normal colors on the decal in a later tutorial.

Exporting
We have to export the plane and the main object in a specific way so the decal baking software can handle them.
Resize Meshes
You need to scale up both the model and the plane to avoid an error that sometimes occurs in xNormal. You will still be able to use the textures made with the scaled-up model on the original.
Press Ctrl+A to bring up the apply menu.
Select “All Transforms”.
We are applying the location, rotation, and scale to the plane before scaling.
Applying Transforms doesn’t change how the plane looks, but it sets the current location, rotation, and scale as the default state for additional transforms. If the main object needs its transform applied, do that now as well.
We are now going to scale x, y, and z by 100 on both the plane and the main object.
In each of the three fields, in the Scale section of the Transform window, enter the value 100.

Triangulate Modifier
Modifiers are tools in Blender that you can add to an object that makes some kind of change to the mesh. The triangulate modifier has a maximum cap on how many vertices each faces in the mesh can have. It splits up any faces with more vertices than the cap.
Sometimes you need to add a triangulate modifier to your main object. xNormal can’t handle meshes that have any faces with more than four vertices. In this example, we don’t need a triangulate modifier since there are not any faces with more than four vertices.
The plane is a face with four vertices. The plane never needs a triangulate modifier unless you edit it. There are situations where you would edit the plane. For example, you wanted the decal to wrap around a corner or follow the main object’s curvature.
Here is a tutorial on the triangulate modifier.
Export FBX Files
Now make sure your plane is the only object selected and export it.
Select File/Export/FBX
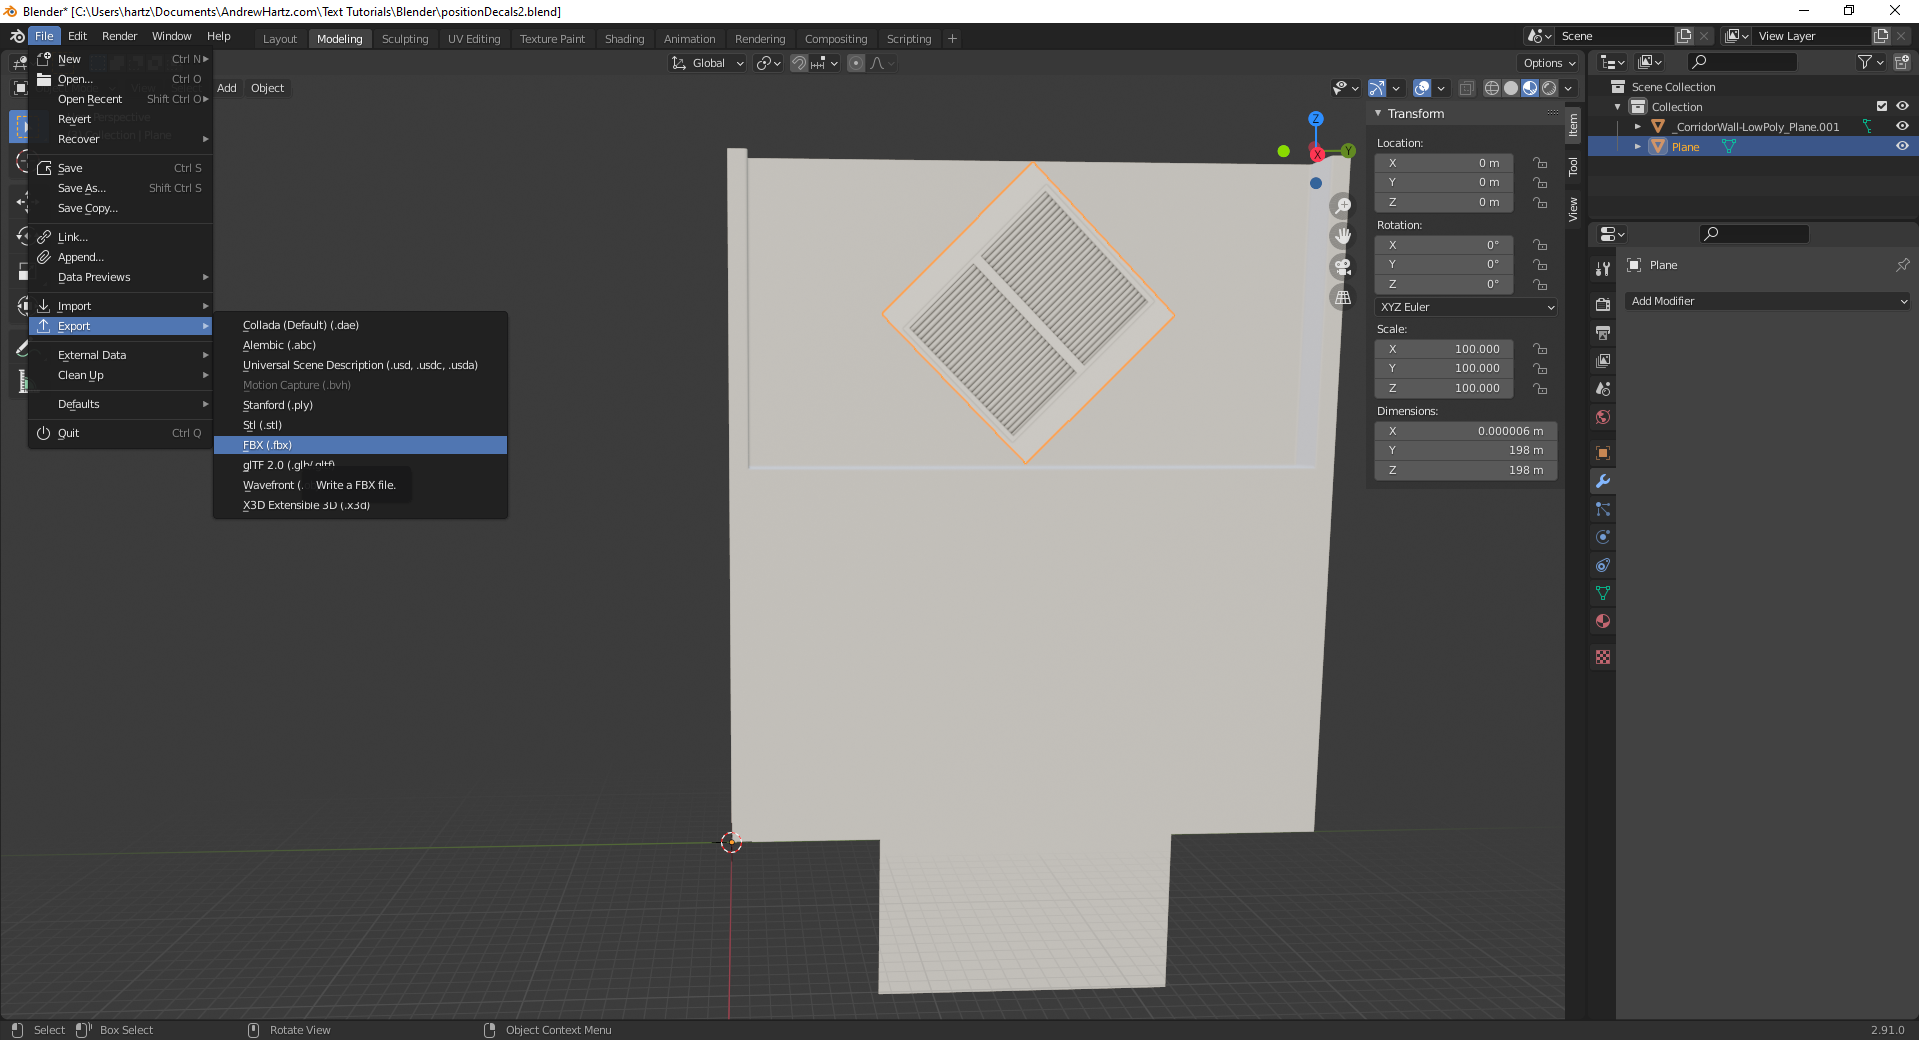
When the window appears, make sure Selection Only is checked and leave all the other settings. Pick your output location and file name.
Click the Export FBX button.

You will want your plane as an FBX for use in xNormal since it tends to work better than OBJ in xNormal.
FBX and OBJ
We will only use these FBX files in xNormal to bake decals in the next tutorial. The original OBj file for the wall will be used again in the last tutorial of this series. This OBJ file is the actual object we will use in Unity with the textures we create in the next tutorial.
Also, export the main object. By this, I mean the wall that has been scaled up in size.
Output Files
Output FBX files (3D meshes)
- A plane positioned where we want our decal
- An enlarged copy of the main object